


I spend my time: Studying fashion and makeup! Jojo Siwa and Barbie are my biggest inspirations!
I live: In a Barbie world! Life in plastic is fantastic, after all!
Name: Lynzie Lyla!
Fav Color: Pink (duh?)
Fav song: Moonlight Magic by Ashnikko!
Dream job: Chef!


If you dont like pink or hello kitty! (no seriously, whats your problem?)


Hello Kitty! and her friends!
making everything i own the color P I N K
Anything that glitters! (and sparkles!!)
Barbie!! I love barbie sm!!
My bf c:


Hi there! looks like you've reached my side of the internet!
I really like Makeup, music, hello kitty, alt fashion and The color Pink


Math, Sports, And Men. I mean like, what even are those?


(Before You Interact)
I'm super unhinged, autistic and loud. I'm also slightly feral. My favorite possession of mine is a manually sharpened hello kitty fork.
Attention!!


THIS WEBSITE IS A GIRLZ ONLY ZONE. NO GUYS ALLOWED BEYOND THIS POINT.


LynziePedia.net//Lynzie'sCats!!
X


Oracle Liddel


Our Story
Obby (Obsidian) was gifted to us via the cat distribution system in early July of 2019. Approx. 9 weeks old, he was the pride and joy of me and my sister. We spoiled him, Nourished him, played with him, and gave him all of the love we had in our hearts. In late July of 2021, Obby fathered a litter of kittens which included the very special Oracle Liddel. She stoof out from the rest of her siblings and we begged our mom not to give her away. Ori is much more timid and has a more kind, sweet and mellow personality compared to the demeanor of her spoiled and bratty father. Both of these babies are a blessing and We wouldn't trade them in for anything in the world.


LynziePedia.net//LynziesFits!!
X


LynziePedia.net//Lynzie'sDinners!
X


More coming soon!


LynziePedia.net//Lynzie'sCookies!
X


LynziePedia.net//Lynzie'sCakes!
X


LynziePedia.net//Lynzie'sBreads!
X


LynziePedia.net//Lynzie'sRecipes!
X


LynziePedia.net//Lynzie'sRecipeCollection!
X


Cookies!

Misc Desserts!
(And Ice Creams!)


Breads!

Dinners!

Cakes and Frostings!


LynziePedia.net//Lynzie'sNewRecipe!
X


this BLANK is so BLANK and BLANK to make! you're welcome!

Wanna add some notes?
¼
½
¾
⅓
⅔
⅛
♥︎
°F


Huh. Nothing here.

This recipe sourced from NOWHERENOONE.com*


LynziePedia.net//Lynzie'sNewRecipe!
X


I never liked guac for a long time, i was too scared to try it. I made it for someone else one day and turns out i love it. heres the recipe i always use, i hope you enjoy!

uhh some avocado
some onion
some jalapeno
salt
lime
(optional) cilantro
diced tomato
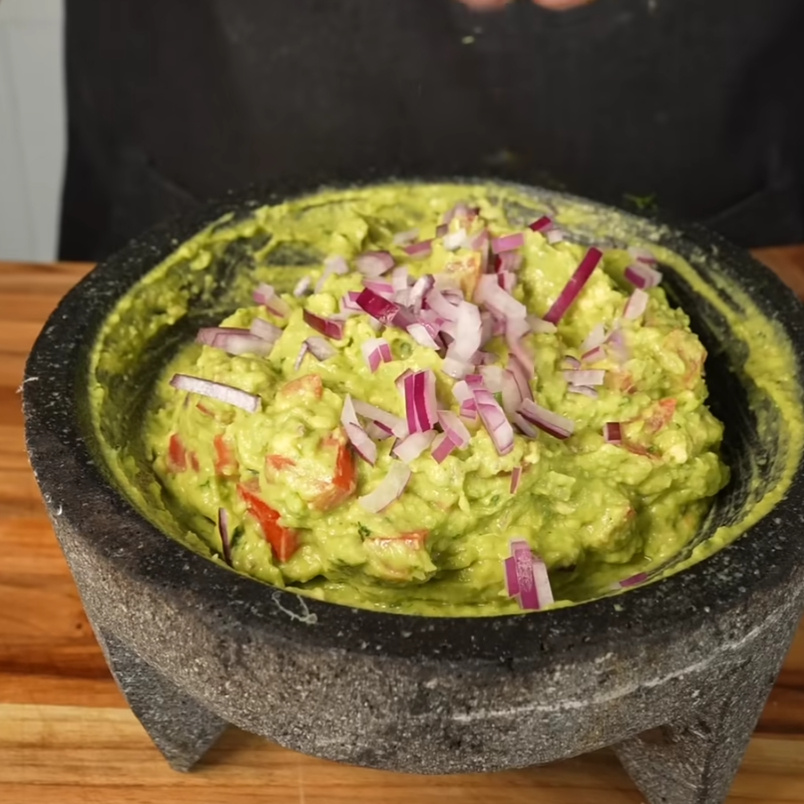

add your salt, onion and cilantro if using into a molcajete with lime or lemon juice and go to pound town. add avocado and pound that down as well until smooth, or if you're fancy like me you can blend it.add in your diced tomato BUTTTT remove the inside part so it isn't watery!
adjust for salt, and top with cilantro and onion for garnish. for a special touch serve in a warm molcajete. Enjoy!

This recipe sourced from Jose.elcook on youtube*


LynziePedia.net//Lynzie'sCustardBase!
X


Custard base
¾ Cup (150g) Sugar ♥︎
½ Cup (60g) Skim Milk Powder ♥︎
1½ Cups (400ml) Whole Milk ♥︎
1 Cup (250ml) Cream ♥︎
3 Egg Yolks ♥︎

Combine sugar, skim milk powder, and milk in a saucepan. Whisk until smooth, continuing to whisk until there are no lumps. Then whisk in cream.Place pan over medium heat. Stir often and scrape bottom of pan to prevent scorching, until the mixture reaches 110° F (45° C), 5 to 10 minutes. Remove pan from heat.Place egg yolks in a bowl. Whisking continually, slowly and gradually pour in 1/2 cup (120 ml) of the hot mixture to temper the eggs. Continue whisking slowly until mixture is an even color and consistency. Then whisk the egg mixture back into the remaining hot milk mixture.
Return pan to stove over medium heat. Cook mixture, stirring often, until it reaches 165° F (75° C), 5 to 10 minutes more. (Note: some cookbooks recommending holding the mixture at 176° F for at least 25 seconds to pasteurize; they also recommend not exceeding 180° F as this will scramble the eggs.)Cool for 15 to 20 minutes, stirring occasionally. Pour ice cream base through a sieve into covered storage container. Place in refrigerator for 1 – 2 hours, until completely cool.

This recipe sourced from Reddit*


LynziePedia.net//Lynzie's1HourPanPizza!
X


This recipe bakes in a 12 inch cast iron skillet. If you dont have one, you can split it between 2 brownie pans. Be careful though as it does rise up quite a bit, so be sure to oil the whole sillet well with olive oil.

180 grams warm water ♥︎
10g instant yeast (this is a lot, but it provides a quick rise.) ♥︎
5g sugar ♥︎
15g oil ♥︎
9g salt ♥︎
280g bread flour ♥︎

warm your water to about 95-100
°F and pour into a large bowl with your yeast and sugar, oil and salt. stir to let your yeast dissolve before adding flour.add in your flour and use a fork to stir until the dough becomes too dry to use a fork with anymore and the mix with your hands until a homogeneous dough forms and all flour clumps are gone. Throw on a lid and ferment for 15 minutes.
Pull the dough up on one side and pull as much as possible, then fold over itself (this is called a stretch and fold.) do this 4 times, once on each side. then fold into a nice litle ball and ferment again for another 15 minutes.
get out your cast iron skillet and oil it well, then put your dough in the middle and press down into it with your fingers to push it outwards. if its elastic and pulling back on you then let it rest for 10 minutes to relax the dough and resume.while your dough relaxes, put your oven to the highest setting possible (do not broil.) then add your sauce, cheese and toppings and bake for 15-20 minutes. Enjoy!

This recipe sourced from Brian Lagerstrom*


LynziePedia.net//Lynzie'sSorbetBase!
X


This silky-smooth base is the perfect starting point for all your frozen creations—whether you're dreaming up a fruity sorbet or a rich gelato. Made with just sugar, corn syrup, water, and a pinch of xanthan gum, it’s designed to churn up soft, scoopable magic every time. Sweet, simple, and endlessly customizable!

1¼ Cup Water♥︎
1 Cup Granulated Sugar♥︎
½ Teaspoon Xanthan Gum♥︎
¼ Cup Corn Syrup♥︎

In a small bowl, stir together the xanthan gum and sugar. Set aside for now.
Combine the corn syrup and water in a small pot, then add the sugar mixture. Set the pan over medium heat and cook, whisking intensely the entire time and adjusting the heat as needed to prevent it from simmering. Cook until all the sugar has dissolved, about 3 minutes.Take off the heat and let cool completely, then transfer to a container to chill in the fridge until ready to use (at least 4 hours). This lasts about 2 weeks.

This recipe sourced from The salt and straw cookbook*


LynziePedia.net//Lynzie'sIceCreamBase!
X


This simple, eggless base is smooth, scoopable, and perfect for letting your favorite flavors shine. Made with whole milk, cream, sugar, milk powder, a touch of corn syrup, and xanthan gum, it’s rich without being too heavy. With a 1:1 milk-to-cream ratio, it’s balanced, flexible, and ready for the mix-ins. Keeps in the fridge for up to 1 week!

½ Cup granulated sugar♥︎
2 Tablespoons dry milk powder♥︎
¼ Teaspoon xanthan gum♥︎
2 Tablespoon light corn syrup♥︎
1⅓ Cup Whole Milk♥︎
1⅓ Heavy Cream♥︎

Combine the sugar, xanthan gum and dry milk in a bowl and stir well.Add in the corn syrup into a small pot and toss in that whole milk goodness. add the sugar mix and whisk vigorously until smooth, then set it over a medium heat on the stove, stirring to make sure all the sugar is dissolved. Make sure to keep it from simmering!Add the cream then whisk again to combine everything then transfer to an airtight container to chill for at least 4 hours before using.

This recipe sourced from The salt and straw cookbook*


LynziePedia.net//Lynzie'sChili!
X


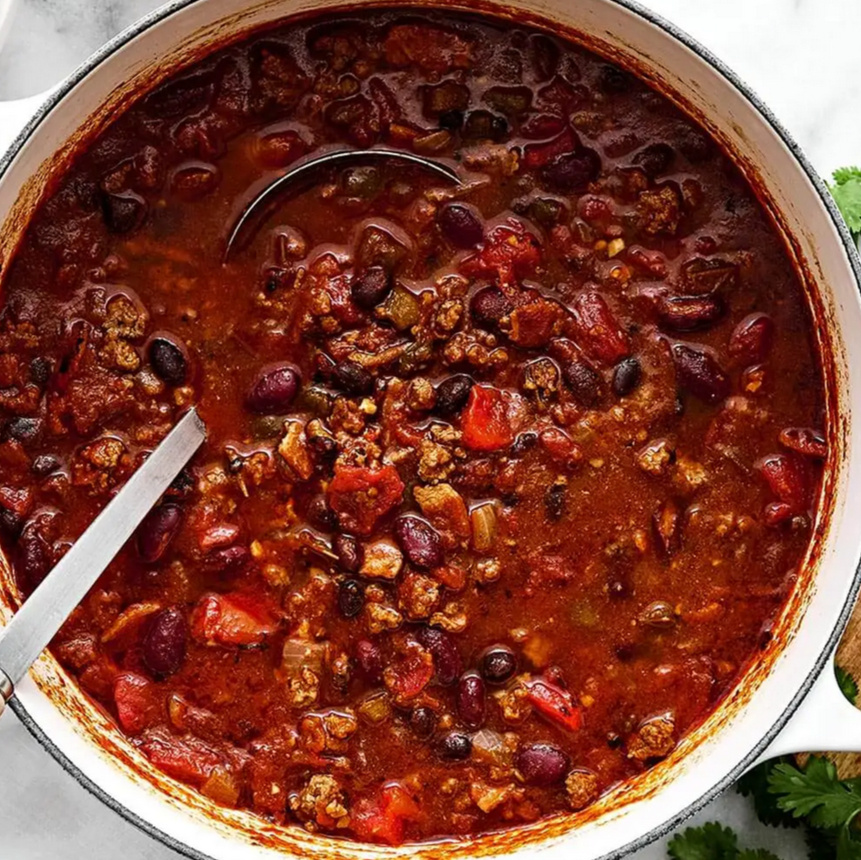
I made this chili for my anniversary and you can too with just a few simple steps. Pro tip: since this has a lot of vegetables i reccomend chopping everything up before you start cooking! Enjoy!

1-2lbs ground beef♥︎
1-2 bell peppers, chopped♥︎
2 poblano peppers, chopped♥︎
1 large tomato (char it over an open flame if you can!)♥︎
1 white onion, chopped♥︎
2–3 jalapeños, chopped♥︎
6 cloves garlic, minced♥︎
6 oz tomato paste♥︎
beef broth (or water with beef bouillon)♥︎
Canned or cooked dry beans (I love Ranch Style!)♥︎
Textured vegetable protein (optional, but its a cheap way to stretch your food)♥︎
1 tablespoon brown sugar♥︎
Hot sauce, to taste (im using a magical salsa that Shishir makes for this part!)♥︎
Cumin, cayenne and chili powder (homemade if you’re up for it!)♥︎
Salt and pepper♥︎
1 tablespoon Apple cider vinegar♥︎

Optional Homemade Chili Powder
If you're making your own chili powder, toast your dried chilis (like arbol or sichuan) in a dry pan over medium-low heat until fragrant and dry. Then blend into a powder and set aside!
Start by browning your ground beef in a large pot. Break it up and let it sear—don't rush it! Once it's got some color, stir in your onion and garlic and cook until soft and fragrant.Next, add in your tomato paste, chopped tomato, peppers, jalapeños, and all your seasonings: chili powder, cumin, cayenne, a touch of brown sugar, and a dash (or three) of hot sauce. Pour in your beef broth and bring everything to a gentle simmer. Add your TVP if using.Let your chili bubble away on low heat for at least an hour to develop that deep, rich flavor. Don't add your beans just yet!
Once everything’s thick and flavorful, stir in your beans. If you're using Ranch Style beans, pour them in with the liquid—they’re already seasoned! Otherwise just give them a quick rinse. Add your apple cider vinegar, give it all one last stir, taste and adjust the seasoning then let it warm through.you can also add in some breakfast sausage or bacon with this to really make it your own. I hope you enjoy!

This recipe sourced from ME!*


LynziePedia.net//Lynzie'sBoba!
X


Yeah so it turns out that boba is pretty easy to make and relatively cheap, especially if you're someone who regularly goes out to get it. I'll also include a recipe for milk tea!

Boba Pearls
80Ml Water♥︎
¼ Cup Brown Sugar♥︎
1 Cup Tapioca Starch♥︎
Black Food Dye (just a pinch, also optional)♥︎
Brown sugar tea
40 grams Dark Brown Sugar
30 ML Water
Black Tea (preferably assam tea)
500 Grams milk
Sweetener as you please!
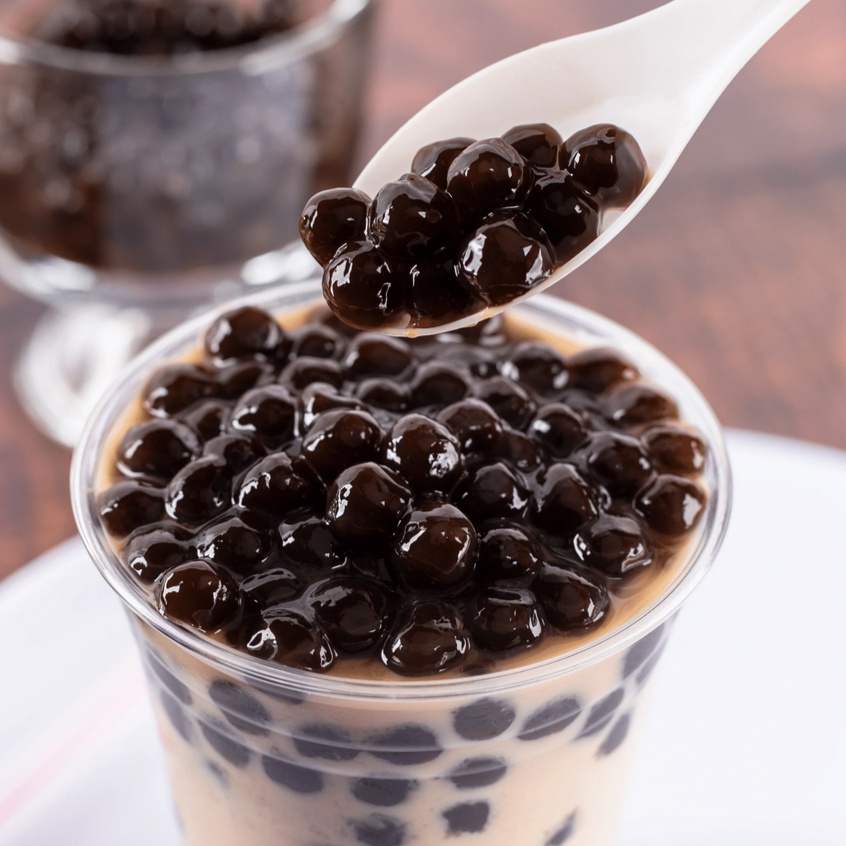

Place the water in a pan over medium heat and add the brown sugar. Stir until all the sugar is dissolved and add just some black food dye.When the water just starts to boil add half the starch and mix until it forms a sticky paste and a lot of the water has dissolved.Turn off the heat and add the rest of the starch and mix in with your spoon then move to a clean surface and knead until all the starch has combined and the boba mixture is smooth.
Roll your boba into a large log and then cut your log in hald to roll into a smaller log! Then once you are happy with the size of your log, cut small pieces off your log then use your hands to roll into little balls. You now have your boba! And I am proud of you!Coat your boba lightly in flour and then cook in boiling water for 15 minutes or so. After that, turn off the heat and let sit for 5 minutes. Strain it and let it cool or serve right away! If you decide to let it cool before serving, sprinkle some sugar on it to keep it from clumping
To make your brown sugar syrup, combine your brown sugar and water in a pot and let it boil. Then lower heat and let simmer for just a minute. Ideally you want it to be slightly thick but just thin enough that it can still drip off a spoon, but you can leave it a little longer if you like.
Simmer your milk on medium low heat until it just starts to simmer and bubble at the edges. Add your tea to your milk (use more or less depending on your preference) and simmer on low for 3-5 minutes. Then add your sweetener and strain into a cup!
Assemble your black sugar syrup, boba, and milk tea into your favorite cup. I hope you enjoy it!

This recipe sourced from the Savor Easy Youtube channel*


LynziePedia.net//Lynzie'sFriedChicken!
X


I've done quite a bit of research to combine all the best parts of fried chicken all around America for this recipe, so you don't have to! Enjoy!

Chicken Marinade:
Chicken! I like thighs or drumsticks but you can use any kind!♥︎
1-2 Cups Buttermilk♥︎
Paprika♥︎
Chili powder♥︎
Turmeric♥︎
Cumin♥︎
Salt & Pepper♥︎
Mustard♥︎
Onion Powder♥︎
Garlic Powder♥︎
Red Chili Flakes (for spice)♥︎
Dry Dredge:
½ Cup all purpose flour
½ Cup bread flour
Seasonings as listed above.
1-2 Tablespoons water
Cornstarch
1 Tablespoon baking powder
1 Tablespoon baking soda
Honey lemon Pepper Glaze!:
¼ Cup honey
1-2 Tablespoons lemon juice
Black pepper (to taste)
Salt (to taste)
1½ Tablespoons butter
½ Clove garlic
Hot n' Spicy Glaze!:
Tanjin Chilis
Sichuan peppercorn
Pinch of Vinegar
Pinch of sugar
Onion powder
Garlic powder
Salt
Black pepper
Other Equipment/Ingredients:
A wire rack or baking pan for resting
Vegetable oil (or oil of your preference)
Any frying pan, but i prefer cast iron or a wok!
A pair of tongs
Thermometer
Blender/food processor
i spent hours creating this recipe for my ex partner. even though our love didnt last this recipe will last me years. so thanks shishir, i guess.

Start by Marinating Your Chicken
If you're new to marinating, I recommend mixing everything together in a bowl first so you can taste it and make sure it’s flavorful enough before it touches the chicken. Once you're happy with the seasoning, go ahead and pour it all into a bag or container with your chicken and pop it in the fridge.And no, you can’t just marinate it for 15 minutes—this needs time. Let it soak for at least 4-6 hours, but if you really want that flavor to shine, give it a good 12 to 24 hours. Trust me, it’s worth the wait.
Make Your Dry Dredge
Once your chicken is done marinating, take it out of the fridge and let it come to room temperature—this helps it cook more evenly.While it warms up a bit, put together your dry dredge: combine your flour, spices, baking powder, baking soda, and cornstarch in a large bowl. Give it a good whisk until everything’s evenly distributed. The color of the flour should shift noticeably—if it still looks pale, you probably haven’t added enough seasoning.Here’s a little trick: splash in a bit of water and gently mix with your hands. Don’t overwork it—we want those tiny flour clumps. They’ll fry up into the crispiest, crunchiest little craggy bits on your chicken.
Time to Get to Work
Get your racks or baking sheets ready—it’s frying time. This method goes straight from the buttermilk brine into the dry dredge, followed by a short rest to let the flour fully hydrate. Let your coated chicken rest for 15–30 minutes before frying. If you want an extra-thick, crunchy crust, you can double-dip by using your marinade as a wet dredge—but always make sure to rest between dredges, and always finish with the dry.Using tongs, lift each piece of chicken out of the buttermilk brine. The marinade will be thick and sticky—that’s perfect! Let any excess drip off for a few seconds, then coat the chicken in your seasoned flour one piece at a time. Don’t toss them all in at once; work in small batches. Gently pat the flour onto the chicken to make sure every nook and cranny is covered. Then set it aside to rest.
Let’s Fry!
Pour your oil into a heavy-bottomed frying pan or Dutch oven and heat it to 300–325°F. This lower temperature is intentional—we’re doing a double fry! Once your oil hits the right temp, gently lower the chicken into the pan away from you. If it bubbles, you want those bubbles heading in the opposite direction. And a quick note: if your oil starts to smoke, it's too hot—bring that heat down.Try not to mess with the chicken too much while it fries. Let it do its thing. Once the internal temperature reaches about 150°F, carefully remove the pieces and place them on a wire rack to rest. Work in batches, and avoid overcrowding the pan—this keeps the oil temperature stable and helps the crust crisp up properly.Now for the second fry: raise the oil temperature to 350–375°F and fry the chicken again until it’s deeply golden and irresistibly crunchy. This final step locks in the texture and makes the outside perfectly crisp.
You can absolutely serve your chicken naked—it's already delicious on its own. But if you’re feeling fancy (or just want to level up), let’s make a glaze. The first one we have is a spicy lemon pepper glaze made with honey. Lets get started!Gather all your glaze ingredients from the list above (or to the side—if you’re on a PC...weirdo). Toss everything into a small saucepan over low heat. Let it gently simmer and reduce until it thickens slightly and the flavors come together. And hey—don’t forget to grate your garlic for that extra kick! Pretty simple, right?
Our second glaze is a bold, spicy red number inspired by (and by "inspired" i mean i just adapted it for the average homecook) Chef Eric Huang of the iconic NYC Peking House. This place was so good it had a waitlist during the pandemic— Crazy, i know. Lets get started!Start by toasting your dried chilies and Sichuan peppercorns in a dry saucepan—separately. This helps draw out the oils and removes any excess moisture, which deepens the flavor.Next, take all your glaze ingredients except the vinegar and give them a good blitz in a blender until powdered. You’ll know it’s ready when it smells amazing...and makes you start coughing a little. (A sign of power.)Pour the blend into a bowl and give it a taste. You can always adjust the seasoning or add a little sugar to balance the heat.Now, take some of the oil you used for frying earlier and pour it over the spice mix. Whisk it all together until smooth. (The original recipe calls for duck fat—but come on, who the hell just has that lying around?) Add a pinch of vinegar for brightness, toss your crispy chicken in the glaze, and enjoy! I know I will!

This recipe sourced from Me!*


LynziePedia.net//Lynzie'sChocolateMilk!
X


This chocolate milk is creamy, dreamy and best made with high quality ingredients. i hightly reccomend using a nicer grade of chocolate like from ghiardelli, but any chocolate will do here.

1 cup (8oz) heavy cream♥︎
3oz cocoa powder♥︎
8oz dark chocolate♥︎
7 cups milk♥︎
1 teaspoon vanilla or vanilla bean paste♥︎
a pinch of kosher salt♥︎
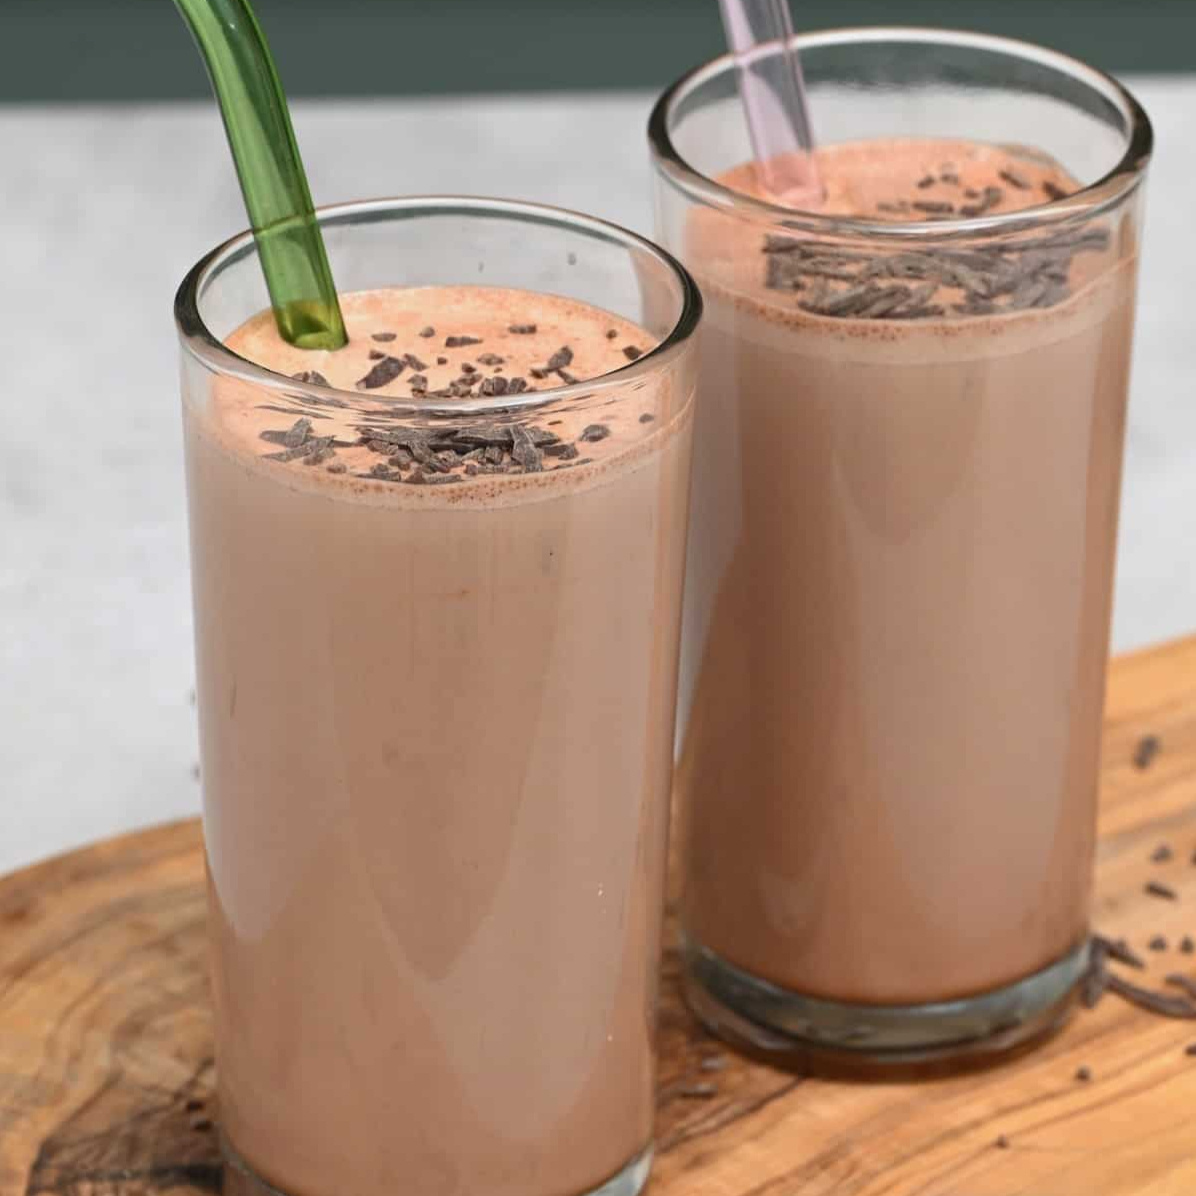

In a saucepan over medium heat, warm the heavy cream and a pinch of salt until it just begins to bubble at the edges—no need to boil! Once it’s simmering, turn off the heat.Add the cocoa powder and chopped dark chocolate to the warm cream, stirring gently until everything is silky smooth and fully melted. Kind of like a ganache!
Pour in half of the milk and add the vanilla. Give it a good whisk to combine, then stir in the rest of the milk.Transfer to a glass jug or mason jar, let it cool slightly, and pop it in the fridge to chill for at least a few hours (overnight is even better!).Keeps in the fridge for 5–7 days... although it wont last that long in my house.

This recipe sourced from the Medusagelato instagram account*


LynziePedia.net//Lynzie'sChocGlaze!
X


By far the easiest chocolate glaze topping to make. And it doesn’t break into pieces when sliced.
If you're using unsweetened chocolate, check my tips n tricks page for info on how to add sugar.

200 grams dark chocolate finely chopped.♥︎
90 grams unsalted butter♥︎
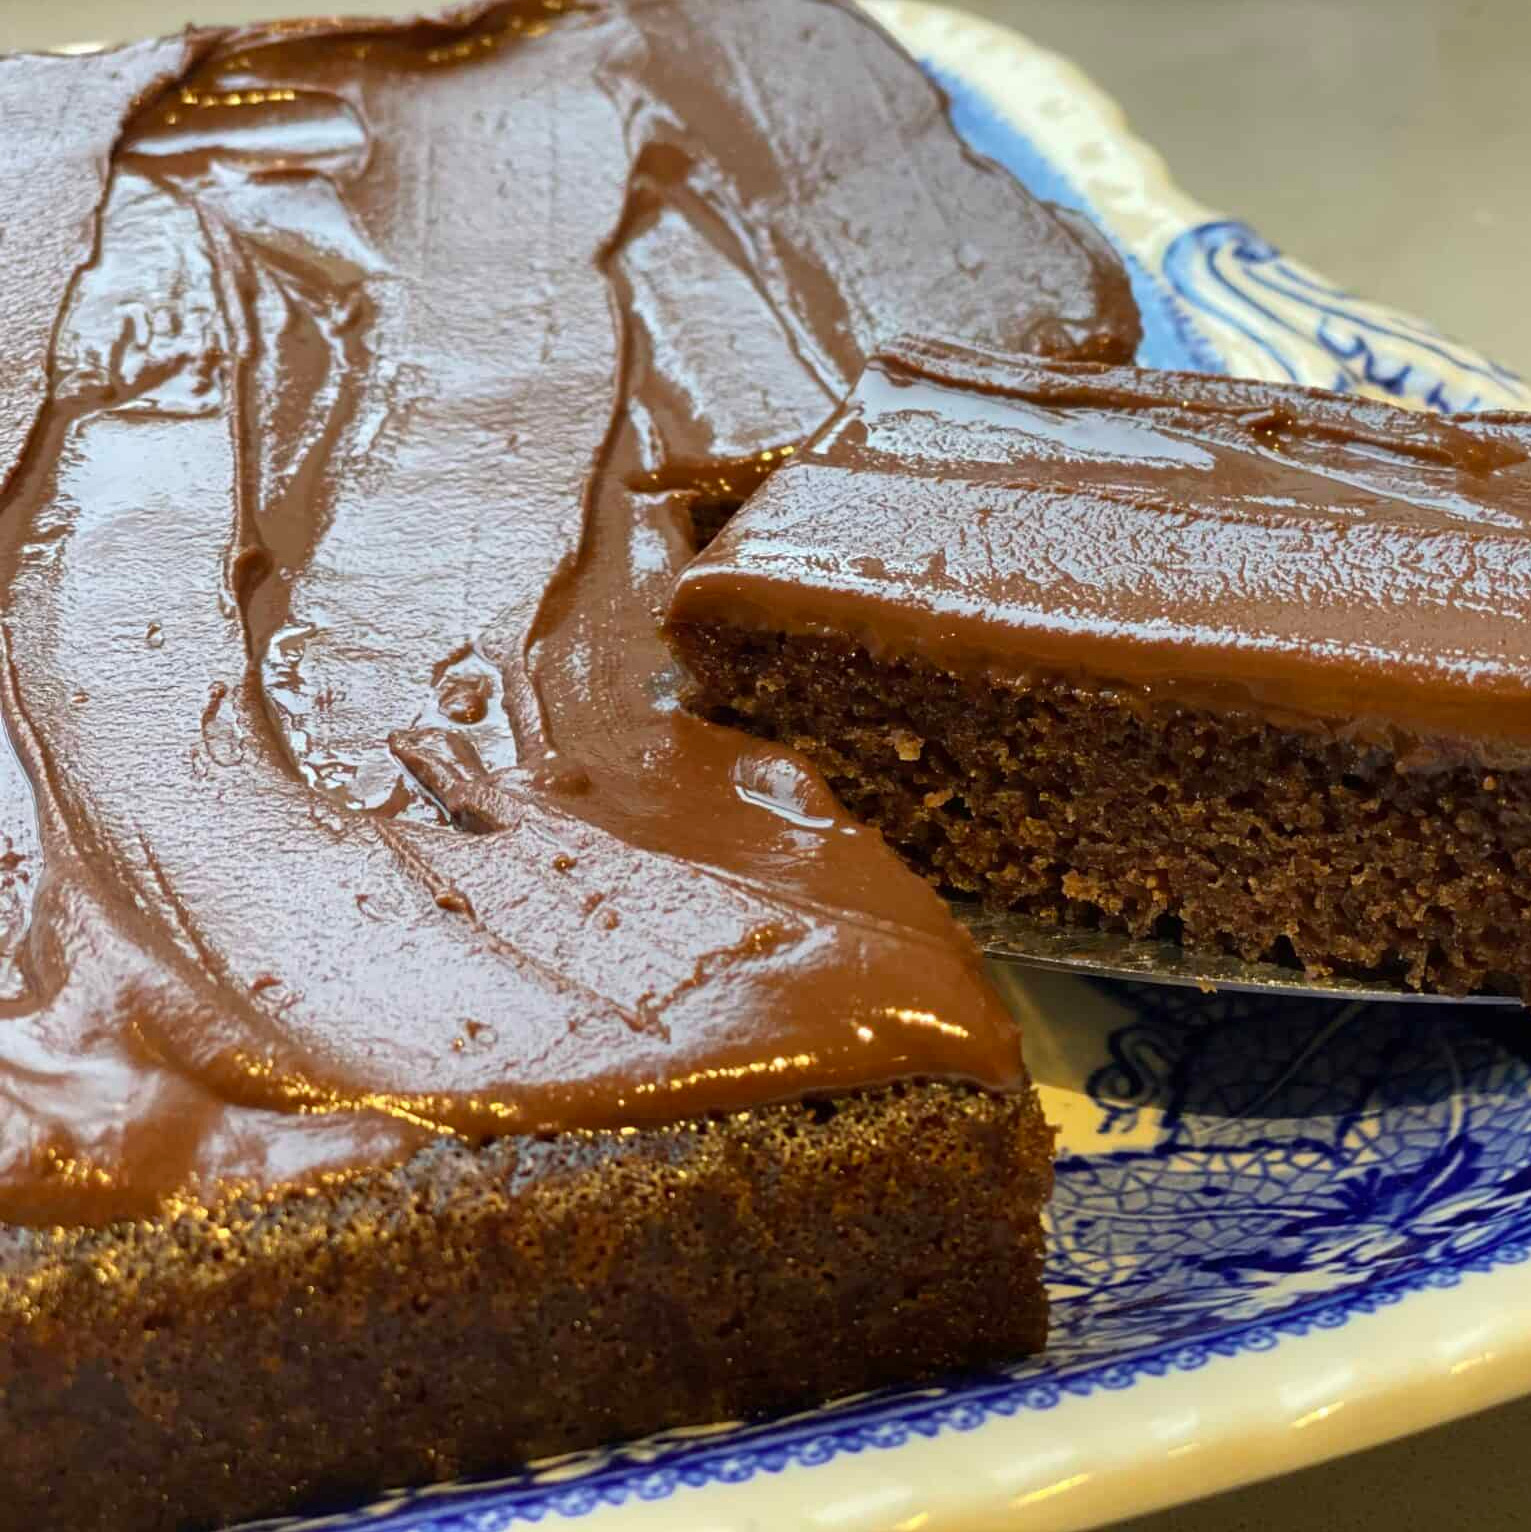

Melt the chocolate and butter in a heat proof bowl over a pan of simmering water. Stir frequently until melted and smooth. Leave to one side to cool a little.Pour the chocolate over the top of the cake while still in the baking tin. Or as desired.

This recipe sourced from traditionalhomebaking.com*


LynziePedia.net//Lynzie'sChocCake!
X


This cake is moist and delicious! if you dont have buttermilk, vinegar with milk is a fine substitute!Makes 3 7 inch round cakes.

2 Cups (250g) A.P flour♥︎
2 Cups (400g) Sugar♥︎
¾ Cup (65g) dark cocoa powder♥︎
2 Teaspoons baking soda♥︎
1 Teaspoon baking powder♥︎
Pinch of salt♥︎
2 Eggs (room temp)♥︎
1 Cup (240g) buttermilk or buttermilk substitute♥︎
½ Cup (112g) vegetable or canola oil♥︎
2 Teaspoons vanilla flavoring♥︎
1 Cup (237g) boiling water♥︎
2 Teaspoons espresso powder♥︎
°F
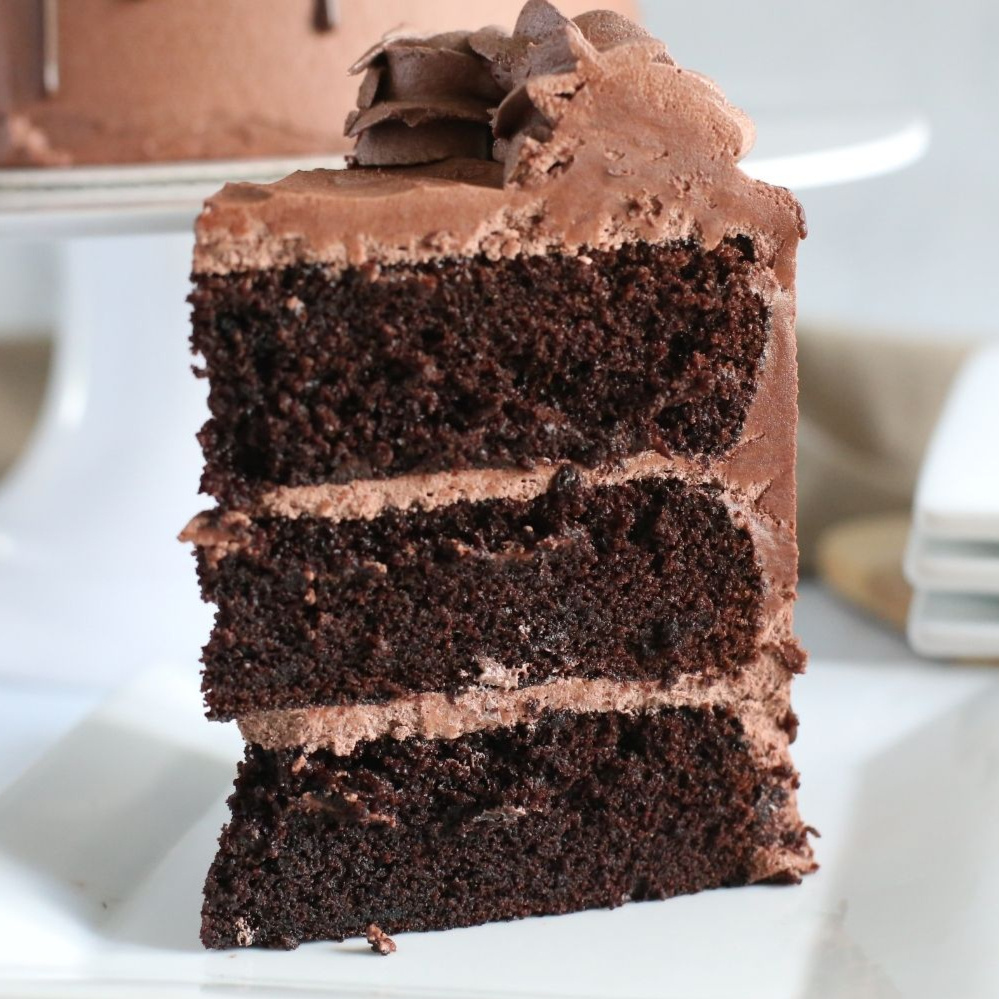

Preheat oven to 350° F. Prepare cake pans using cooking spray and parchment circles.In a large mixing bowl, combine flour, sugar, dark cocoa powder, baking soda, baking powder, and salt. Whisk to combine.Add in room temperature eggs, buttermilk or buttermilk substitute, vegetable oil, and vanilla extract. Whisk until the dry and wet ingredients are just combined.Pour in boiling water and espresso powder and mis with a silicone spatula until the water and cake batter are combined and smooth. Do not overmix.
Divide batter evenly between your cake pans (see equipment for sizes). Use a kitchen scale to ensure that the batter is equally divided.Bake cakes for approximately 30-35 minutes in the oven until the cakes spring back when gently touched or toothpick comes out clean. *Please note that baking times may be different for different size pans.Remove cakes from the oven and allow them to cool in the pans on a wire rack until they are at room temperature.Run a knife or small offset spatula between the cake and edge of the pan to loosen from the edges. Invert the cakes to remove from the pan.

This recipe sourced from cakemehometonight.com*


LynziePedia.net//Lynzie'sPizzaDough!
X


This 24 hour pizza dough is absolutely delicious. it does take extra time but i promise you it's worth it! and its relatively easy!

350g Warm Water (90-95°C)♥︎
13g Sea Salt♥︎
¾ of ½ OR 1.5g Instant Yeast♥︎
500g Flour, Preferably Pizza Flour♥︎


Measure out your water and temp it with a thermomoter, making sure the temperature is correct and add it into a large mixing bowl with the sea salt, stirring to dissolve. Add the yeast to the water to hydrate then swish to dissolve. Add 500 grams of flour (preferably 00) to the water-salt-yeast mixture.Mix by hand, first by stirring your hand around inside the dough tub, Then use this method to develop it into a unified mass. Continue for just 30 seconds to 1 minute.The target dough temperature at the end of the mix is 80°F (27°C); use your probe thermometer to check it.Let the dough rest for 20 minutes, then knead it on a work surface with a very light dusting of flour for about 30 seconds to 1 minute. The skin of the dough should be very smooth.Place the dough ball seam side down in the lightly oiled dough tub. Cover with a tight-fitting lid. Hold the dough for 2 hours at room temperature (assuming 70° to 74°F) for the first rise.2
Shape the dough into 3-5 tight balls and place them on a plate covered in plastic wrap. Let sit in the fridge for at least 24 hours, up to 48 hours. (24 hours is best for this recipe)When you're ready to bake, preheat the oven to the highest temp without broiling. (note that your pizza dough should sit outside the fridge for at least 30 minutes before baking)Stretch out your pizza dough with your hands. Here's a great visual guide on doing so!Transfer the dough to a parchment paper-lined baking sheet or pizza pan and reshape into a circle if needed. Brush the rim with olive oil if desired, and top with sauce and your choice of pizza toppings.
For the best possible pizza, I recommend using a blend of non-smoked provolone and hand-shredded, low-moisture whole milk mozzarella. Part-skim works too—just make sure it’s low-moisture and block-style, not pre-shredded.Pre-shredded cheese might seem convenient, but it’s often coated in anticaking agents that can mess with the melt and leave a bit of a chalky taste.
To make your pizza even more legendary, you could also buy whole and peeled tomatoes in a can and shred them in a blender then season it over the stove yourself. I really like this guide on doing so yourselfYou can also swap out the A.P flour for bread flour or pizza dough flour. both of these work quite well but are a little more expensive.
If you want to really get into making pizza regularly, I have two final tips for you.Buy some corn meal, and invest in a nice pizza stone or at minimum the proper pizza rack. you can find amazing ones on amazon!Choosing to roll out and stretch your pizza dough with your hands instead of using a rolling pin makes such a big difference, especially if you use the proper '00 flour (pizza flour)A pizza stone will also help to distribute heat more evenly and ensure everything bakes thoroughly. If you don't have or dont want to buy a pizza stone, I suggest using a cast iron pan.

This recipe sourced from The Elements Of Pizza*


LynziePedia.net//Lynzie'sFryBread!
X


I grew up in Oklahoma and absolutely LOVED Indian tacos and added this recipe to my website just so i could make them. they're very popular at county fairs especially and they're super delicious.

frying oil as needed♥︎
4 cups all-purpose flour♥︎
3 tablespoons baking powder♥︎
2 teaspoons salt♥︎
2 ½ cups warm milk♥︎


HHeat oil in a deep fryer or large saucepan to 375°FCombine flour, baking powder, and salt in a large bowl; mix in milk to form a soft dough. Divide dough into eighteen 2-inch diameter balls; flatten or roll each ball into 1/2-inch-thick rounds. Make a small hole in the center of each round to help keep them flat while frying.Lower dough rounds, about 3 or 4 at a time, carefully into hot oil. Fry until rounds have bubbles on the surface and are golden brown, about 2 to 3 minutes per side. Transfer to a paper towel-lined plate to drain. Repeat with remaining dough.

This recipe sourced from allrecipes.com*


LynziePedia.net//Lynzie'sOnionPasta!
X


A hands-off, flavor-packed pasta dish featuring sweet caramelized onions, roasted garlic, and sun-dried tomatoes—all baked together for an effortlessly elegant meal.

5 small yellow onions (or 3 large), thinly sliced
1 head of garlic, top sliced off to expose cloves
sun dried tomatoes
Salt, black pepper, paprika and parsely to taste.
Olive or canola oil
Pasta of your choice! cooked according to package instructions
Coconut milk or heavy cream to taste
Juice of 1 lemon
Reserved pasta water (up to 1 cup)
°F
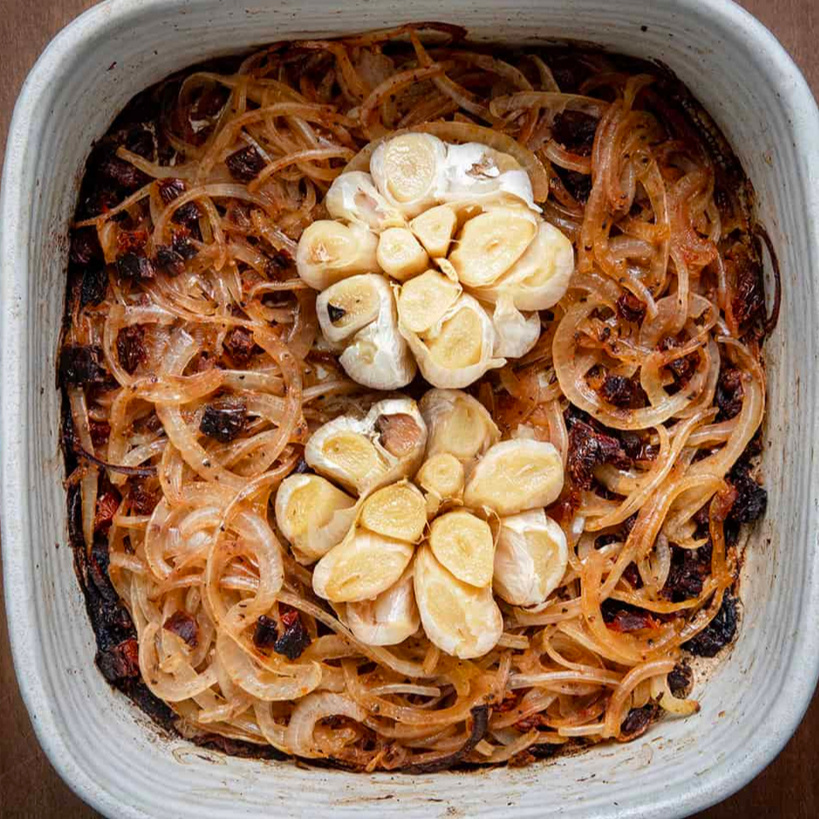

Preheat the oven to 400°F (200°C).n a casserole dish, combine sliced onions, chopped sun-dried tomatoes, paprika, salt, pepper, and dried parsley. Toss to mix.Place the whole head of garlic, cut side up, in the center of the dish. Drizzle everything generously with olive oil or the oil from the sun-dried tomato jar. Cover the dish with foil.Place the whole head of garlic, cut side up, in the center of the dish. Drizzle everything generously with olive oil or the oil from the sun-dried tomato jar. Cover the dish with foil.
About 20 minutes before the onions are done, cook the pasta according to package instructions. Reserve up to 1 cup of the pasta water before draining.Once the onions are caramelized, remove the garlic head from the dish. When cool enough to handle, squeeze the roasted garlic cloves out of their skins and mash them into the onion mixture.Add the cooked pasta, coconut milk (or heavy cream), chopped parsley, chopped basil, and lemon juice to the casserole dish. Mix well, adding reserved pasta water as needed to achieve a creamy consistency
Serve warm, garnished with additional fresh herbs if desired.
Enjoy!


LynziePedia.net//Lynzie'sShrimpPasta!
X


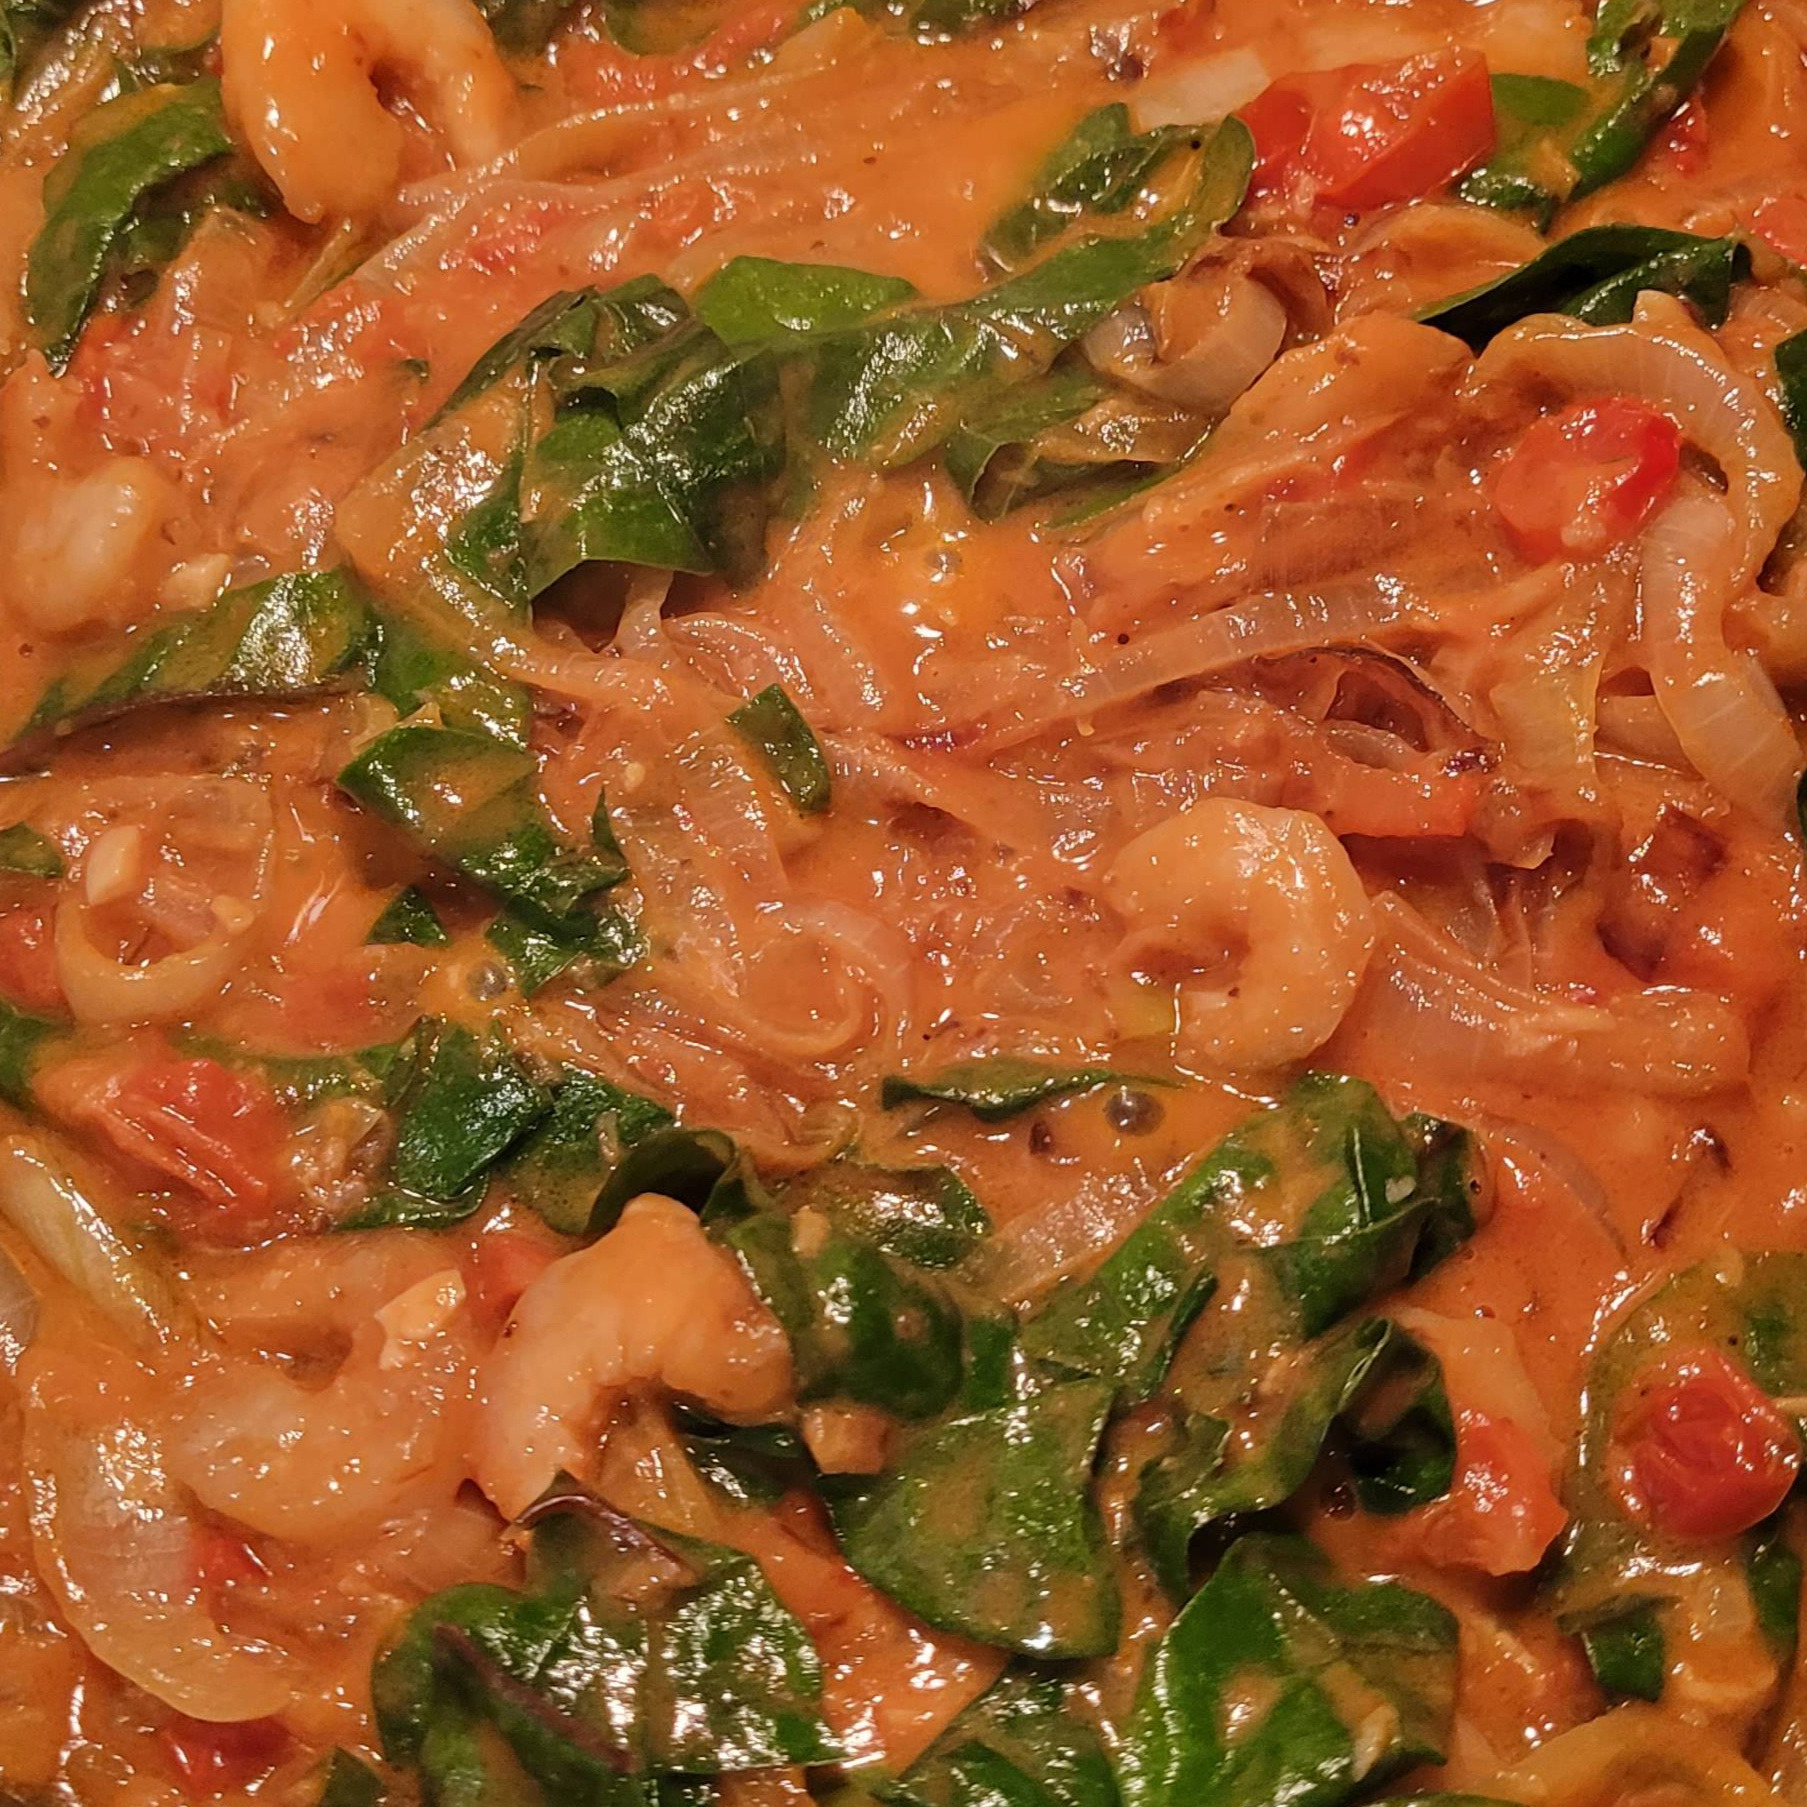
A cozy, slightly indulgent pasta dish with a gentle kick and a citrusy twist—perfect for a date night, or just when you want to feel like a person who definitely has their life together.

1 lb uncooked shrimp, peeled and deveined♥︎
Zest and juice of 1 lemon♥︎
1 jar red pasta sauce of your choice (I love the Trader Joe’s ones!)♥︎
1 white or yellow onion, chopped (no need to dice too fine)♥︎
½ stick of butter♥︎
3–4 tablespoons heavy cream, or to taste♥︎
A generous splash (or two) of cooking wine♥︎
8 oz cherry tomatoes, sliced♥︎
Olive oil♥︎
3–5 cloves of garlic, grated or finely minced♥︎
A drizzle of chili oil♥︎
Pasta of your choice (I usually go with spaghetti!!)♥︎
Salt and pepper, to taste♥︎
Reserved pasta water♥︎

In a large pan, heat a swirl of chili oil and a splash of cooking wine until just bubbling. Add the shrimp and cook until they're about 80–90% done—pink and opaque with just a bit of rawness left. This keeps them from overcooking later. Remove from the pan and set aside.Bring a pot of salted water to a boil and cook your pasta according to the package directions. Before draining, save a cup of the pasta water—this is important! Rinse the noodles briefly under cold water to stop the cooking process, then set aside.
In the same pan, add a bit more cooking wine and melt in all the butter. Toss in your chopped onion and a generous pinch of salt—even if your wine is salted. The salt helps the onion break down and sweeten faster. Add your grated garlic and cook everything gently until the onions are soft, sweet, and translucent.Lower the heat and stir in the heavy cream. You want just enough to soften and mellow the sauce—start with 2 tablespoons and adjust to your liking. Then add your marinara sauce, lemon zest and juice, cherry tomatoes, and another splash of wine if you're feeling bold. Let it simmer gently until everything is warmed through and slightly thickened.
Return the shrimp to the pan, along with a bit of your reserved pasta water. Let it cook for a few more minutes until the sauce reduces slightly and the shrimp finish cooking. Taste and adjust with salt and pepper.Add in your pasta and toss until your pasta is completely coated. Plate it up with a little extra zest, cracked black pepper, or maybe even a sprinkle of Parmesan if you’re feeling fancy.
Enjoy! this is a great date night dish or just to impress. Try pairing with a glass of chilled wine or a lovely side salad.

This recipe sourced from ME!*


LynziePedia.net//Lynzie'sChocolateCupcakes!
X


If you’ve ever wondered how to make chocolate cupcakes from scratch, you’ve come to the right place! I can say without pride or delusions of grandeur — this is the BEST Chocolate Cupcake Recipe you’ll ever try!

all-purpose flour (180g)♥︎
1¼ cups granulated sugar (250g)♥︎
unsweetened cocoa powder (25g)♥︎
¾ teaspoon baking soda♥︎
¼ teaspoon salt♥︎
1 cup buttermilk room temperature (240ml)♥︎
½ cup vegetable oil (80ml)♥︎
1 large egg♥︎
2 teaspoons vanilla extract♥︎
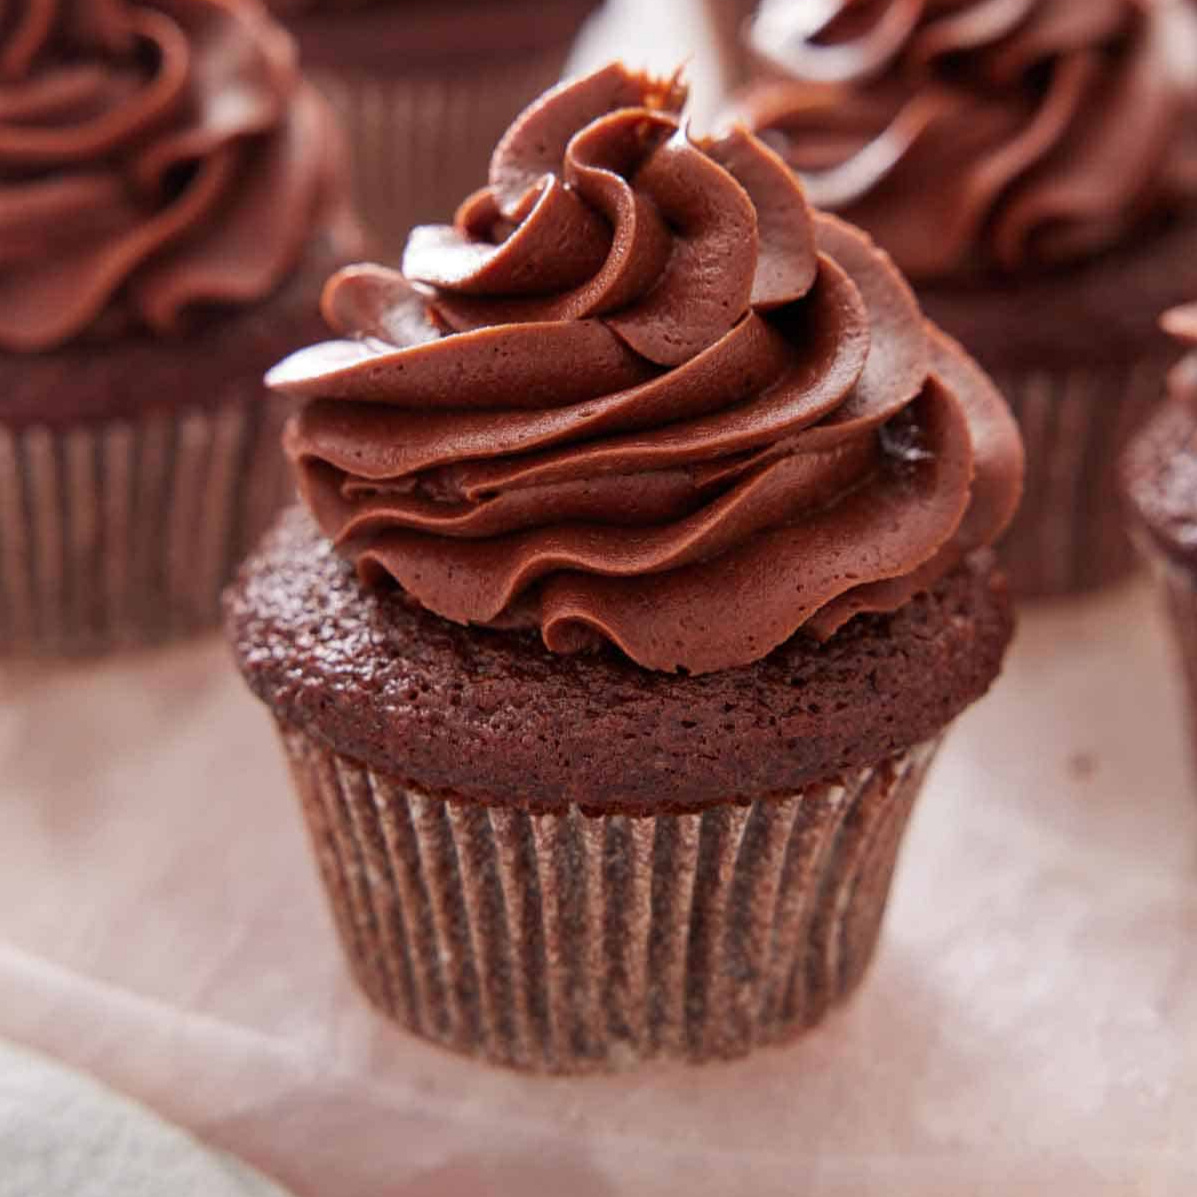

Preheat the oven to 350°F. Line a 12-cup muffin pan with paper cupcake liners.Whisk together the flour, sugar, cocoa powder, baking soda, and salt in a large mixing bowl.
In a medium mixing bowl, whisk the buttermilk, oil, eggs, and vanilla until well combined.
Pour the wet ingredients into the dry ingredients and whisk until well combined and no dry streaks of flour remain. Divide the cupcake batter among the paper liners, filling each about ⅔ full.Bake for 20 to 25 minutes or until a toothpick inserted into the center comes out clean. Let cool in the pan for a few minutes, then remove and finish cooling on a wire rack. Frost the cupcakes as desired.

This recipe sourced from preppykitchen.com*


LynziePedia.net//SingleServeCookie!
X


So you want a chocolate chip cookie, but don’t want to whip up a whooooole batch of chocolate chip cookies just for yourself? You’ve come to the right place. I present to you the best single serve chocolate chip cookie recipe you’ll ever eat.

3 tablespoons unsalted butter
4 tablespoons brown sugar, packed
1 tablespoon granulated sugar
1 egg yolk
6 tablespoons all purpose flour
⅛ teaspoon baking soda
pinch of salt
pinch of vanilla flavoring
3 tablespoon chocolate chips


Brown the butter over medium heat, stirring constantly until the butter begins to foam and turns a golden brown, emitting a nutty aroma. Take butter off the heat and allow to cool.In a small mixing bowl combine the butter and the sugars and mix well. Add the egg yolk, and vanilla extract and mix until smooth and homogenous.
Add the flour, salt and baking soda. Mix until just combined and no streaks of flour remain. Last, fold in the chocolate. Do not over mix.Shape into 2 huge cookies or 4 smaller cookies and place on your prepared cookie sheet.
Wanna wait? cool in the fridge for a few hours until you're ready to eat. otherwise preheat an oven at 350 degrees for 10 minutes and pop in the oven for 11 minutes.Enjoy!

This recipe sourced from bromabakery.com*


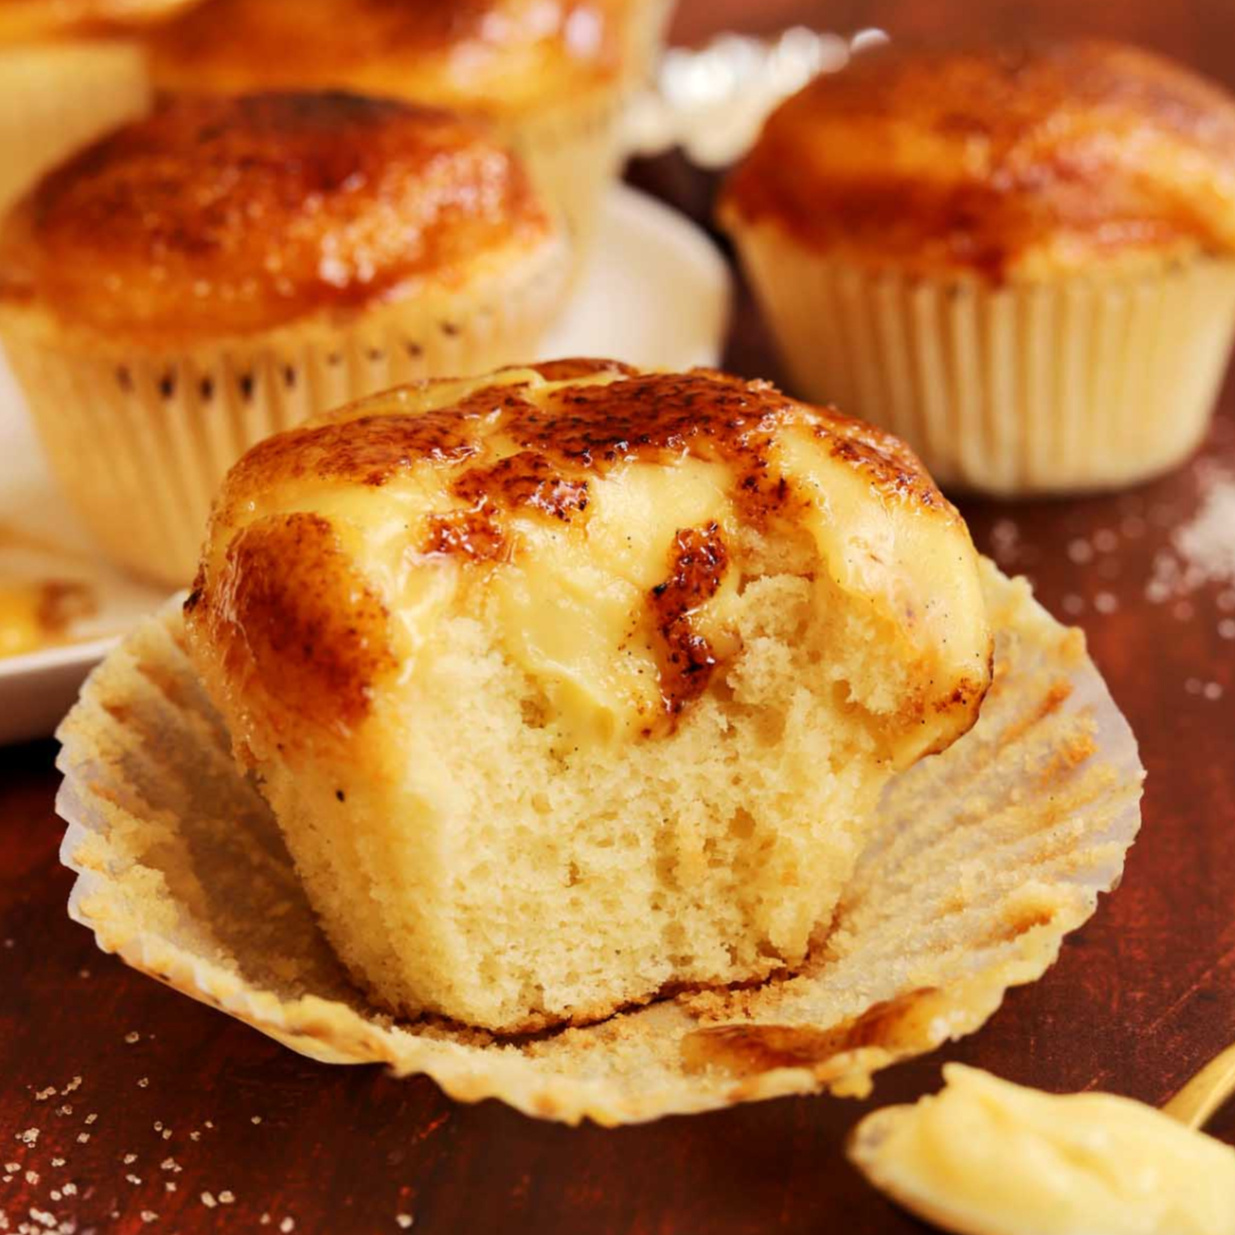
LynziePedia.net//Lynzie'sCrèmeBrûléeCupcakes!
X


Tender, buttery and custardy vanilla cupcakes filled and topped with the smoothest vanilla bean pastry cream with a crunchy caramelized sugar coating! It's just like classic Crème Brûlée served in a cupcake! This dessert is such a show-stopper.

Cupcake Filling/Topping
⅓ cup granulated sugar (65g)
2 tablespoons cornstarch (16g)
1 tablespoon ap flour (9g)
¾ cup 35% heavy whipping cream (180ml)
¾ cup whole milk (180ml)
4 large egg yolks
Pure vanilla bean paste
2 tablespoons unsalted butter (28g)
Coarse/sanding sugar
Cupcake batter
6 tablespoon unsalted butter, softened (84g)
¾ cup granulated sugar (150g)
Vanilla Flavoring
2 large room temp eggs
1¼ cups all-purpose flour (180g)
1 teaspoon cornstarch (3g)
1¼ teaspoon baking powder
pinch of salt
⅓ cup + 1 tablespoon whole milk (95ml)
1 tablespoon (15ml) sunflower oil (you can also use canola oil or vegetable oil)

Make the pastry cream first, I recommend doing this a day in advance.In a small saucepan, combine sugar, corn starch and flour then whisk to blend evenly so there are no lumps of starch or flour.Very slowly begin to whisk in the cream so that it blends smoothly with the starch/sugar mixture. Once all the cream is added, you can pour in the milk and whisk well. Add egg yolks one a time and whisk them in evenly before each addition.
Place the sauce pot over medium-low heat and whisk constantly until it starts to thicken. Be patient as this can take up to 10 minutes. Increase the heat slightly to medium if necessary, but do not walk away from the pan and do not stop stirring as it can easily catch and scorch at the bottom of the pan.Once the mixture starts to thicken, lower the heat and watch carefully. Once it starts to bubble, let it bubble for just 5 seconds while stirring then immediately transfer it to a clean bowl. NOTE: you can pass it through a fine mesh sieve to remove any curdled egg pieces if you are so inclined.
Add butter and stir it in until melted and evenly incorporated. If you’re using vanilla extract instead of the pod, then you can stir it in at this point.Place a piece of plastic wrap directly over the surface of the custard to cover it and refrigerate for at least 4 hours until thoroughly chilled and use within 3 days.
Make your cupcake batter!!Sift flour, corn starch, baking powder and salt into a medium bowl and whisk to blend evenly.Combine soft butter with sugar and vanilla in a large bowl and beat with an electric hand mixer for about 3 minutes on medium-high speed until pale, light and fluffy.Add one egg and beat until well incorporated. Add the other egg and beat until evenly combined, smooth and creamy.Whisk together milk and oil in a volumetric measuring cup or a small bowl.
Add one-third of the flour mixture to the butter mixture and beat on medium-low speed until mostly incorporated.Add half of the milk mixture and beat until well blended, 10-15 seconds.Beat in half of the remaining flour mixture followed by the last of the milk mixture on medium speed just until the batter is smooth, but do not over beat.Finally, add the rest of the flour mixture and mix until just combined. Turn the mixer up to high speed and beat for 5 seconds to emulsify the batter.
Divide the batter among prepared muffin cups, filling them about two-thirds full and bake for 18-20 minutes until a toothpick inserted into the center comes out clean.Transfer the pan to a wire rack and let cupcakes cool for 5 minutes in the pan before transferring individually to the rack to cool completely.Fill the cupcakes. Using a sharp paring knife, cut out a small cone in the center of each cooled cupcake, being careful not to cut too deep (cut just to the center of the cupcake). Snack on the cut-outs.
fill the well of each cupcake and then spoon another dollop of custard over the tops, dividing it evenly among them.Use a small off-set spatula to spread the custard to the edges. Place cupcakes on a baking sheet and refrigerate until custard is firm and the surface has dried out a bit, about 15 minutes.Gently dip the tops in coarse/raw sugar, and then flame with a kitchen torch until caramelized. Don’t be alarmed if you torch the paper liners a bit because I do it all the time and it’s kinda fun – the singed edges add character.
Let the sugar harden and serve immediately. If the cupcakes sit for too long before they are served, the hard sugar layer will become soft as it dissolves into the custard, but it will still have an incredibly complex burnt sugar flavor.

This recipe sourced from scientificallysweet.com*


LynziePedia.net//Lynzie'sChickenSoup!
X


This hearty, flavor-packed chicken soup comes together effortlessly with tender rotisserie chicken, sweet corn, black beans, tomatoes, onion, and carrots. Just toss everything into your Instant Pot or slow cooker and let the magic happen—perfect for a comforting weeknight meal with minimal prep and maximum flavor.

1 can crushed or diced tomatoes
rotisserie or canned chicken. or breast i really dont care.
4 cups chicken broth
black beans
corn
chopped white or yellow onion
celery
carrots
garleck (garlic)
cumin
chili powder
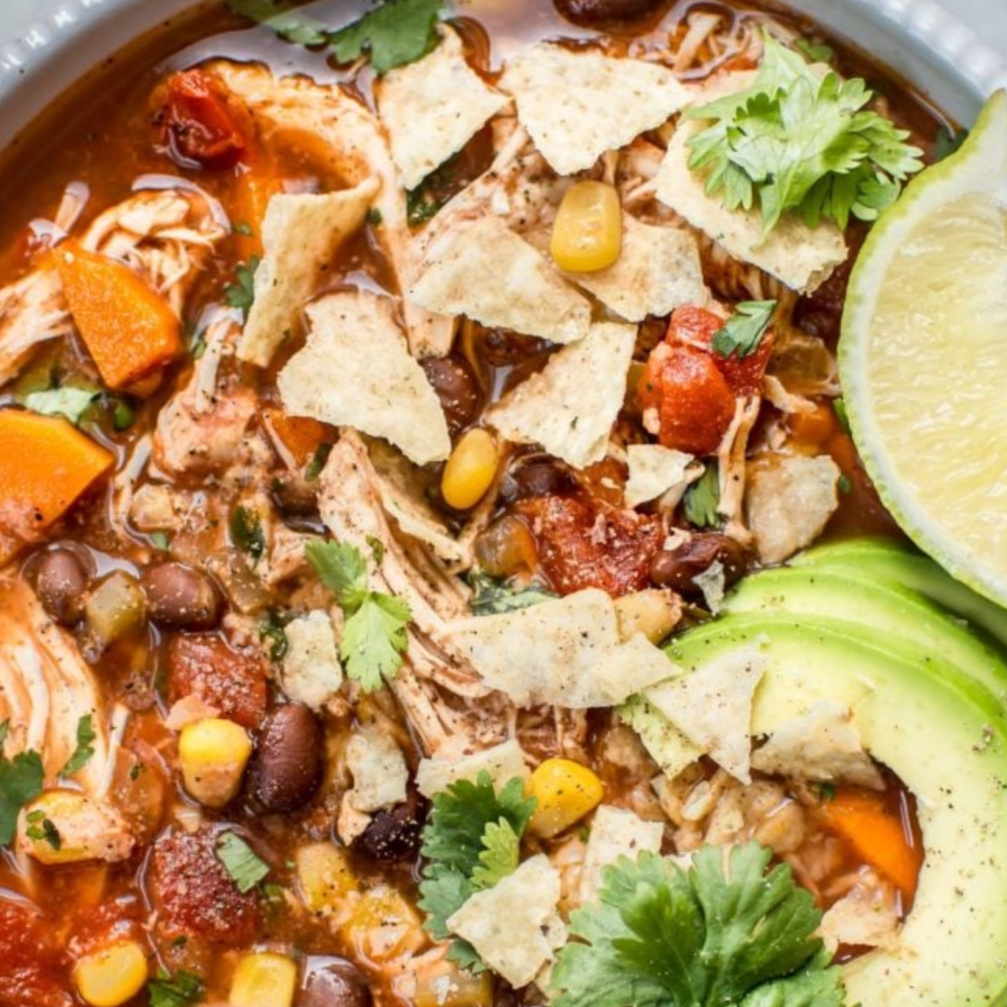

prep your veg as u may please. dont be afraid to get creative with it! add or omit ingredients! i personally like to add TVP :))
When you are ready, add everything to your instant or crock pot and cook until the chicken is fully cooked and can easily be shredded with a fork.add salt and pepper to taste and enjoy!!!

This recipe sourced from ME!*


LynziePedia.net//Lynzie'sPumpkinSpiceCookies!
X


These pillowy-soft cookies are packed with real pumpkin and cozy fall spices like cinnamon and nutmeg. With a melt-in-your-mouth texture and just the right touch of sweetness, they’re perfect for chilly days and festive gatherings.

2 sticks salted butter, browned (226 grams)
270 grams ap flour
1 teaspoon baking soda
2 teaspoons ground cinnamon
½ teaspoon ground nutmeg
½ teaspoon ground ginger
¼ teaspoon ground cloves
¼ teaspoon ground allspice
50 grams granulated sugar
150 grams light brown sugar
120 grams pumpkin puree, room temp (not pumpkin pie filling)
1 egg yolk, room temp
30ml maple syrup
vanilla flavoring


start by browning 2 sticks of butter in a pan. if you need help with this go on yt cause im lazy as hell.Let your butter cool to room temp and then in a seperate bowl mix together flour, spices and baking soda
In another bowl, mix both types of sugar with your cooled butter using a whisk. Whisk for about 1 minute.Add pumpkin puree, maple syrup, egg yolk n vanilla. Whisk until smooth.Fold in ur dry ingredients with a spatula until just combined.
using a cookie scoop, scoop your cookies into evenly portioned circles and then chill in the fridge for at least 1 hour.When u r ready, bake at 375 for 6-9 minutes. let your cookies cool completely on the cookie sheet before eating. Enjoy!

This recipe sourced from birchberryco.com*


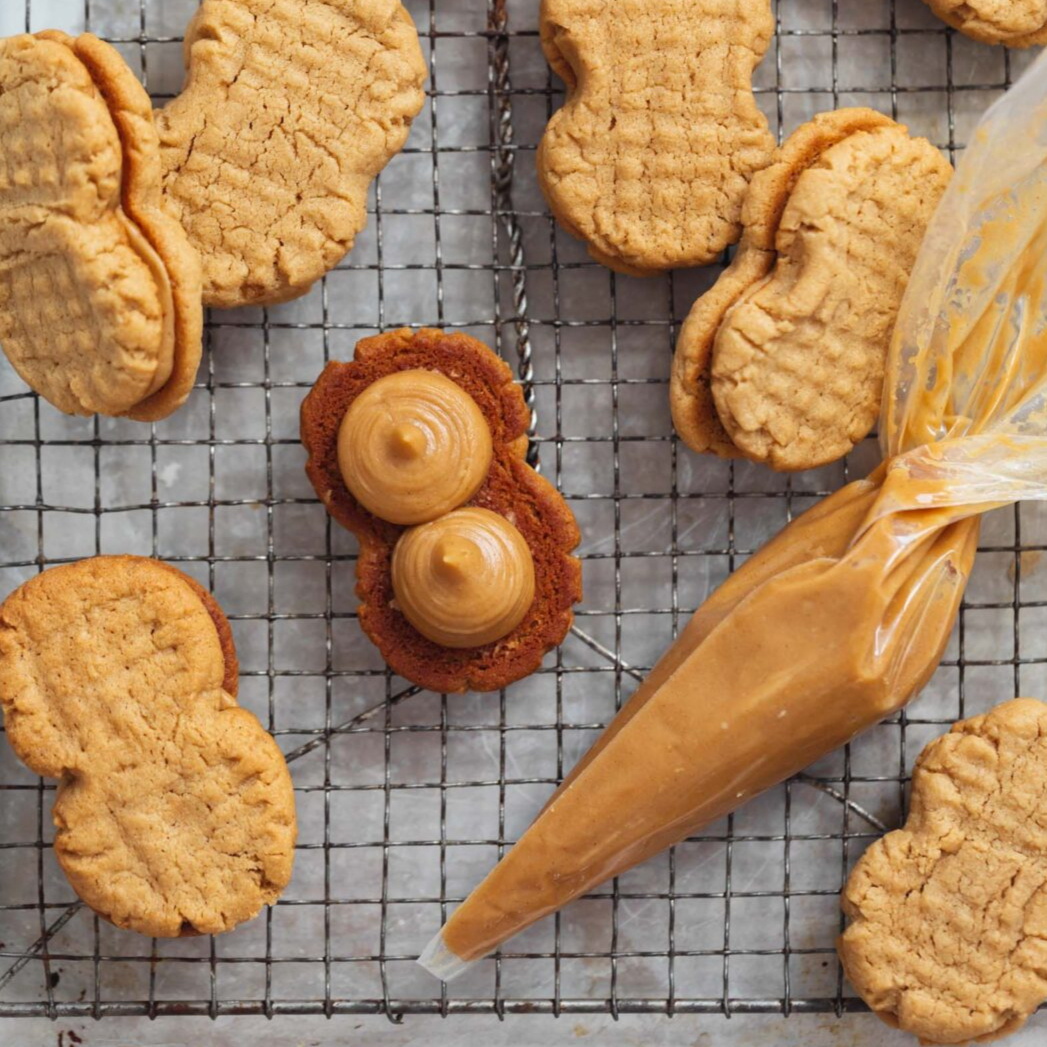
LynziePedia.net//Lynzie'sNutterButterBars!
X


These homemade Nutter Butters have all the salty-sweet peanut butter flavor of the store bought treat but are way tastier.TIP: if you don't have a scale, lightly brush your measuring cup with oil before filling with peanut butter. it will slide right out.

For the cookies:
¾ Cup creamy peanut butter (170 grams)
¼ Cup butter (58 grams)
1 Cup packed brown sugar (213 grams)
1 Large egg room temp
1 Teaspoon vanilla flavoring
1 Cup flour (120 grams)
2 Tablespoons cornstarch
¼ Teaspoon baking soda
Pinch of salt
For the filling:
½ Cup peanut butter (135 grams)
Powdered sugar (to taste)
3-4 tablespoons heavy cream
Pure vanilla extract
Equipment:
Piping bag
Stand or hand mixer

First, make the cookies. Preheat the oven to 350°F. Line a baking sheet with parchment paper. Set aside.In a stand mixer fitted with the paddle attachment, beat together the peanut butter, butter and brown sugar on low speed until combined.Gradually increase the speed to medium-high and beat until light and fluffy, about 1 minute.
Use a silicone spatula to scrape down the sides and bottom of the bowl, then add in the egg and vanilla. Beat to combine.Add the flour, cornstarch, baking soda, and salt and beat on low speed until just combined and no streaks of flour remain.
Use a 1 ounce cookie scoop to portion out equal amounts of dough. Shape the dough balls into flat oval discs, using your fingers to pinch the middle in so that each one looks like a peanut.Place the dough on the prepared baking sheets, spacing the dough 2 inches apart. Use a fork to make crosshatches on each circular end of the dough.Bake for 9 to 10 minutes or until the cookies have puffed up and are set and firm around the edges but still somewhat soft in the middle. Remove the baking sheet from the oven and allow the cookies to cool completely.If you prefer crunchier cookies, bake the cookies for 2 to 3 more minutes or until the edges are golden brown!
While the cookies cool make the filling.In a stand mixer fitted with the paddle attachment, combine the peanut butter, powdered sugar, 3 tablespoons of the heavy cream, and vanilla extract.Beat on low speed until smooth–do not over mix or the cream can split! If the filling feels too thick add the last tablespoon of cream. Transfer to a piping bag.
Match up the cooled cookies into pairs. Pipe about two teaspoons worth of filling onto the bottom of one half and sandwich together with the other half. Repeat with the remaining cookies. Enjoy!

This recipe sourced from BromaBakery.com*


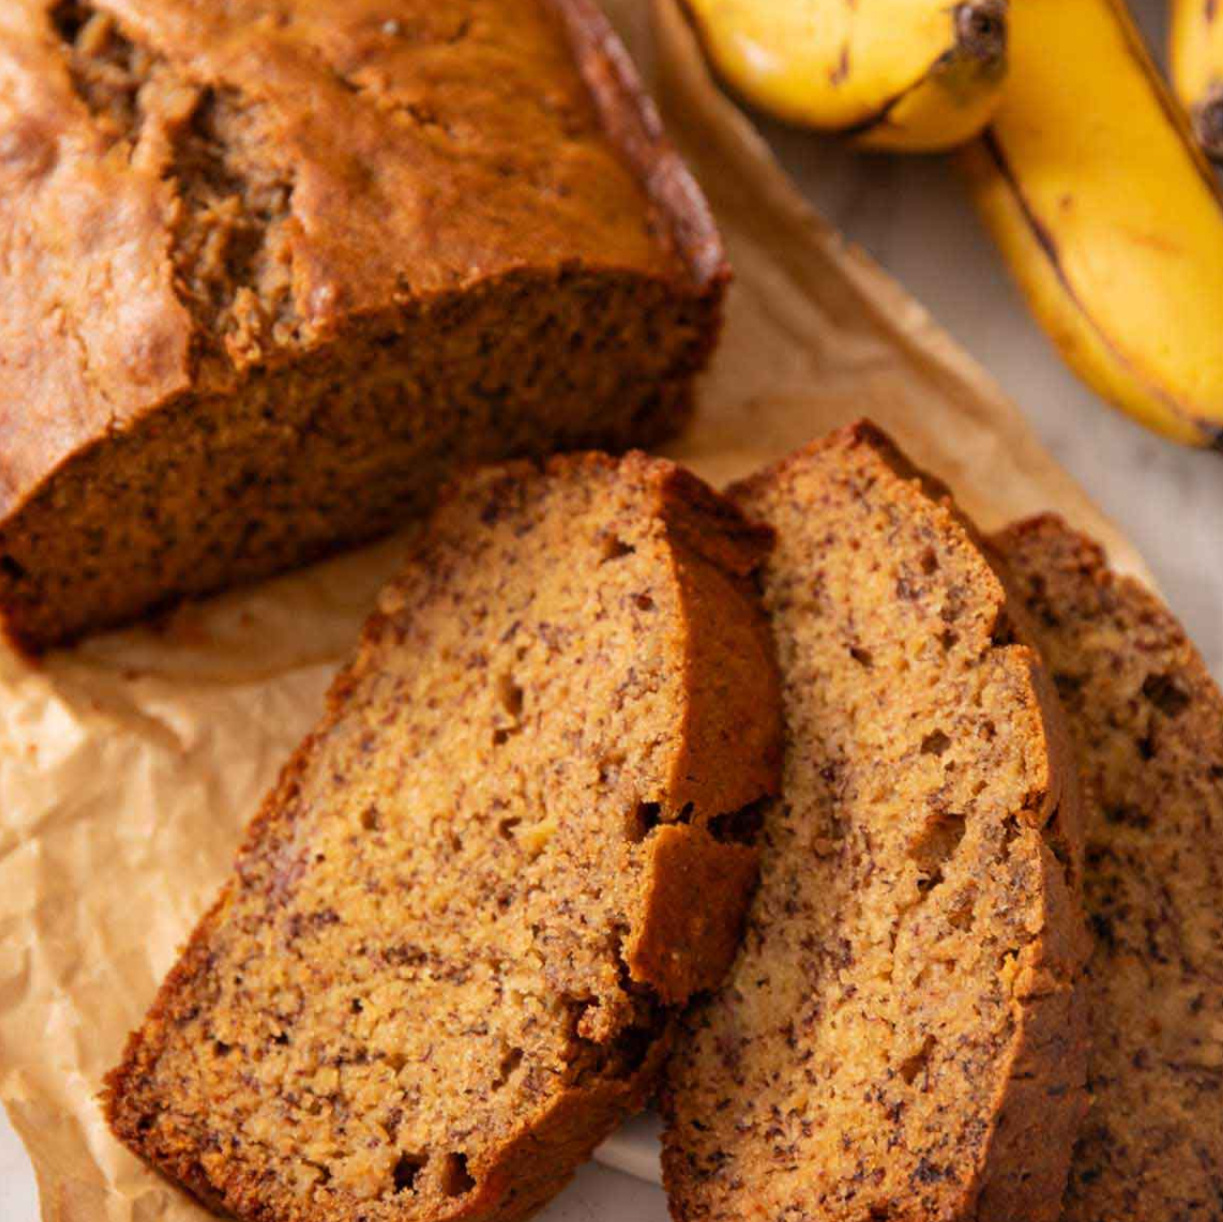
LynziePedia.net//Lynzie'sBananaBread!
X


This banana bread is absolutely wonderfully sweet and moist, and a great way to use some overripe bananas sitting on your counter.TIP: if your bananas aren't ripe, stick them in the oven at 300-350°F until brown.

1¾ cup A.P flour (210 grams)
1 teaspoon baking soda
Pinch of salt
½ teaspoon cinnamon
¾ cup light or dark brown sugar (165 grams)
½ cup unsalted butter room temp (113 grams)
2 large room temp eggs
430 grams mashed ripe bananas ~3-4 large bananas
Vanilla flavoring

Preheat oven to 350F. Grease a 9×5-inch loaf pan with butter or baking spray.In a medium bowl, whisk together the flour, baking soda, salt, and cinnamon.
In a large mixing bowl or the bowl of a stand mixer fitted with the paddle attachment, beat the brown sugar and butter together on high speed until light and fluffy, about 3 minutes.Beat in the eggs one at a time, stopping to scrape down the bowl between each. Beat in the vanilla extract. Mix the mashed bananas in and then add the dry ingredients and fold together until just combined.
Pour the batter into the prepared loaf pan.Bake for 50 to 60 minutes or until a wooden pick inserted into the center comes out clean. Let cool in the pan for 20 minutes then remove and finish cooling on a wire rack.

This recipe sourced from preppykitchen.com*


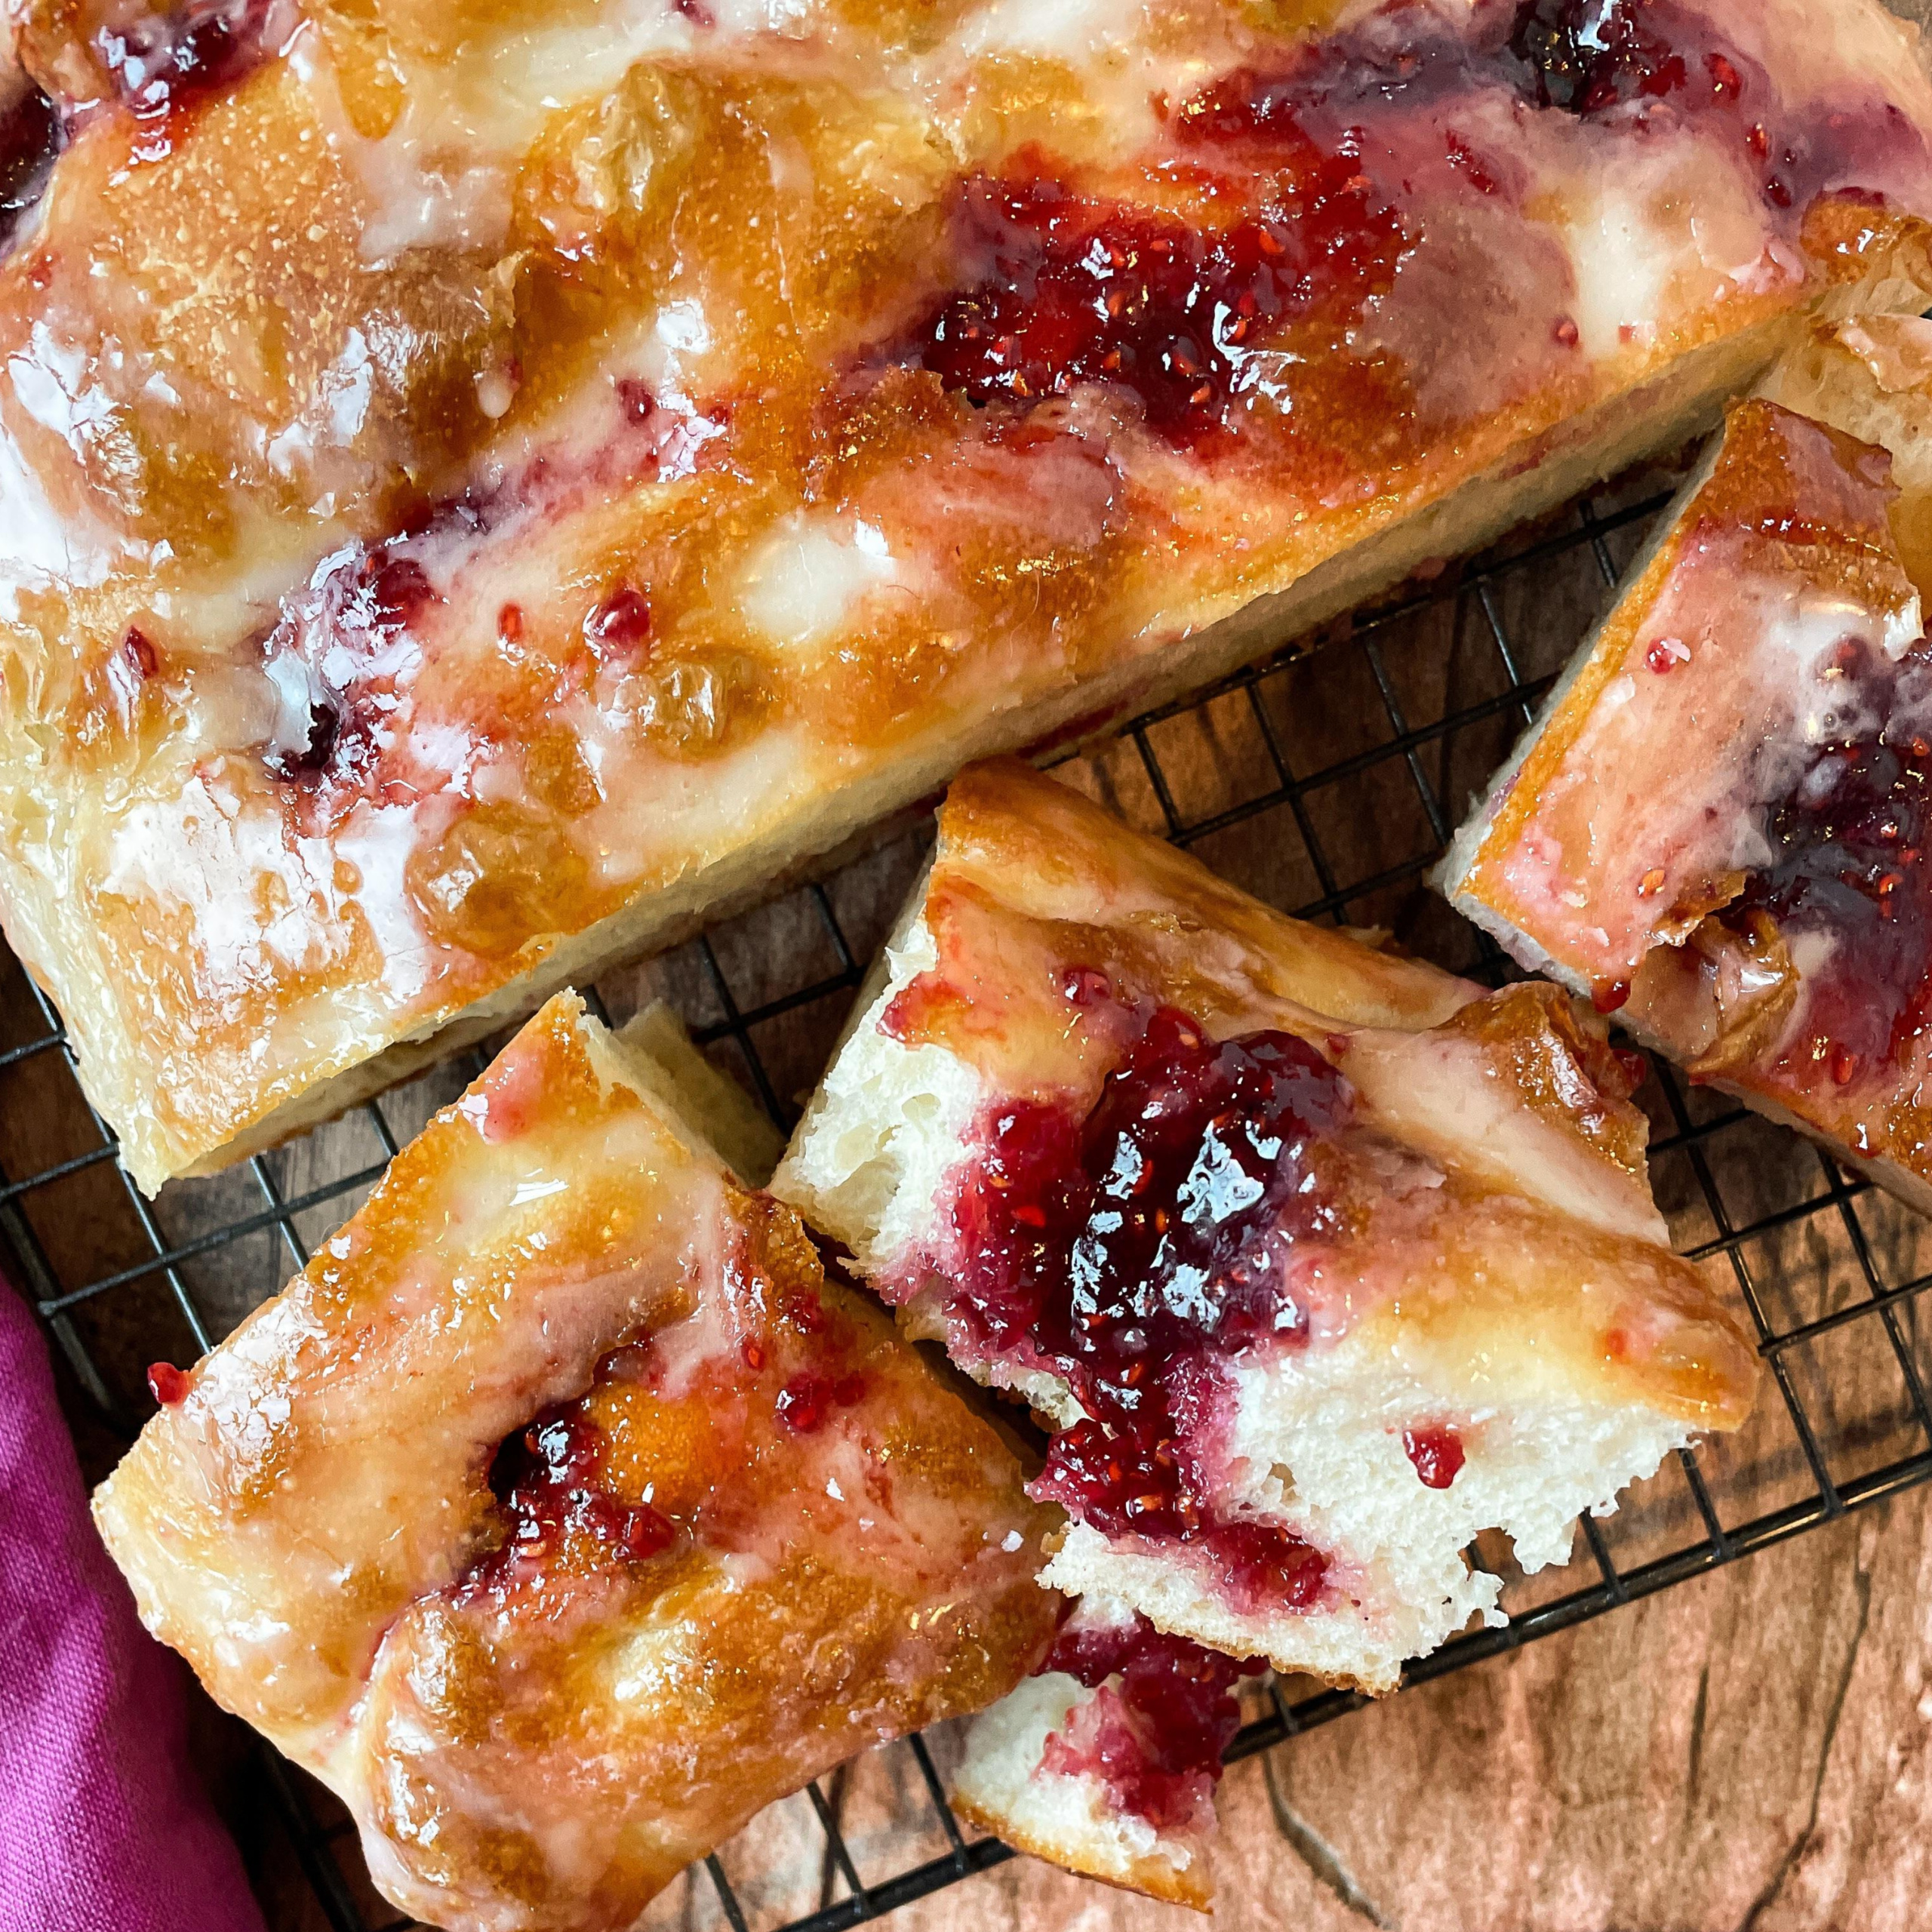
LynziePedia.net//Lynzie'sFocaccia!
X


This focaccia is made of delicious, pillowy and fluffy bread. I like to pipe in homemade jam and cream cheese in the holes when its done baking, but enjoy however you and your family see fit.

480ml (2 cups) water, warmed to 100-110°F
1oz/7g/2¼tsp active dry yeast (NOT INSTANT)
1 tablespoon sugar
600g (5 cups) all purpose flour
1 tablespoon salt
Herbs of your choice (optional)
Oil (as needed)

Mix your water, yeast and sugar in a bowl and let sit for 5-10 minutes to bloom.In a separate bowl, measure out your dry ingredients and then mix with a whisk.
If you're using any herbs, add them into the dry ingredients now.
Add in your dry mixture into your wet mixture and fold with a spatula. the resulting dough should have no flour clumps left and be very wet and sticky.Tip: If you want to let the dough ferment longer to develop flavor, let it rise in an oiled bowl in the fridge for 12-18 hours, then let it come to room temp before baking.
In the bowl you used for your dry ingredients add in 135ml of oil. Turn the dough with a spatula until it is coated in olive oil. Then cover to let rise for 2 hours or until doubled in size.After it has risen, lightly oil your CLEAN hands and lift up under the dough in the bowl and pull. Do this on each side for a total of 4 times turning the bowl 90 degrees each time you fold.
In a large 9x13 pan or 2 smaller pans, add parchment and then oil to your pan, then add in your dough. Pull your dough towards the edges of your pan after adding, and again every 30 minutes of rising or as needed.
Let your dough rise for 1.5-2 hours and Preheat for oven at 415-425°F for 15-30 minutes before its done rising. If you are using toppings for your dough, add them now.Bake for 30 minutes or until golden brown on top and enjoy! If you want to use jam and/or cream cheese like me, pipe them in once cooled slightly
Tip: to keep your dough crispy after baking, let cool slightly then transfer to another surface to finish cooling. If you're fancy, you'll have a wire rack for this.

This recipe sourced from the preppy kitchen youtube channel*


LynziePedia.net//Lynzie'sAlmondCookies!
X


These almond cookies are sleek, crisp, with a distinct almond aroma made without the obvious texture of chunky almonds. Enjoy!

This recipe makes very large cookies! for smaller cookies, use 1 tablespoon of dough and reduce baking time by 2 minutes
2¼ cups all purpose flour♥︎
½ cup almond meal or ground almonds♥︎
1¼ teaspoon baking soda♥︎
½ teaspoon salt♥︎
½ cup canola or refined coconut oil♥︎
¼ cup brown rice syrup♥︎
¼ Cup unsweetened almond milk♥︎
1 cup sugar♥︎
1½ teaspoons almond extract♥︎
½ teaspoon vanilla extract♥︎
1 teaspoon toasted sesame seed oil♥︎
⅓ cup sliced, blanched almonds♥︎


preheat oven to 350°F and prepare two large cooking sheets.
sift together the flour, almond meal, baking soda and salt then set aside.In a large bowl, beat together the canola oil, brown rice syrup, milk, sugar, almond extract, vanilla extract and sesame oil.Add the flour mixture and mix until a firm dough forms.
Roll the dough into balls, using 2 tablespoons of dough per piece. press one side of each dough ball into the sliced almonds and place about 2 inches apart on a cookie sheet, almond side up. flatten each ball to an inch thick and bake for 12-15 minutes.
cool completely before handling, the cookies will be very soft coming out of the oven but will continue to bake as they cool.
Enjoy!

This recipe sourced from Veganomicon!*


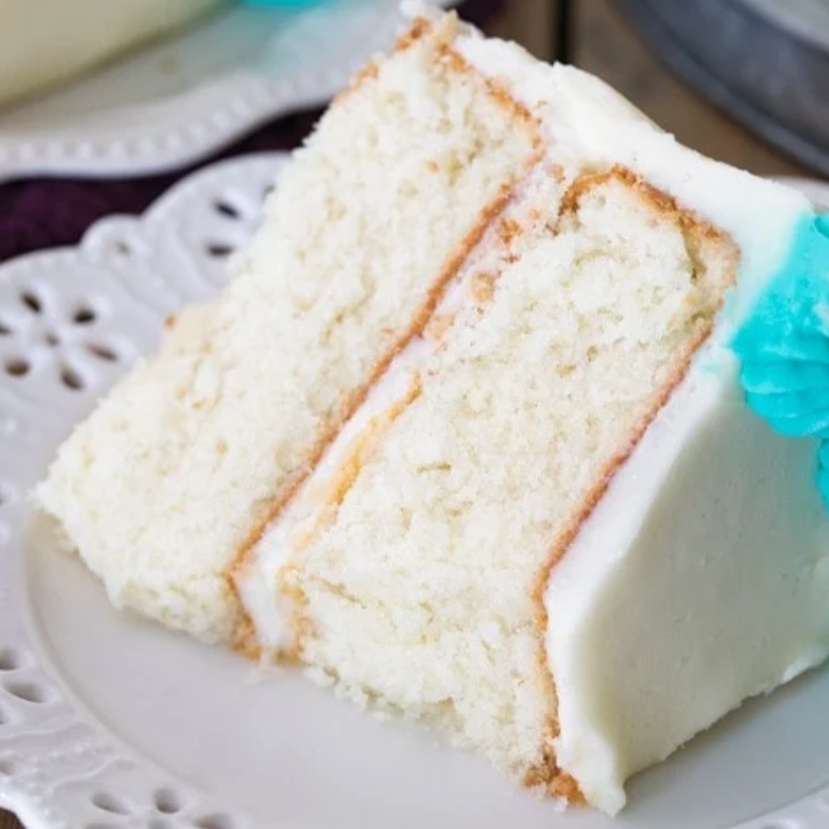
LynziePedia.net//Lynzie'sWhiteCake!
X


This AMAZING white cake recipe yields a fluffy, snow-white cake that's light and soft but still sturdy enough to stack or cover with fondant.

i suggest pairing with the vanilla buttercream in the cakes and frostings page!
3 tablespoons room temp unsalted butter♥︎ (43g)
80 grams vegetable oil♥︎
1 cup sweetener♥︎
vanilla extract!♥︎
172 grams of flour♥︎
½ tablespoon baking powder♥︎
pinch of salt♥︎
117 grams room temp milk♥︎
3 egg whites♥︎

Preheat oven to 350°F and prepare your baking pan with parchmentIn a stand mixer (or using an electric mixer), beat butter on medium-low speed until creamy.Add sugar and oil and beat until all ingredients are well-combined and creamy.Scrape down the sides and bottom of the bowl and then stir in your vanilla extract.
In separate bowl, whisk together your flour, baking powder, and salt.measure out your milk and with mixer on medium speed, gradually alternate between adding the flour mixture and the milk to the butter mixture, starting and ending with the flour mixture.Stir until each one is almost completely combined before adding the next.
In separate bowl combine your egg whites and using a hand-mixer on high-speed beat until stiff peaks form.Using a spatula, gently fold your egg whites into your batter. Take care to scrape the sides and bottom of the bowl so that ingredients are well-combined, and take care not to over-mix.
Bake on 350F for 35-40 minutes, or until a toothpick inserted in the center of each cake layer comes out clean or with few crumbs (should not be wet)

This recipe sourced from sugarspunrun.com*


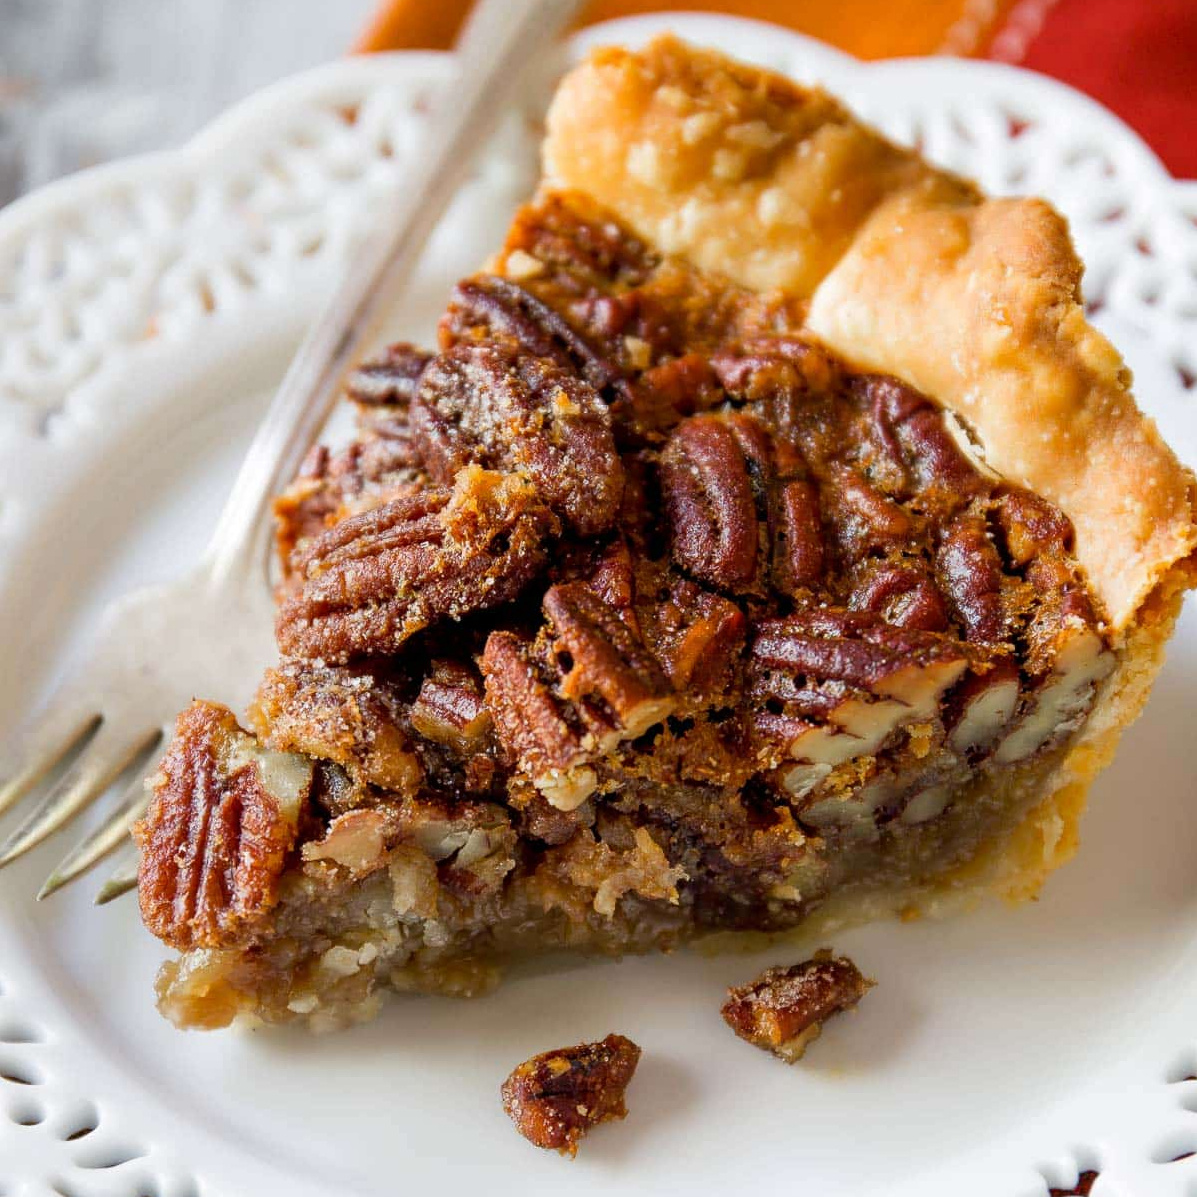
LynziePedia.net//Lynzie'sPecanPie!
X


250g Pecan Halves
3 large eggs
240ml dark corn syrup
100g Brown Sugar
1½ Teaspoons Vanilla Extract
56g Unsalted Butter, Melted and Cooled
½ Teaspoon Salt

oven rack to the lower third position and preheat to 350°FVery roughly chop the pecans—some whole, some coarsely chopped is fine. Spread pecans evenly inside pie crust. Whisk the eggs, corn syrup, brown sugar, vanilla, melted butter, salt, and cinnamon together in a large bowl until combined. Pour over pecans.
oven rack to the lower third position and preheat to 350°F
Bake the pie for 50–55 minutes or until the top is lightly browned. After the first 20 minutes of bake time, I place a pie crust shield on top of the pie to prevent the edges from browning too quickly. You can also tent a piece of aluminum foil over the whole pie if it is browning too quickly. Remove finished pie from the oven and place on a wire rack to cool completely. The pie filling will settle as it cools.

This recipe sourced from sallysbakingaddiction.com*


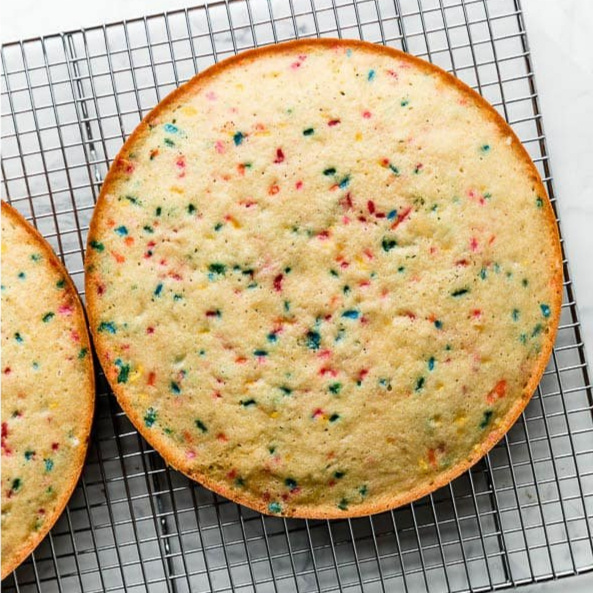
LynziePedia.net//Lynzie'sConfettiCake!
X


Buttery vanilla layer cake filled to the brim with rainbow sprinkles and finished off with sweet vanilla frosting. Pictured cake is 9 inches; for thicker cakes, use 8-inch pans. Review the recipe notes and bring all ingredients to room temperature before you begin.

3¾ cups (443g) cake flour♥︎
1 teaspoon baking powder♥︎
1 teaspoon baking soda♥︎
1 teaspoon salt♥︎
1¼ cups butter, room temp (282g)♥︎
2 cups granulated sugar (400g)♥︎
⅓ cup vegetable oil (80ml)♥︎
4 large eggs, room temp♥︎
2 large egg whites, room temp♥︎
3 teaspoons vanilla extract (15ml)♥︎
1½ Cup Buttermilk, room temp (360ml)♥︎
¾ (135g) rainbow sprinkles♥︎
°F

Preheat oven to 350°F (177°C). Grease three 8-inch or 9-inch cake pans, line with parchment paper rounds, then grease the parchment paper.Make the cake: Whisk the cake flour, baking powder, baking soda, and salt together in a large bowl. Set aside.Using a handheld Mixer, beat the butter and sugar together on high speed for 5 full minutes until completely creamed together and fluffy.
Scrape down the sides and up the bottom of the bowl with a rubber spatula as needed.Add the oil and beat for 1 minute until combined.Add the eggs, egg whites, and vanilla extract and beat on medium-high speed until combined. Scrape down the sides and up the bottom of the bowl with a rubber spatula as needed.
Add dry ingredients and buttermilk in three additions, mixing after each addition just until incorporated. Do not over-mix this batter. The batter will be velvety and thick. Gently fold in the sprinkles. Pour and spread the batter evenly into each cake pan.Bake for around 25–26 minutes or until the cakes are baked through. (8-inch cakes may take about 27–28 minutes.) Tent the cakes with foil after about 15 minutes to prevent the sides and top from over-browning. To test for doneness, insert a toothpick into the center of the cake. If it comes out clean, it’s done.

This recipe sourced from sallysbakingaddiction.com*


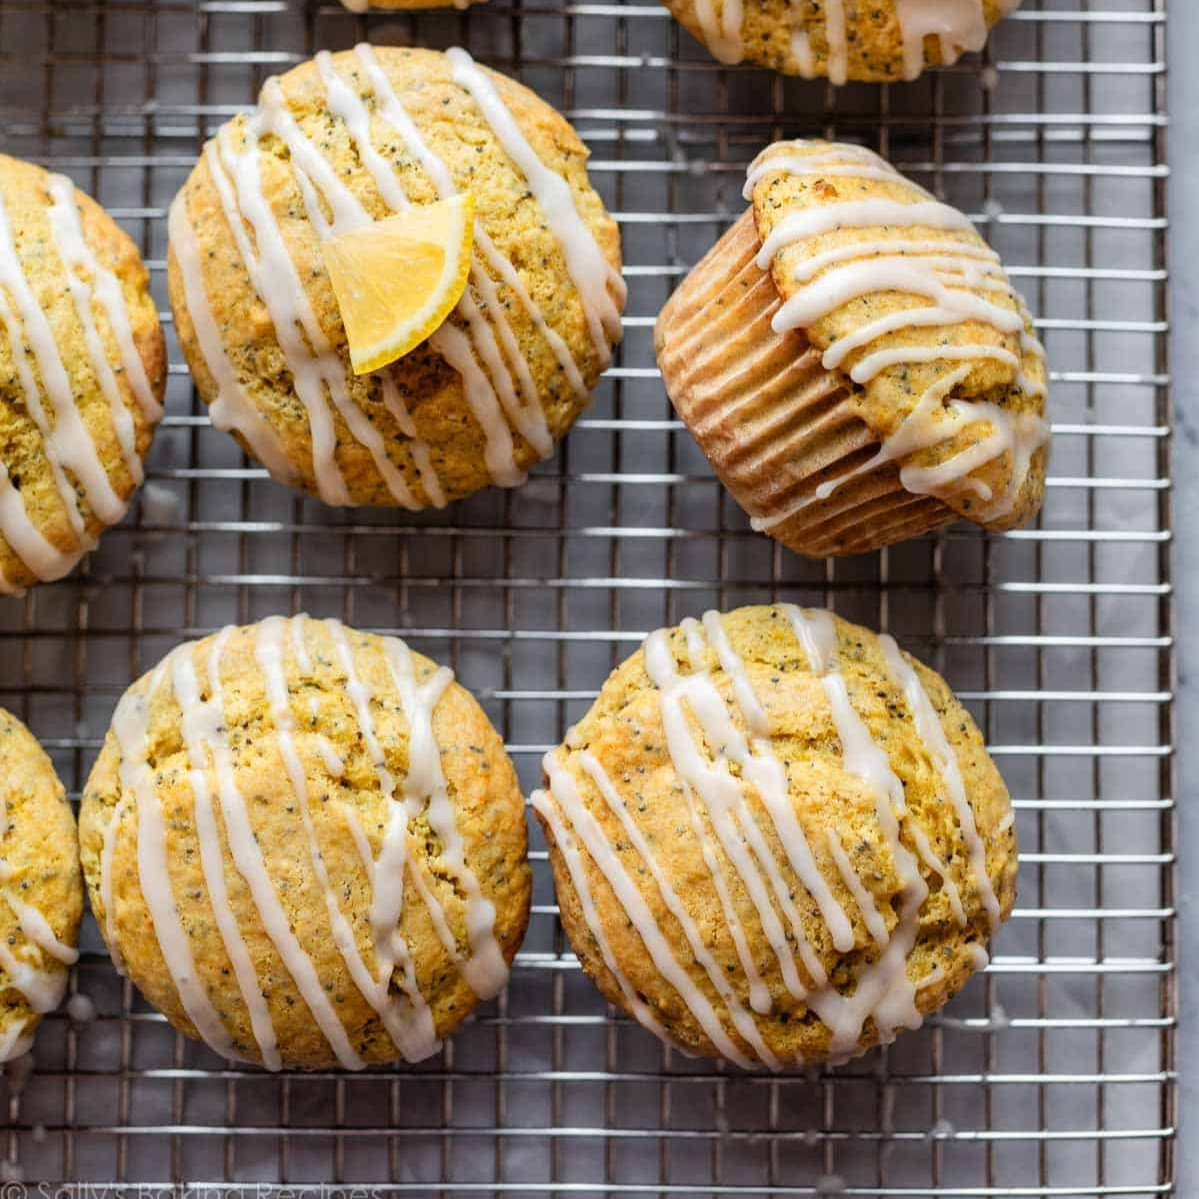
LynziePedia.net//LemonPoppyseedMuffins!
X


Tangy-sweet and tender, lemon poppy seed muffins make for a special breakfast treat that tastes like it came from a bakery.

1¾ All-Purpose Flour (219g)
1 Teaspoon Baking Powder
1 Teaspoon Baking Soda
½ Teaspoon Salt
2 Tablespoons Poppy Seeds
½ Cup Butter, Room Temp (113g)
½ Cup Sugar (100g)
¼ Cup Brown Sugar (50g)
2 large eggs, room temp
½ Cup Sour Cream or Yogurt ,Room Temp (120g)
1½ Tablespoons Fresh Lemon Zest (if using frozen, double the amount)
3 Tablespoons Fresh Lemon Juice (45ml)
1½ Tablespoons Vanilla Flavoring
¼ Cup Milk (60ML) Room Temp

Preheat oven to 425°F
Spray a 12-count muffin pan with cupcake liners. Set aside.In a large bowl, whisk the flour, baking powder, baking soda, salt, and poppy seeds together. Set aside.In a large bowl using a handheld Mixer, beat the butter, and both sugars together on high speed until smooth and creamy.Scrape down the sides and bottom of the bowl as needed.
Add the eggs, sour cream, vanilla extract, lemon zest, and lemon juice. Beat on medium speed for 1 minute, then turn up to high speed and beat until combined. Scrape down the sides and bottom of the bowl as needed. Mixture may look a little chunky and curded; that’s ok.With the mixer running on low speed, add the dry ingredients and milk into the wet ingredients and beat until no flour pockets remain.
Spoon the batter evenly into each muffin cup or liner. Bake the muffins for 5 minutes at 425°F then, keeping the muffins in the oven, reduce the oven temperature to 350°F (177°C). Bake for an additional 15–17 minutes or until a toothpick inserted in the center comes out clean. The total time these muffins take in the oven is about 20–22 minutes. Allow the muffins to cool.

This recipe sourced from sallysbakingaddiction.com*


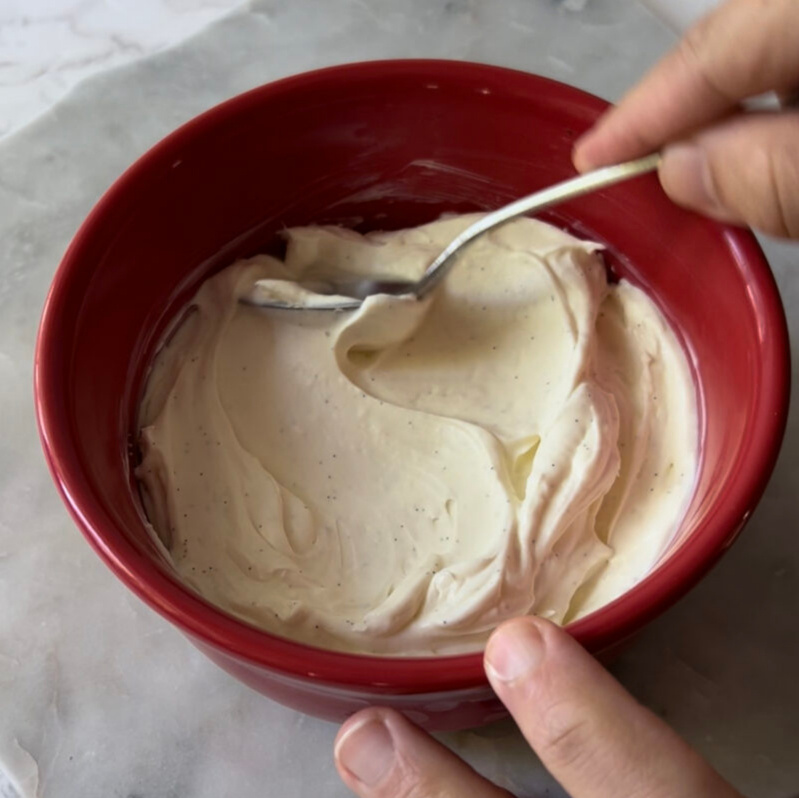
LynziePedia.net//VanillaBeanButtercream
X


This filling is absolutely delicious and works inside of cakes or just as a frosting! i hope you enjoy!

1 block room temp cream cheese (452g)♥︎
1 stick of butter; cubed (113g)
2 Tbsp vanilla bean paste (24g)♥︎
½ tsp fine salt (3g)♥︎
1 cup powdered sugar (250g)♥︎
¼ cup heavy cream or whipping cream (60g)♥︎

In a large mixing bowl using a handmixer or a standmixer, beat the butter until fluffy and pale in color.Gradually mix in powdered sugar and 1/4 cup of heavy cream in additions on a low speed, alternating between sugar and heavy cream, then add the cream cheese LAST.
Continue to mix on a low speed for a few minutes until the desired consistency is reached. If the frosting seems too thick, add in additional whipping cream (1 Tbsp at a time). If the frosting seems too thin, add in more powdered sugar (quarter of a cup at a time).If you plan to color the buttercream, add in the gel food coloring once the frosting is fully made, and beat on low until it reaches the desired color.

This recipe sourced from me!*


LynziePedia.net//Lynzie'sFlatBread!
X


this flatbread is easy to make, delicious, and only needs 5 ingredients! Plus, without using any butter or milk it's super cheap to prepare!

1 teaspoon active dry or instant yeast♥︎
1 teaspoon granulated sugar♥︎
¾ Cup Warm Water♥︎ (177g)
2 Cups all purpose OR bread flour♥︎ (250g)
1 Tablespoon olive oil♥︎
1 teaspoon salt♥︎

Whisk the yeast, sugar, and warm water together in the bowl of your stand mixer. Loosely cover and allow to sit for 5–10 minutes until foamy and frothy on top.
Add the flour, olive oil, and salt (and garlic/seasoning if using). Mix until combined, about 2 minutes. The dough should be thick, yet soft and slightly sticky. It should pull away from the sides of the bowl as it mixes. When it does, it is ready to knead.
If, however, the dough is too sticky to handle, mix in more flour, 1 Tablespoon at a time. Make sure you do not add too much extra flour; you want a soft, slightly tacky dough.
Keep the dough in the mixer (and switch to the dough hook if using the paddle) and beat for an additional 6-8 full minutes, or knead by hand on a lightly floured surface for 6-8 full minutes.
Poke it with your finger—if it slowly bounces back, your dough is ready to rise
Place the dough in a greased bowl (I use nonstick spray to grease) and cover with plastic wrap, aluminum foil, or a clean kitchen towel. Allow to sit and rest for 45 minutes at room temperature. Once it has rested and slightly risen, you can continue with the recipe or place the covered dough in the refrigerator for up to 2 days.
Preheat oven to 475°FPunch the dough down to release any air. Divide the dough in half. On a lightly floured surface with floured hands and working with one dough piece at a time, begin shaping and stretching the dough until it is ¼ inch thick.
Repeat with the second piece of dough. Carefully transfer both pieces of dough to a parchment paperPoke your fingers all around the surface of the flatbreads or prick a few holes with a forkBake for 15–20 minutes or until the crust and toppings are browned to your liking. Remove from the oven. Slice and serve warm.

This recipe sourced from sallysbakingaddiction.com*


LynziePedia.net//Lynzie'sUltimateCookies!
X


This recipe was made by me, and im very proud of it. its very specific and features the best of both worlds of a lot of these ingredients. they're my pride and joy and i hope you love them as much as i do!

1 stick browned butter♥︎ (113g)
1 stick melted butter♥︎ (113g)
2 Tablespoons milk powder♥︎
pinch of salt♥︎
1 teaspoon baking powder♥︎
1 cup all purpose flour♥︎ (125g)
1 cup bread flour♥︎ (125g)
1 full egg, 1 egg yolk♥︎
2tsp vanilla extract♥︎
1 1/2 cup brown sugar (light or dark, packed)♥︎ (292g)
1/4th cup granulated sugar♥︎ (50g)
toffee♥︎
chocolate; i like a mix of chips and cut up chocolate bars♥︎


Brown butter on low, and then in a separate pot or pan toast your milk powder. when your butter is browned and your toasted milk powder to your dry mix and melt the rest of your butter.
mix salt, baking soda and flour in a large bowl (the same bowl as the toasted milk powder)cool liquefied butter to room temp in a separate bowl (like a warm bath)mix all sugar, vanilla extract, eggs and butter with solids using a WHISK. whisk the TARNATION OUT OF IT until the mixture thickens and turns light and fluffy.
add half your dry ingredients to the butter and stir to combined, then add the other half.add chocolate and toffee and gently stir to combine.chill your dough for at least one hour, up to 72 hours.bake at 350°F for 9-12 minutes (355°F for a slightly crunchier cookie)top with sea salt and enjoy!


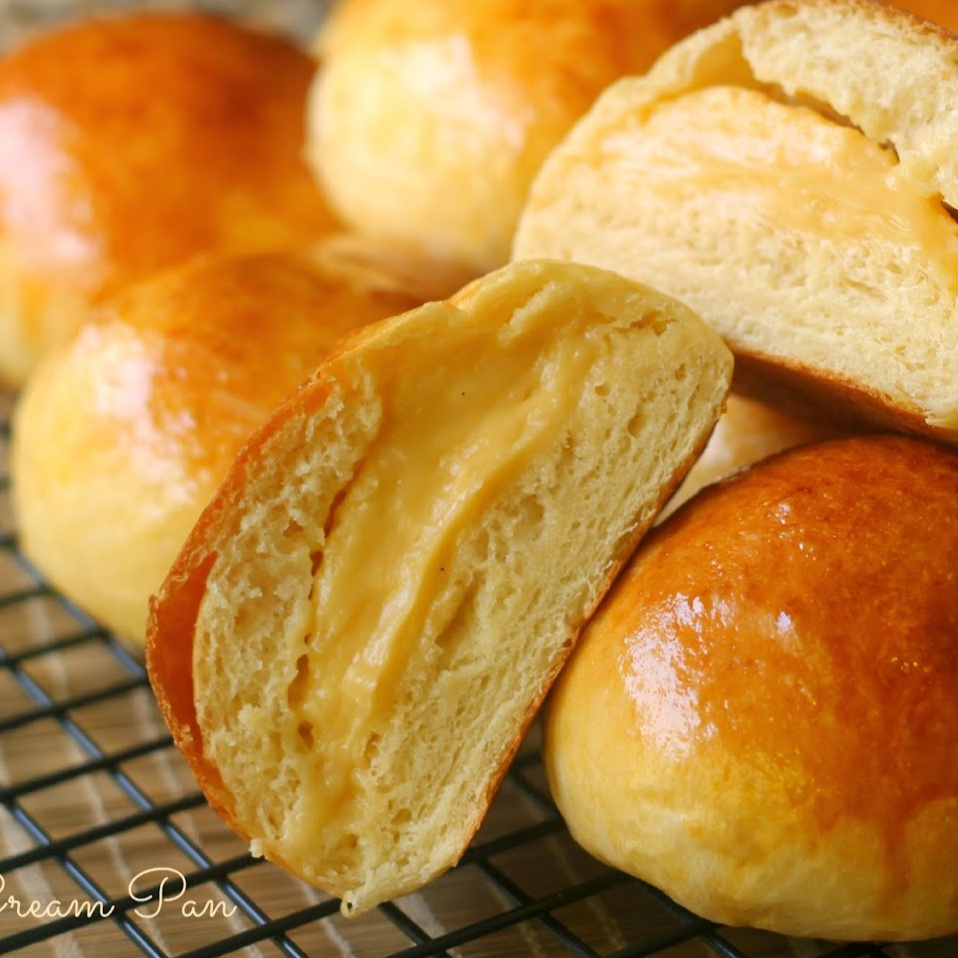
LynziePedia.net//Lynzie'sCustardBuns!
X


These Sweet, delectable and fun to make custard buns are sure to be a hit with your house! an edited version of the traditional version, these are fun and easy to make and very delicious.

For the dough:
1 package dry yeast or 2¼ Tablespoons
¾ cup milk (183g)
½ cup butter melted (115g)
½ Cup Sugar (100.5g)
3 eggs room temperature
1 teaspoon salt
1 teaspoon vanilla extract
2¼ Cups Ap Flour (270.5)
2¼ Cups Bread Flour (270.5)
for the custard:
1¾ Cup Whole milk (429g)
4 Tablespoons unsalted butter (60g)
4 Egg Yolks
½ Cup Sugar (100.5)
5 Tablespoons Flour (40g)
2 Tablespoons Cornstarch (15g)
1 Pinch of salt
2 Teaspoons Vanilla Extract (I recommend using the real stuff)

make the custard first since it needs to chill.place the butter and milk in a bowl and heat until butter is melted.In another bowl beat the egg yolk lightly and add the flour, cornstarch, sugar and salt and whisk until thick and crumbly. then add the milk and butter little by little, whisking well between additions.
Strain into a non stick sauce pan and stir over low-medium heat until all egg bits are smothered and no lumps remain. Add the vanilla extract and continue cooking until mixture thickens enough to see swirl lines.
cool and place into refrigerator.
for your dough, Warm your milk to about 110F then transfer to the bowl of your stand mixer or a large bowl if using an electric hand mixer. Mix in half the sugar and the yeast. Set aside for about 5 minutes or until the yeast is nice and bubbly. No bubbles mean dead yeast so you’ll have to start over if this happens.Whisk in the eggs, vanilla, salt and remaining sugar then whisk in half the flour to create a smooth paste.
Add the melted butter and mix once more then add the remaining flour. Knead for a few minutes until the dough comes together, is smooth and will not stick to your finger when pressed lightly. You can sprinkle a couple teaspoons of flour on the edge of the bowl to discourage the dough from sticking.Transfer the dough to a large lightly oiled bowl then cover and place in a warm place to rise for one and a half to two hours, or until doubled in size.
Separate the dough into 16 equal pieces. Then place the custard in the middle using an ice cream scoop. Pull the edges together and place on a baking sheet covered in parchment, seam side down. Allow to rise for 30-40 minutes.
preheat oven to 350°F and bake for 12-15 minutes.
Enjoy!


LynziePedia.net//Lynzie'sMashedPotatoes!
X


For a single serving, just use one Potato! Multiply ingredients by the amt of people serving.
1-5 Mashed potatoes
¼ Cup Whole Milk (61g)
½ Tablespoon Melted Butter
2 Tablespoons Heavy whipping cream
1 Handful Green Onions
Black pepper
Italian Seasoning
Garlic & Onion Salt
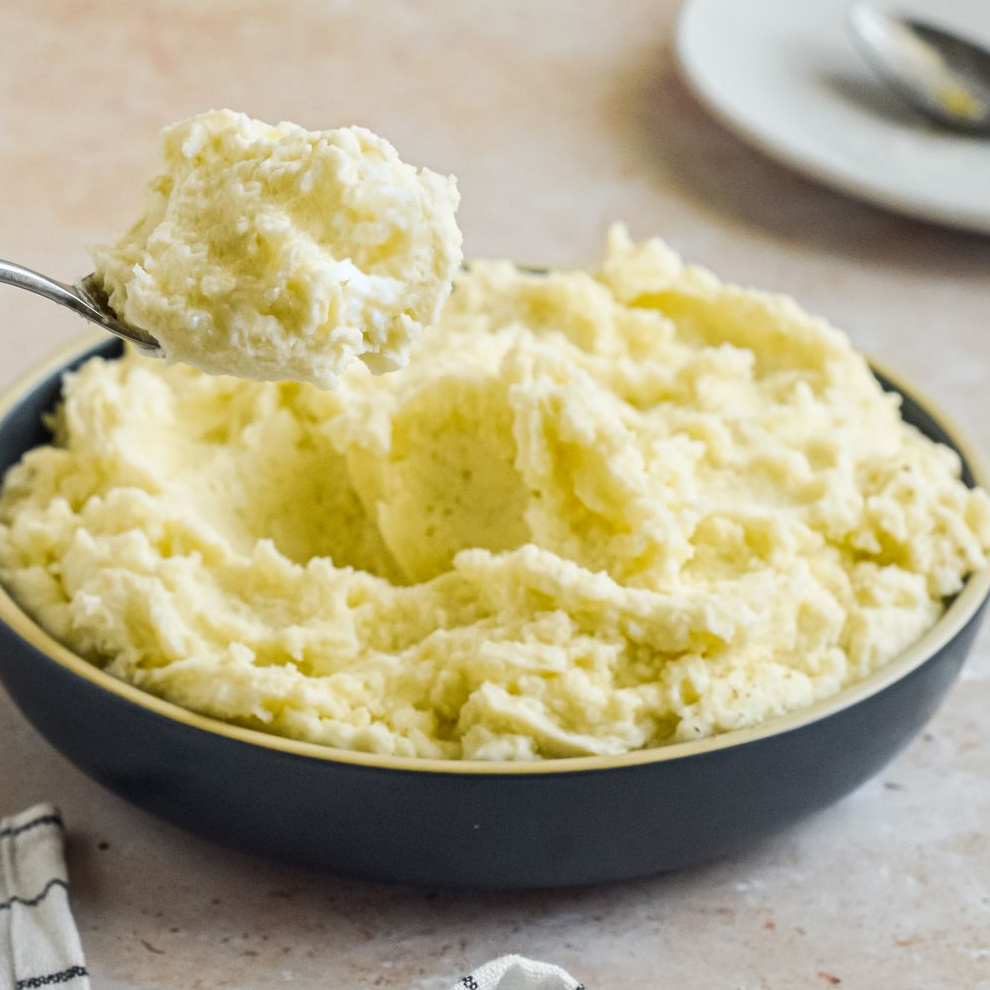

Fully submerge Peeled Potatoes in a pot of boiling water. Cook for 10-20 minutes until soft and tender.Dump into a strainer and cool. The potatoes will continue to cook as the steam rises off of them.
Place potatoes into a large bowl, and mash vigorously. I hate lumps, but you may choose to have some as you please.Once mashed to perfection, add milk and mash to combine. Then add heavy cream, Melted Butter and all your spices (Including green onions) until fully integrated.
Place potatoes into a large bowl, and mash vigorously. I hate lumps, but you may choose to have some as you please.Once mashed to perfection, add milk and mash to combine. Then add heavy cream and all your spices (Including green onions) until fully integrated.
Serve and enjoy! i like to eat these with some good steak and other steamed vegetables.

This recipe sourced from Me!*


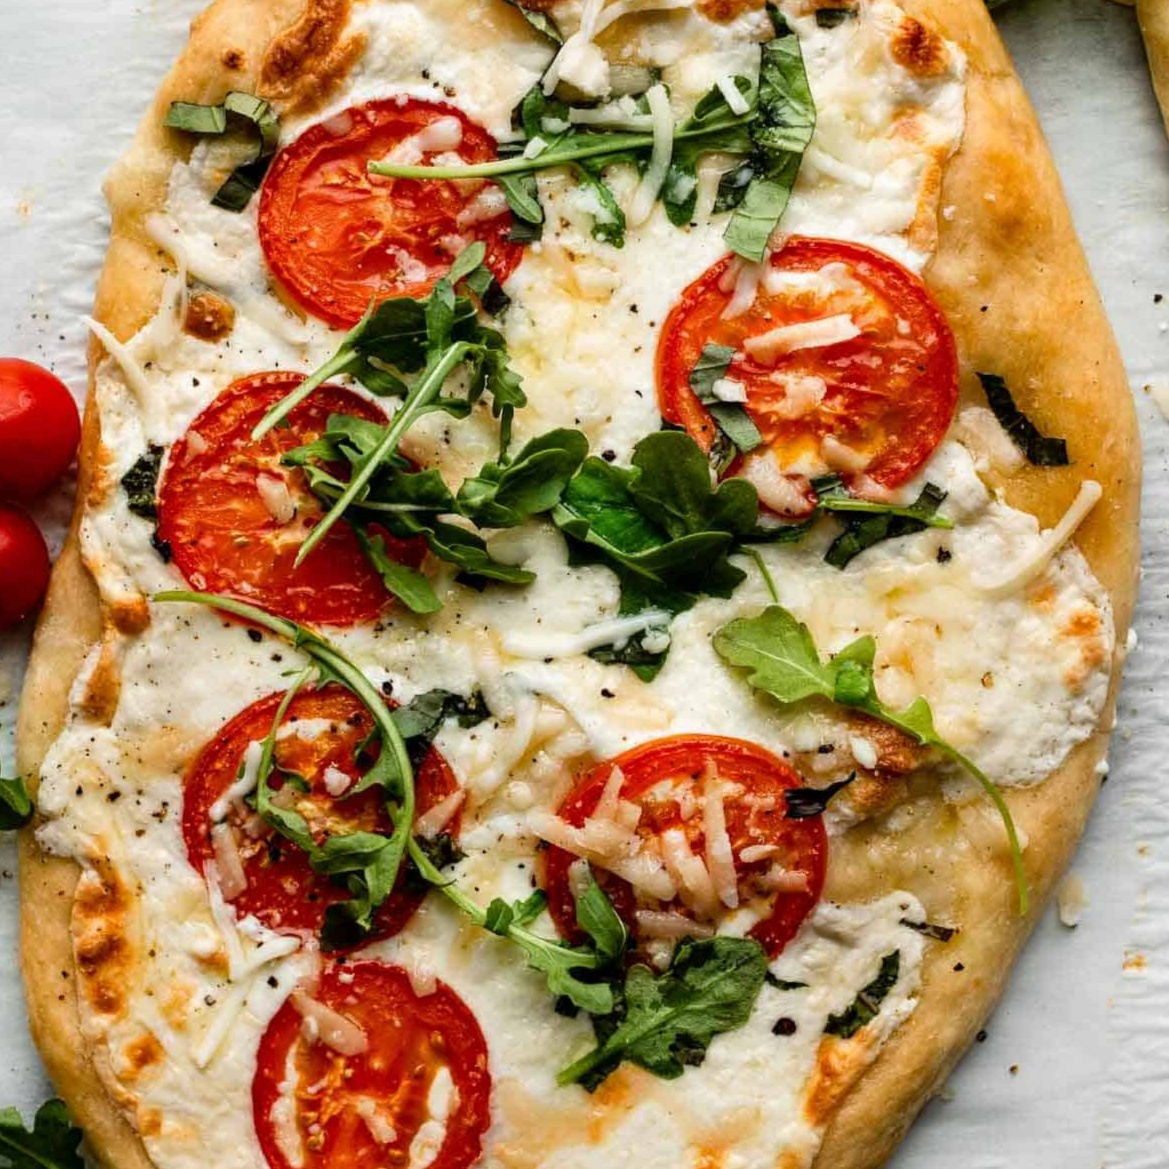
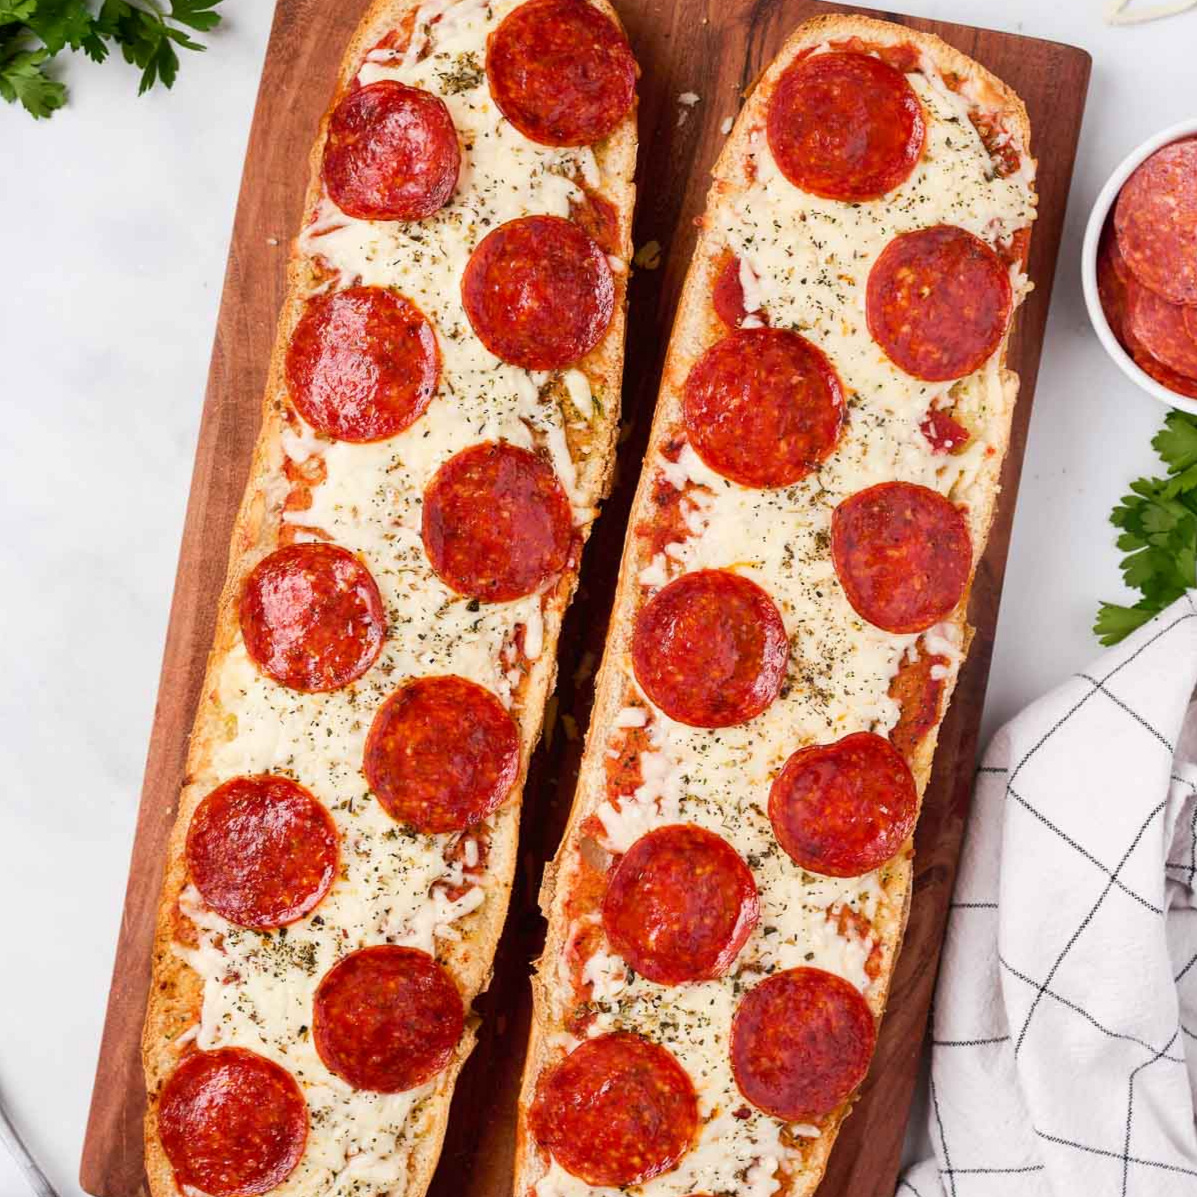
LynziePedia.net//Lynzie'sBaugettePizza!
X


I love this recipe so much for an easy and cheap yet filling dinner. This is so much fun to make and you'll have enough for leftovers, with the cost of ingredients being less than if you ordered dominoes!

For the pizza sauce:
1 can of Crushed tomatoes!
1 can of tomato paste!
¼ Cup Water!
1 clove of garlic!
Italian Seasoning!
Cumin seeds!
Msg!
Kosher Salt!
Black pepper!
Parsley!
Red pepper seeds!
For the pizza base:
1 Baguette or loaf of choice!
Mozzarella or other cheese!
Pepperoni!
Other topping of choice!

Turn your stove onto medium-high heat. Add the tomato paste and crushed tomatoes with water into a medium sauce-pan. Add your seasonings as desired and cook for 5-10 minutes. Let cool and transfer to a container.
Preheat oven to 400°F and cut your loaf into two halves. i prefer to spoon out some of the inside bread, but you can choose not to.Add pizza sauce onto bread, being sure to saturate. Add cheese and other toppings as desired and bake for 15-25 minutes or until golden brown at the edges. Enjoy!

This recipe sourced from Me!*


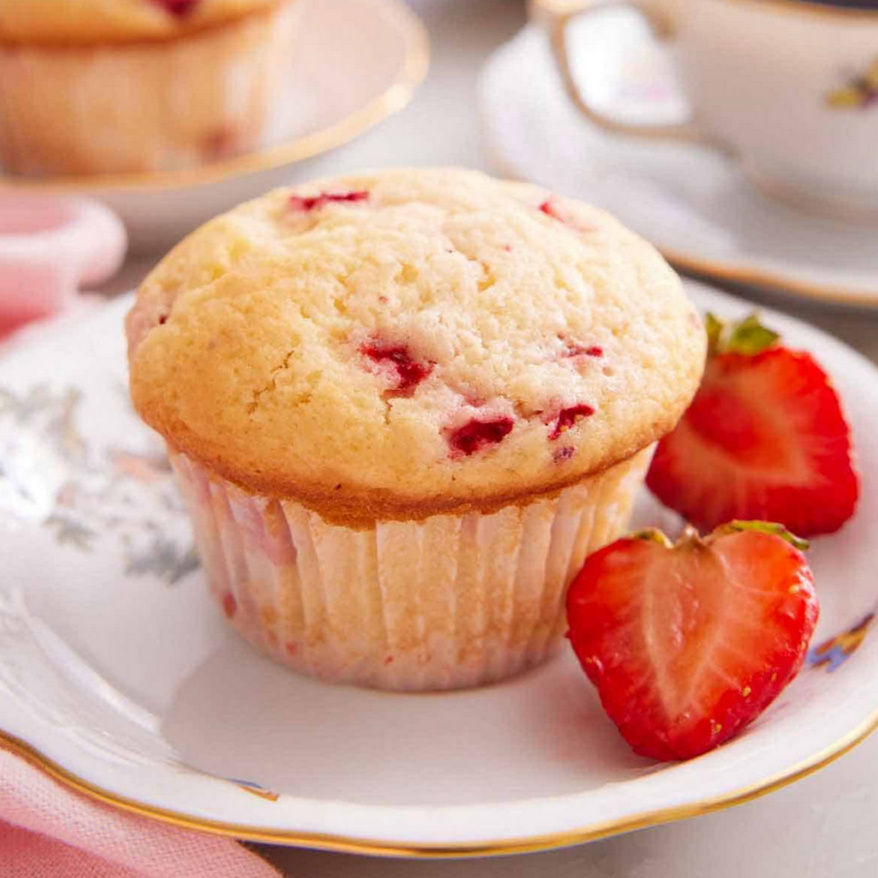
LynziePedia.net//Lynzie'sStrawberryMuffins!
X


Made with simple ingredients, these Strawberry Muffins are moist, tender, and full of fresh strawberries! And you can whip 'em up in a few quick 'n easy steps!

Be sure to use fresh strawberries here!
¾ Cup Bread Flour! (180g)
¾ Cup all purpose flour! (180g)
½ tablespoon baking powder!
1 Pinch of sea salt!
1 stick unsalted butter; softened! (113g)
¼ cup granulated sugar! (50g)
¼ cup sucralose (50g)
1 large egg; room temp!
½ teaspoon vanilla extract!
½ cup milk! (122g)
1 Package Diced Strawberries!

Preheat the oven to 375°F. Line a 12-cup muffin pan with paper liners.In a medium mixing bowl, whisk together the flour, baking powder, and salt.
In another large mixing bowl, beat the butter and sugar together until light and fluffy.Add the egg, beating until well combined before adding the next. Beat in the vanilla.Add the flour mixture to butter mixture in 3 additions, alternating with milk. Once all is added, mix just until a few streaks of flour remain. Using a rubber spatula, fold in the strawberries.
Divide the batter amongst the paper liners, and top with strawberries!Bake for 18 to 20 minutes or until the tops are golden brown and a toothpick inserted into the center comes out clean.Let cool for a few minutes in the pan, then remove and finish cooling on a plate.Muffins can be stored in an airtight container for up to 3 days or frozen or up to 1 month.

This recipe sourced from preppykitchen.com*


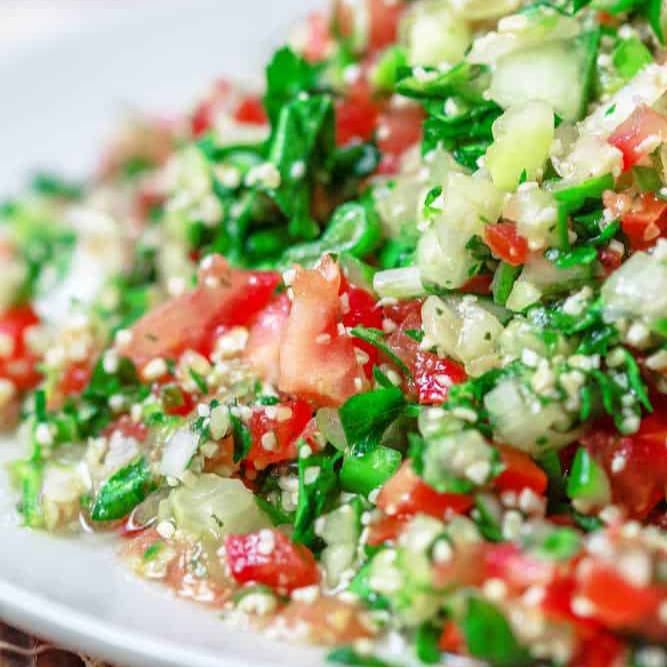
LynziePedia.net//Lynzie'sTabouli!
X


Tabouli is an easy to make, helathy AF and delicious salad that you will love! plus, its cheap!

¾ Cup Fine Bulgur Wheat
4 firm Roma tomatoes, very finely chopped
1 cucumber, very finely chopped
2 Handfuls of Parsely; washed with stems removed and finely chopped
12-15 fresh mint leaves, stems removed, washed, well-dried, very finely chopped
4 green onions, white and green parts, very finely chopped
Sea Salt
Msg
Lemon Juice
Extra virgin Olive Oil

Wash the bulgur wheat and soak it in water for 5-7 minute. Drain very well (squeeze the bulgur wheat by hand to get rid of any excess water). Set aside.
Very finely chop the vegetables, herbs and green onions as indicated above.
Place the chopped vegetables, herbs and green onions in a mixing bowl or dish. Add the bulgur and season with salt. Mix gently.
Now add the the lemon juice and olive oil and mix again.
Cover and Refridgerate for at least 30 minutes. For best results wait overnight.

This recipe sourced from themediterraneandish.com*


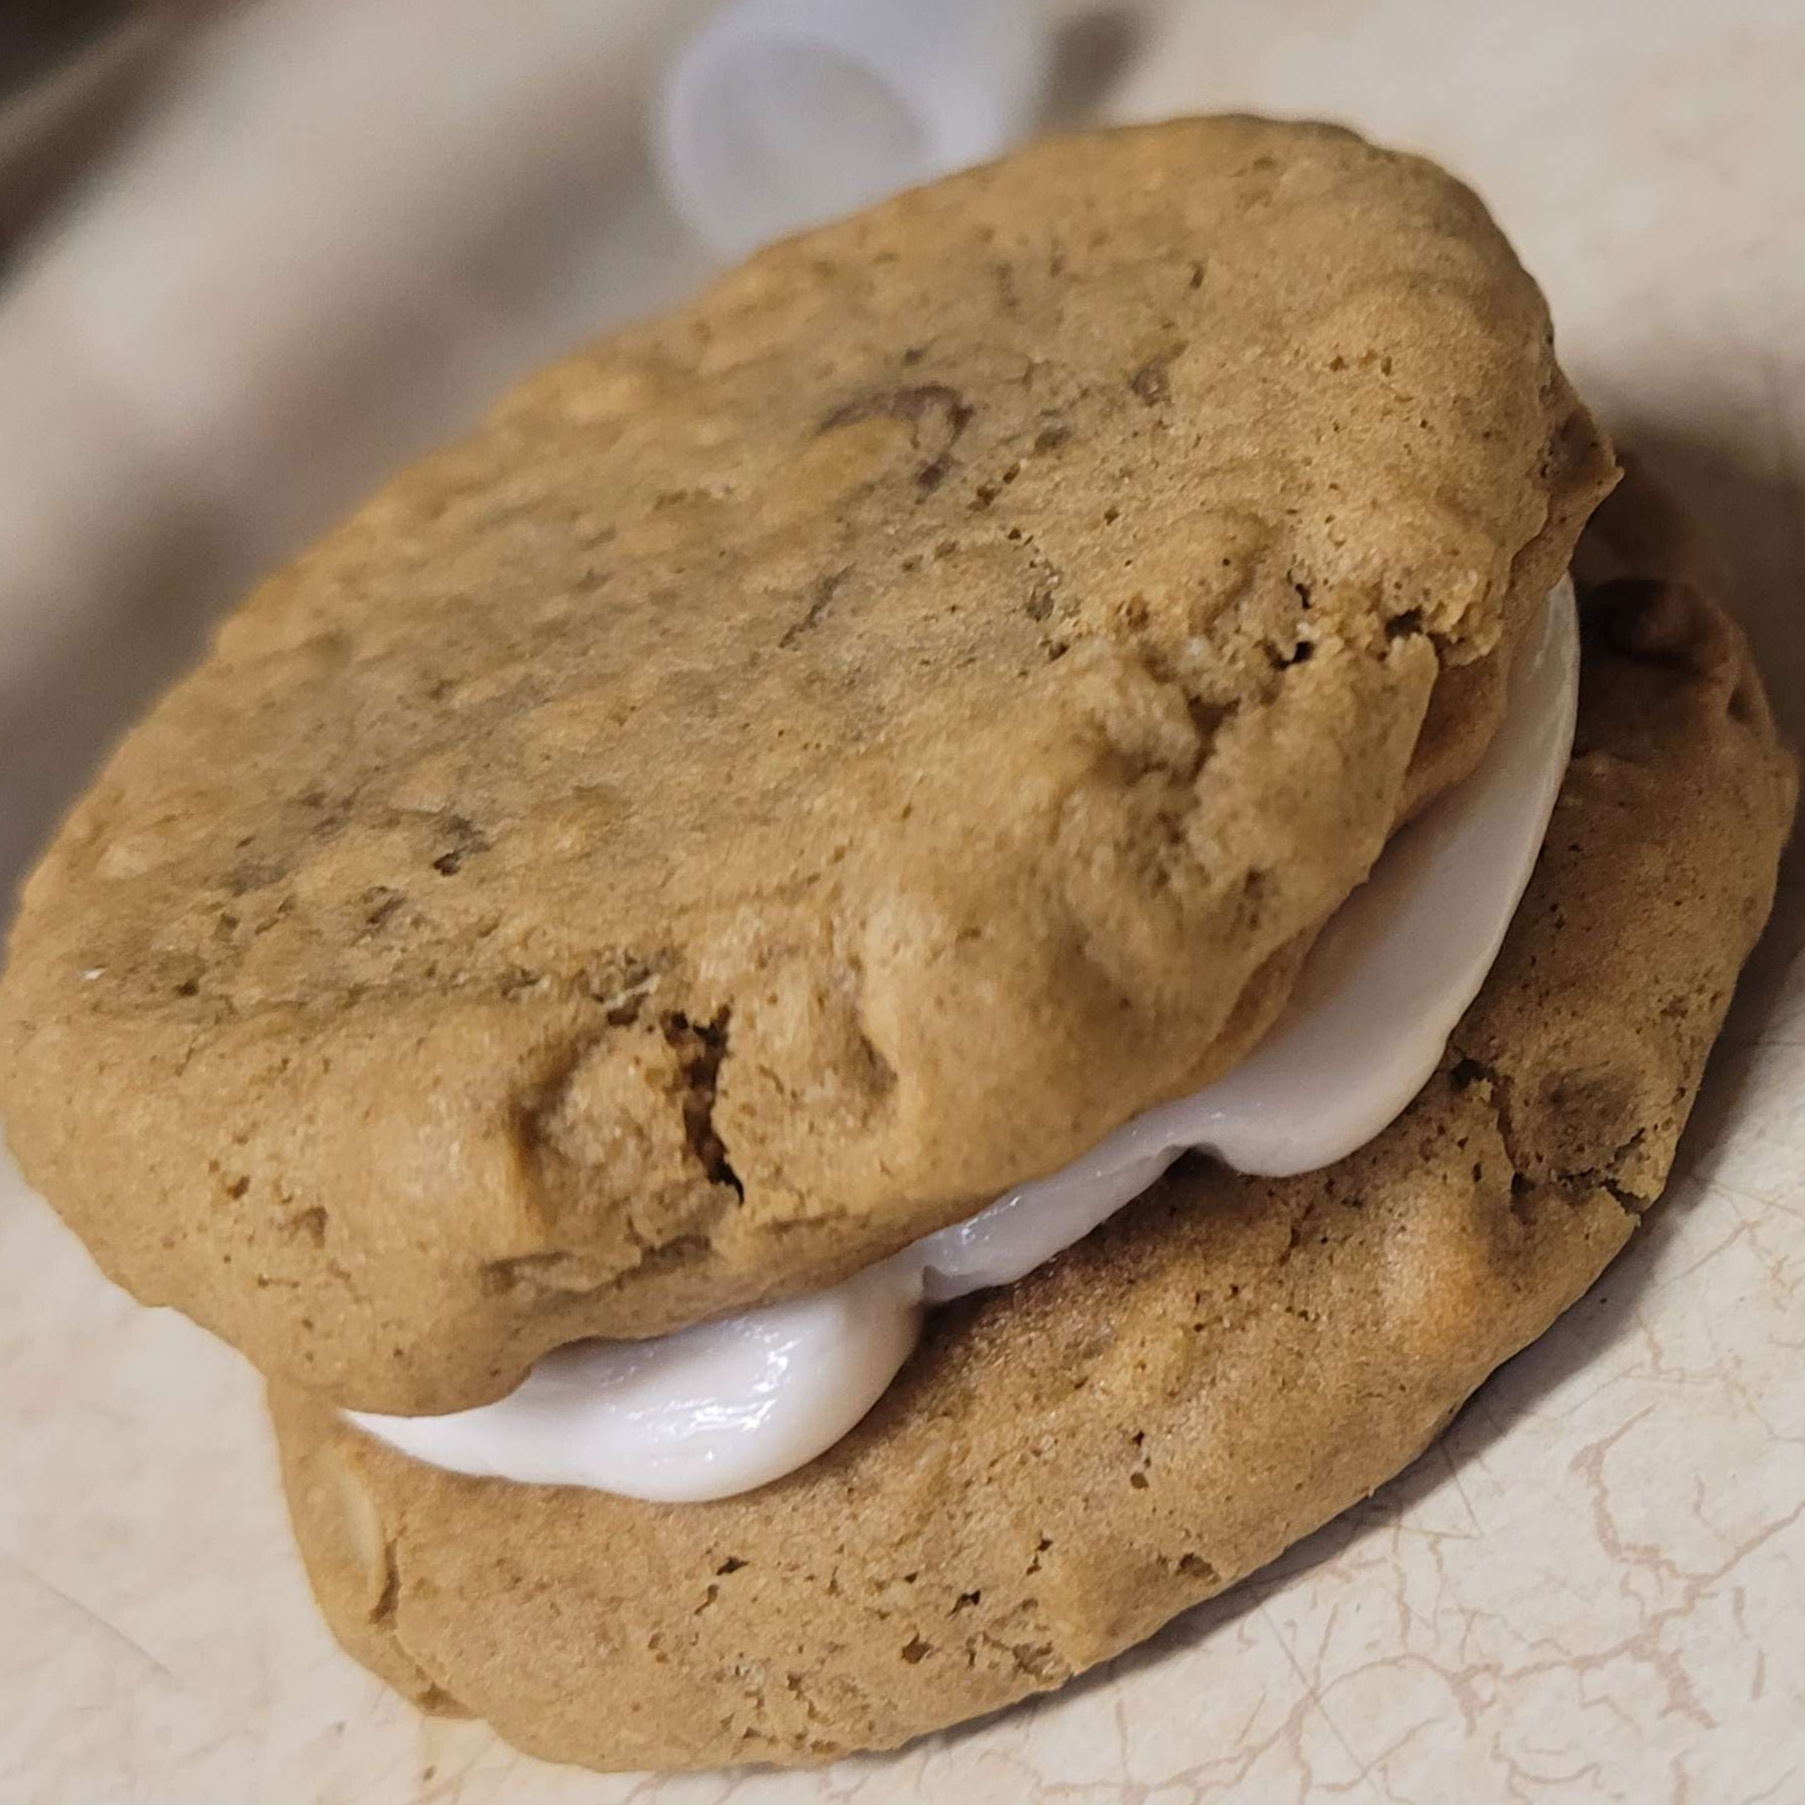
LynziePedia.net//OatmealCreamPies!
X


This homemade version of the classic little debbies snack is de-licious! Plus, All you need are a few simple ingredients to make these pies.

For the cookies:
1 ¼ cups all-purpose flour♥︎ (150g)
⅔ cup quick oats♥︎ (70g)
¾ teaspoon baking soda♥︎
¾ teaspoon ground cinnamon♥︎
½ cup unsalted butter room temp♥︎ (113g)
¾ cup packed dark brown sugar♥︎ (165g)
¼ cup granulated sugar♥︎ (50g)
1 tablespoon molasses♥︎
½ teaspoon salt♥︎
1 large egg♥︎
2 teaspoons vanilla extract♥︎
For the cream filling:
½ cup unsalted butter♥︎ (113g)
Pinch of salt♥︎
2 cups confectioners’ sugar♥︎ (240g)
2 to 3 tablespoons heavy cream♥︎
1 teaspoon pure vanilla extract♥︎

For the cookies:
Preheat the oven to 350F. Line two baking sheets with parchment paper.In a large bowl, whisk together the flour, oats, baking soda, and cinnamon.
In a large mixing bowl or the bowl of a stand mixer fitted with the paddle attachment, beat the butter just until creamy.Add the sugars, molasses, and salt. Beat at medium speed until light and fluffy, about 5 minutes.Add the egg and vanilla and beat until well combined. Stop and scrape down the bowl during mixing, as needed.
With the mixer on low speed, gradually add in the flour mixture and mix just until combined. Using a 1 ½-tablespoon scoop, scoop the dough onto the lined cookie sheets spacing each one about 2 inches apart.
Bake one sheet at a time for 10 minutes or just until the cookie edges are set and the centers puff up but still appear underdone. (You want soft cookies for these sandwiches so don’t be afraid to underbake them!) Let cool on the cookie sheet for a few minutes, then transfer to a wire rack to cool completely.
For the cream filling:
n a large mixing bowl or the bowl of a stand mixer fitted with the paddle attachment, beat the butter and salt until light and fluffy, about 3 minutes. With the mixer on low speed, gradually add the sugar and cream. Stop and scrape down the bowl as needed. Add the vanilla. Once combined, beat on medium speed until fluffy, about 1 minute.
Using a round tip, pipe the cream onto the cookies in a thick layer. Top with another cookie. Oatmeal cream pies can be stored in an airtight container for up to 5 days.

This recipe sourced from preppykitchen.com*


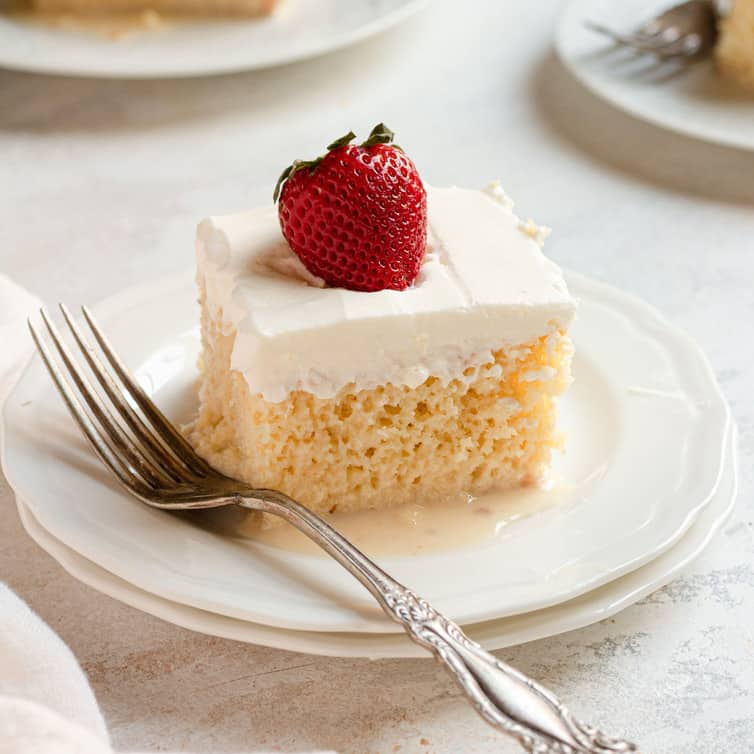
LynziePedia.net//Lynzie'sTresLeches!
X


For the Cake:
1¼ Cup AP flour; Sifted (219g)
1 Teaspoon Baking Powder
1 Pinch of Salt
1 Stick Unsalted Butter; Melted and cooled (227g)
1 Cup of Sugar (201g)
5 Whole eggs
1 Teaspoon Vanilla Extract
For the Milk Mixture
1 Can Sweetened Condensed Milk
1 Can Evaporated milk
1 Can of “Media Crema Nestle”
1½ Teaspoons Pure Vanilla Extract
For the Frosting:
1¼ Cup of Heavy Whipping Cream (294g)
4 Tablespoons of Sugar
1 Tablespoon of Pure Vanilla Extract

Preheat oven to 325°F and adjust oven rack to middle position. Grease a 13x9 cake pan or an 8x8 inch cake pan. set aside.
Place the flour, baking powder, and salt in a medium-size bowl and whisk together to mix.In a seperate bowl, using an electric mixer, beat the eggs one by one on a medium speed, for about 45-60 seconds, and slowly add the sugar in, until all sugar is incorporated. The egg mix will be very fluffy and be a light yellow.Reduce speed of mixer, and slowly add the melted butter, little by little, and then the vanilla. Keep the mixer running on low. (The butter HAS to be melted and cool. If not, it will flatten your bubbles, meaning flat cake)
Add the flour in batches (spoon by spoon) and gently fold with a spatula until well combined. DO NOT OVER MIX.Transfer batter to your prepared pan using a rubber spatula to help you spread it evenly. Bake for 30-35 minutes or until cake looks light golden or a wooden toothpick comes out clean when inserted into the cake.Remove the cake from the oven and cool completely. Poke the top of the cake using a fork all over.
Whisk condensed milk, evaporated milk and cream with the vanilla in a sauce pan, warm over low heat until completed mixed. Remove from heat and set aside.(Not everyone warms the milk, some people just mix them and pour over the cake, this is a personal choice)Once the cake has cooled, pour the milk mixture over the cake, cover with a plastic wrap and refrigerated for 4 hours or overnight.
Make the frosting after the milk has soaked into the cake. Place heavy cream, sugar, and vanilla into a bowl and mix on medium speed until soft peaks form. This will take about 2 minutes.I usually place the mixer attachment in the freezer and the bowl in the fridge before making whipping cream. This trick always works to form a smooth and fluffy frosting.
To Assemble, spread the frosting over the cake and top with fruit. Its better to leave the cake in the fridge overnight to soak up the milk and then assemble, as opposed to doing it all at once.

This recipe sourced from mexicoinmykitchen.com*


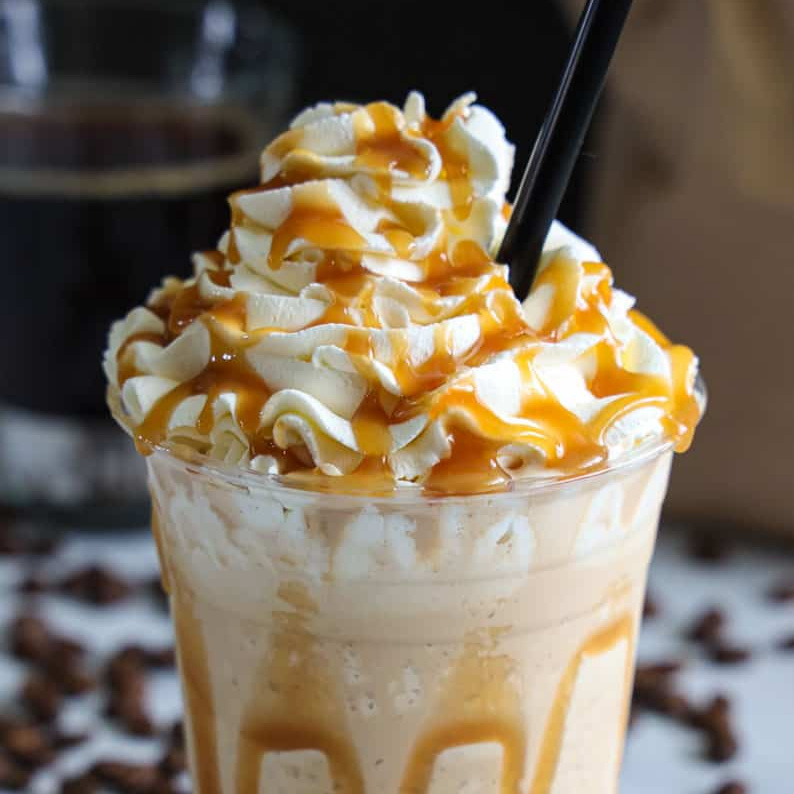
LynziePedia.net//Lynzie'sFrappeBase!
X


Have you ever wondered why when you make a frappe, it's never quite right? It separates, the flavor isn't quite right and it's just not what you paid 8 bucks for from the coffee shop down the road?
Well look no further, this frappe base will solve all of these problems! And, its super easy to make!

1 Cup of Water♥︎ (236.5g)
1½ Cup of Brown sugar♥︎ (292g)
2 Teaspoons vanilla extract♥︎
2 Teaspoons Xanthan Gum♥︎

In a pot over medium heat, combine water, sugar & vanilla extract. Stir until sugar dissolves.♥︎Set off to side and cool to room temperature. Then, add to a blender and add xanthan gum. Blend to combine.♥︎Store in an airtight container in the fridge for up to a month.♥︎
When ready to use, simply place in a blender with all your other ingredients and and enjoy♥︎

This recipe sourced from Stefania Marzelia*


LynziePedia.net//Lynzie'sLofthouseCookies!
X


You know those cute little pink cookies you see at the store that you either absolutely love or completely hate? well they actually have a name! even better, they can be made at home with little effort.

For the cookies:
1 ⅛ Cup Flour♥︎ (141g)
¼ Teaspoon Baking Powder♥︎
¼ Teaspoon Baking Soda♥︎
½ Tablespoon Cornstarch♥︎
1 Pinch of Salt♥︎
¼ Cup Butter; Room Temp♥︎ (141g)
½ Cup Granulated Sugar♥︎ (100.5g)
1 Egg; Room Temp, lobotimized and Halved♥︎
¼ Cup Sour Cream (or Yogurt)♥︎ (57g)
1 Teaspoon Vanilla Extract♥︎
¼ tsp almond extract♥︎
For the frosting;
¼ Cup Room Temp Butter♥︎ (141g)
1 Cup Powdered Sugar♥︎ (121g)
½ Teaspoon Pure Vanilla Extract♥︎
1 Tablespoon Milk♥︎


Combine the flour, salt, baking powder, baking soda, and cornstarch in a bowl then whisk together and set aside.Cream the butter and sugar until fluffy then beat in the egg, vanilla and almond extract. Add the sour cream and mix until combined, scraping the bowl down as needed.
Add the dry mixture to the wet and mix until just combined. Use your spatula to scrape down the bowl and combine any errant flour.Shape dough into a disk then cover in plastic and chill for an hour.
Add the dry mixture to the wet and mix until just combined. Use your spatula to scrape down the bowl and combine any errant flour.Shape dough into a disk then cover in plastic and chill for an hour.
Bake at 375°F for 8-9 minutes or until slightly golden brown at the edges. Set aside to cool completely.
While the Cookies bake, cream the butter then mix in the powdered sugar, and vanilla. (Yes Lynzie, you DO need an electric mixer for this.)Drizzle in the milk while mixing on low then increase speed to high and beat until smooth. If using food dye, mix in a drop at a time until desired color is reached.
Assemble the cookies with the icing and enjoy!

This recipe sourced from preppykitchen.com*


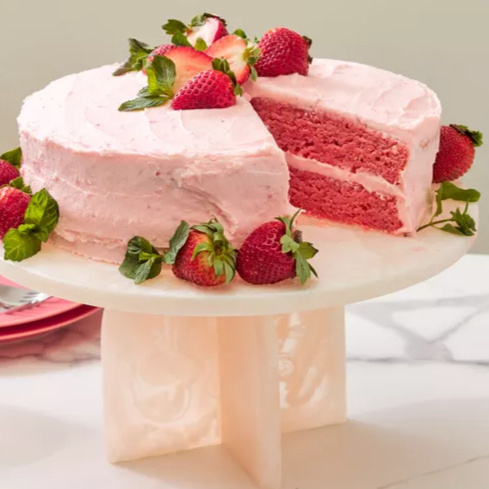
LynziePedia.net//StrawberryCake!
X


This lovely little piece of work uses pureed strawberries in the batter, a strawberry syrup in the frosting and a cute little garnish of even more berries! And the addition of gelatin powder makes it beautifully pink and flavorful!

400g Trimmed Fresh Strawberries♥︎
2 ¾ Cups All-Purpose Flour♥︎ (344g)
2 ½ Teaspoons Baking Powder♥︎
1 ¼ Teaspoon Sea Salt, Divided♥︎
1 ⅔ Cup Granulated Sugar♥︎ (333.5)
1 Pkg Strawberry Gelatin♥︎
454g (4 Sticks) Unsalted Butter; Softened and Divided♥︎
4 Large Room Temp Eggs♥︎
¾ Teaspoon Vanilla Extract, Divided♥︎
1 Cup Whole Milk; Room Temp♥︎ (245g)
3 ½ Cups Powdered Sugar; Sifted♥︎ (423g)

Make the strawberry puree by placing strawberries in a blender and processing until completely pulverized.Preheat oven to 350°F with rack in center position. Coat 2 (9-inch) round cake pans with baking spray.
♥︎
Whisk together flour, baking powder, and 1 teaspoon of the salt in a medium bowl.♥︎Beat the granulated sugar, gelatin, and 1 cup of butter with a whisk until combined.
beat in eggs, one at a time, mixing well after each addition. Beat in ½ teaspoon of the vanilla until just combined.♥︎
Whisk together the milk and ½ cup of the reserved strawberry puree in a measuring cup.♥︎gently alternate between adding the flour and milk mixtures, mixing until just combined♥︎
Divide cake batter evenly among prepared pans, spreading batter into an even layer.♥︎Bake in preheated oven until a wooden pick inserted in centers comes out clean, 25 to 28 minutes.♥︎Let cakes cool in pans ~15 minutes.♥︎
While the cakes are baking, make the strawberry reduction!
Use the remaining strawberry puree in a small saucepan and bring to a simmer.♥︎Once at a simmer reduce heat until reduced to ¼ cup and place in the fridge uncovered for 30 minutes.♥︎
beat together remaining 1 cup butter, ¼ teaspoon salt, and ¼ teaspoon vanilla with an electric mixer until smooth.♥︎Then, alternately add powdered sugar and cooled strawberry reduction, beating until just combined after each addition. Increase speed to medium, and beat until fluffy, about 1 minute.♥︎
Then, add frosting and to assemble cake and enjoy!!♥︎♥︎♥︎♥︎♥︎

This recipe sourced from southernliving.com*


LynziePedia.net//Lynzie'sHeathCookies!
X


These delicious chocolatey, fudgey cookies topped a decadent icing and sprinkled with heath toffee bits are sure to blow your guest's minds! If you're planning on freezing these, wait until you're ready to eat before frosting.

Cookie:
1 ½ cups salted butter, softened (340g)
1 ½ cups Brown Sugar (292g)
½ cup granulated sugar (100.5g)
3 eggs
2 tablespoons corn syrup!! (13.5g)
1 tablespoon + ½ teaspoon vanilla extract, divided
3 ¾ cup all purpose flour (469g)
1 Cup Cocoa Powder! (152g)
2 teaspoon baking soda
1 tablespoon cornstarch
1 teaspoon salt
Topping:
Sweetened condensed milk
2 cups heavy cream (470g)
1 cup powdered sugar (121g)
3/4 cup heath bits


Preheat the oven to 350°.Using a stand mixer, cream together the butter and sugars until light in color and fluffy in texture.Add in the eggs, corn syrup and 1 tbsp of vanilla. Mix until thoroughly combined.Next, add the flour, cocoa, cornstarch baking soda and salt. Mix until your chocolate cookie dough forms. The dough will be soft.Divide the dough out into 12 equal portions, I like to use my ½ cup measuring cup to help divide the dough. You'll want to use a little less than ½ cup of dough to have 12 cookies.Bake at 350° for 15-17 minutes.
Right after the cookies come out of the oven, spoon about a tbsp or so of sweetened condensed milk onto each cookie.It will drip down the sides, that's fine! Just let that cookie soak up the sweetened condensed milk.
Make the frosting by adding the heavy whipping cream to a large bowl and whip the cream on medium high speed until it starts to thicken.Once it starts to thicken, slow the speed down and gradually add in the powdered sugar and vanilla. Once all of the powdered sugar has been added bump the speed up to as high as it can go and whip it until stiff peaks form. Once stiff peaks form, the frosting is done!
Add the frosting to a piping bag with a large closed star tip. Zig zag the frosting across the cookies from side to side to cover the top of the cookie and then sprinkle the heath bits on top.Repeat with all of the cookies and then chill in the fridge for 30 minutes before serving.!!

This recipe sourced from cookingwithkarli.com*


LynziePedia.net//Lynzie'sCosmicCookies!
X


Cosmic Brownie Cookies are a super fudgey cookie topped with a thick fudge glaze and colored chocolate chips on top. This is a Crumbl Cookies copycat recipe that will change everything!

Cookie:
1½ cups salted butter, softened (340g)
1½ cups Brown sugar (392g)
½ cup granulated sugar (100.5g)
3 eggs
2 tablespoons corn syrup (13.5g)
1 tablespoon vanilla flavor
3¾ cup all purpose flour (469g)
1 cup dutch processed cocoa powder (152g)
1 tablespoon cornstarch
2 teaspoons baking soda
1 teaspoon salt
Topping:
2/3 cup heavy cream (155g)
2 cups semi sweet chocolate chips (341g)
1/3 cup rainbow coated chocolate chips


Complete this Cookie base recipe as required, adding in corn syrup when making the wet's♥︎When making the dry's, add in 1 cup of cocoa powder♥︎
While the cookies are baking in the oven, make the fudge frosting by measuring out the heavy cream into a saucepan and bring to a boil♥︎Once brought to a boil, bring off the heat and pour in chocolate chips. Stir until fully combined♥︎
Once the cookies are out of the oven, let them cool on the pan for about 10 minutes and then spoon the frosting onto the top of each cookie and sprinkle with the candy coated chocolate chips while the icing is still wet♥︎

This recipe sourced from cookingwithkarli.com*


LynziePedia.net//Lynzie'sToffee!
X


This easy to make and basic toffee recipe is great for enjoying alone or inside of other baked goods! feel free to add nuts, chocolate, sea salt and anything else your sweet heart could desire!

½ Cup Unsalted Butter! (Or One Stick!) (113.5g)
½ Cup Granulated Sugar! (100.5g)
⅛ Cup o' Water! (6g)
¼ Teaspoon Kosher or Sea Salt!
½ Teaspoon Vanilla Extract!
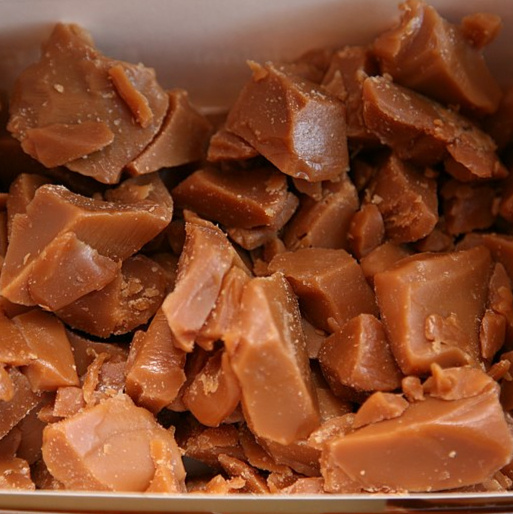

Line a 9x9 inch baking dish with parchment paper♥︎Add the sugar, water, salt and butter to a heavy-bottomed pot. Place over medium heat and bring to a boil, stirring frequently♥︎
Once boiling stir occasionally until the mixture reaches 300°F, which is the hard crack stage.Remove from heat and carefully stir in the vanilla then immediately pour into the prepared baking dish. Use a spatula to spread to the edges into a flat layer then set aside to cool.

This recipe sourced from cookingwithkarli.com*


LynziePedia.net//MarshmallowFluff!
X


This marshmallow cream is a substitute for the store-bought marshmallow fluff. This makes 7 ounces, equivalent to 2 cups.

1 Egg White At Room Temp! (33g)
¾ Cup Light Corn Syrup! (245g)
¼ Teaspoon Salt
¾ Cup Powdered Sugar! (91g)
2 ¼ Teaspoons Vanilla Extract! (Use The Good Stuff!!) (12g)


Beat egg white, corn syrup, and salt in a large bowl with an electric mixer on high speed until mixture is thick and doubled in volume, about 5 minutes.Reduce mixer speed to low and beat in confectioners' sugar until thoroughly combined.Beat vanilla extract into marshmallow creme just until incorporated.

This recipe sourced from allrecipes.com*


LynziePedia.net//RaspberryCookies!
X


Crumbl's Raspberry Cheesecake Cookies are a Graham Cracker flavored Cookie base topped with a Cheesecake Frosting and a Raspberry Drizzle. This recipe is inspired by Crumbl's Cookie.

For the cookie:
1½ cups unsalted butter, softened (340g)
¾ cup granulated sugar (150.5)
1½ cups packed brown sugar (292g)
2 eggs
1 tablespoon vanilla
3¾ cups all purpose flour (469g)
2 pkg graham crackers, crushed
2 teaspoons baking soda
1 teaspoon baking powder
1 teaspoon salt
For the cream cheese topping:
8-16 Oz Cream Cheese; Softened!
2 Cups Powdered Sugar! (242g)
For the raspberry topping:
1 Pkg Raspberries!
1 Cup Sugar! (200g)
½ Cup Water! (118g)


Preheat oven to 350 degrees and
cream together the butter, granulated sugar and brown sugar.Add the egg and vanilla. Mix until light in color and creamy.Add in the dry ingredients (flour, crushed graham crackers, baking soda, baking powder and salt), mix into the dough. Mix until completely combined.Portion out the dough into 1/2 cup portions. Roll into a ball and arrange 6 onto each cookie sheet. Press down slightly on the cookie dough, flattening it until it is about 1 inch thick.Bake for 10-13 minutes, until the cookies are turning golden brown.
Using a saucepan, heat the raspberries, sugar and water on medium heat. cook until softened, 5-10 minutes.Let cool, then blend to a smooth consistency.
While the cookies are baking, make the frosting by whipping the cream cheese until smooth.Add the powdered sugar 1/2 cup at a time, mixing until completely combined before adding more powdered sugar. Repeat until the full 2 cups of powdered sugar have been added.
Add in the marshmallow cream and mix until all of it has been combined thoroughly.Add the frosting to a piping bag, and using a large circular tip pipe the frosting onto the cookies in a spiral.
Add the raspberry sauce to a small zip lock bag and cut the corner; zig zag the raspberry sauce over top of the frosting. Serve and Enjoy!

This recipe sourced from cookingwithkarli.com*


LynziePedia.net//StrawberryRolls!
X


These beautiful rolls are perfect for valentine's day or when you're looking to feed a crowd! They're soft and fluffy with a beautifully sweet and tangy after-taste. Enjoy!

Filling:
3 Cups Strawberries (498g)
1 Cup Granulated Sugar (201g)
1 Sprinkle Sea Salt
1 Lemon Juiced and Zested
3 Tablespoons Cornstarch (30)
¼ cup butter cold (57g)
Dough:
½ Cup Warm Water (118g)
1 Teaspoon Granulated Sugar (4g)
1 Packet Active Dry Yeast (20.5g)
5 Cups All Purpose Flour (626g)
⅓ cup granulated sugar (66g)
1 Sprinkle Sea Salt
¾ Cup Butter; Very Soft (170g)
2 Large Eggs
1 Tablespoon Vanilla Extract
¾ Cup Warm Milk (184)
1 Cup Strawberries, Fresh (166g)
Strawberry Cream Cheese:
8 Oz Cream Cheese, Softened
3 Cups Powdered Sugar, sifted (363g)
½ Cup Strawberry Filling (115g)
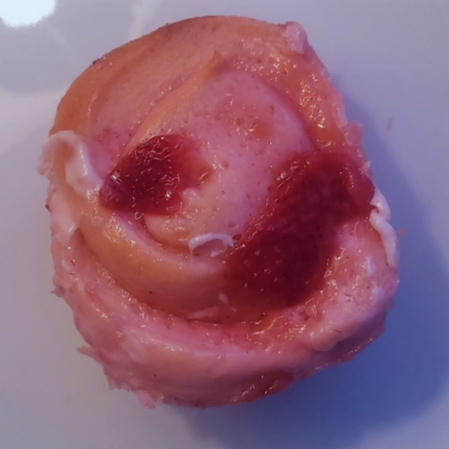

Filling:
Combine cut strawberries sugar, cornstarch, lemon juice, salt, and grated lemon zest in a medium saucepan. Heat on medium heat, stirring to release the juices. Let come to a simmer. Stir frequently; cook until thickened.Once the strawberries become soft (5 minutes of simmering), take it off the heat. Use a blender or a potato masher to break up the strawberry pieces. Add butter and whisk to melt and combine. Refrigerate until ready to use.
Dough:
Dissolve yeast and sugar in warm water. Let sit for 10 minutes until it gets foamy. If it doesn't foam, try a different batch of yeast. Work on the rest of the dough while it foams.
In a large bowl combine flour, sugar, salt, and stir. Make a well in the middle and add the butter, eggs, vanilla, milk, and yeast mixture. Whisk to combine the wet ingredients, then switch to a large spoon to stir the dough together.Mix until a cohesive dough forms. It will be sticky and won't be completely smooth. It will come together after it rises. Cover the bowl with a dish cloth and put in a warm place to rise until doubled, about 40 minutes. Butter a 9”x12” baking pan while it rises.
Punch down the dough, then flatten and fold the dough a few times to make sure everything is mixed well. Transfer onto a floured surface. Roll the dough into a large rectangle, about 18” by 24”.Set aside a half cup of the filling for the frosting. Spread the strawberry filling on top of the dough, leaving a 1” border on all the edges. Sprinkle the reserved chopped fresh strawberries on top.
Beginning at the long edge, carefully roll into a log. Then mark the roll into 12 equal pieces.Using a piece of string or unflavored floss, wrap the string around the log and pull to cut. Using a string to cut instead of a knife prevents the roll from getting squished - they hold their shape better. Scoop up each cut roll with your hands and place on the prepared baking pan. Place any filling that escapes back on top of the roll.
Let rise until doubled in size in a warm place, about 15 minutes. Preheat oven to 355°F (180°F). Bake the rolls for 25-30 minutes or until the rolls are golden brown on top. Work on the glaze while it bakes.
Strawberry cream cheese:
Combine the softened cream cheese and powdered sugar in a large bowl. Beat until creamy and smooth. Add the reserved strawberry sauce into the glaze and beat well.Let the baked rolls cool for 10 minutes inside the pan. Spread all of the glaze over the rolls, letting it seep in through all of the crevices. Best served warm!
Combine the softened cream cheese and powdered sugar in a large bowl. Beat until creamy and smooth. Add the reserved strawberry sauce into the glaze and beat well.Let the baked rolls cool for 10 minutes inside the pan. Spread all of the glaze over the rolls, letting it seep in through all of the crevices. Best served warm!
To Reheat, place in oven at 300-325°F for 10 minutes. No need to Pre-heat.

This recipe sourced from flouringkitchen.com*


LynziePedia.net//Cowboy Coffee Cake!
X


I took this recipe from A taste of Cowboy! A wonderful book made by a very gifted author and storyteller, Kent Rollins. Here's to you, Kent!
This cake is simple, Easy to make and has ingredients everyone has lying around this house. Plus, it tastes better than anything from a bakery!

2 ½ Cups AP Flour! (313g)
1 Teaspoon Baking Powder!
1 Pinch of Salt!
1 Stick Softened Butter! (115g)
1½ Cups Sugar! (301g)
½ Cup Brown sugar! (97.5g)
1 Egg!
2 Tablespoons Greek Yogurt! (31g)
½ Teaspoon Cinnamon!
1 Cup Strong Coffee, Cooled! (240g)
2 Tablespoons Used Coffee Grounds! (10g)
1 Tablespoon Maple Syrup! (20g)
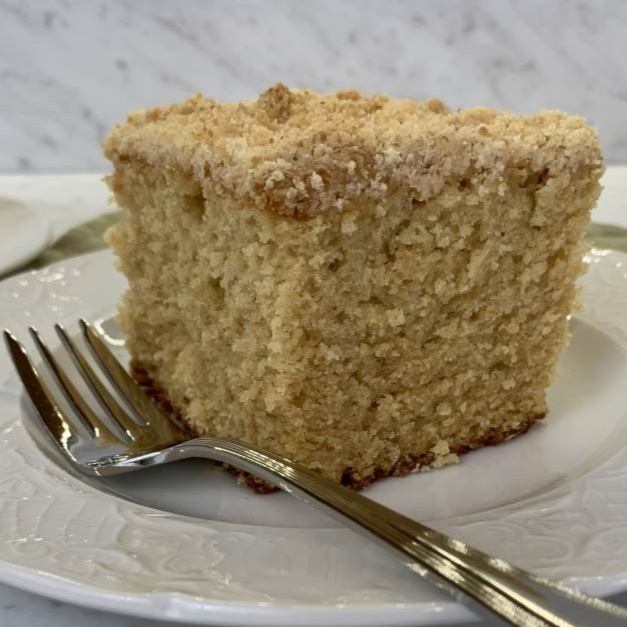

Preheat your oven to 350°F and place a rack in the middle to prevent burning and evenly bake.
In a large bowl, combine the Flour, Baking powder and Salt, then set aside.In another bowl, Beat together the Butter, Sugar, and Brown Sugar.
Slowly beat in the Egg, Greek Yogurt, Cinnamon, Coffee, Coffee grounds and Syrup until well combined.
Mix the Dry's with the Wet's until combined, Then place into a cake pan.
Bake for 25 minutes or until a toothpick comes out clean. let cool before eating.

WARNING! Once you eat this you cannot stop. May cause yummies and stomach Rumbling. Proceed with Caution.*


LynziePedia.net//Lynzie'sOrangePosset!
X


This is such a cute and easy to make little recipe! The use of the orange peels as measuring cups and serving bowls is so freakin' cute!! My partner also loves the aesthetics of this adorable recipe.

Note that "orange cup" refers to using the peel as a measuring tool, not an actual cup.
4 oranges
8 Orange Cups of heavy whipping cream (About 2 US cup)
1 orange cup of granulated sugar (About ¼ US cup)
¾ orange cup of orange juice (About 3 tbsps)
¼ orange cup of vanilla extract (About 1 tbsp)


Cut 4 oranges in half. Use a metal spoon to carefully scoop out the pulp to create orange “cups.”
Place the pulp in a small strainer and use a spoon to press the juice out of the pulp.
Place the halved orange peels in a muffin pan or small ramekins to ensure stability.

Use a halved orange peel as a measuring cup. In a cooking pan, add 8 orange cups of heavy whipping cream, 1 orange cup of granulated sugar, and the zest of 1 orange peel.

Heat the mixture over medium low heat, use a silicone spatula to stir constantly until the sugar dissolves. Allow the mixture to simmer for approximately 5 minutes, ensuring consistent stirring until it slightly thickens and gets a light yellow hue. Remove the pan from heat.

Pour orange juice into a halved orange peel, filling it ¾ full, and then fill up the remaining space with vanilla extract. Stir the orange juice mixture into the hot mixture.

Then, strain the mixture through a fine-mesh sieve into a pouring cup to remove the orange zest.
Carefully pour the posset mixture into the hollowed-out orange peels. Place the filled orange halves in the refrigerator to chill for at least 4 hours or overnight until they are fully set.


This recipe sourced from msshiandmrhe.com*


LynziePedia.net//HokkaidoMilkBread!
X


Japanese milk bread is unlike any other bread out there. Extremely soft, fluffy and flakey texture that is a product of the tangzhong method.
As a white woman, I take NO credit for this recipe. This Lovely recipe was written by the talented Jacky Kwok over at Kwokspots.com! Check it out!

Yeast mixture:
1 tbsp active dry yeast or instant yeast (10g)
2 tbsp lukewarm water (20g)
Tangzhong:
2 Tablespoons Flour! (20g)
2 Tablespoons Water! (27g)
4½ Tablespoons Milk! (60g)
Dough:
Tangzhong!
Yeast mixture!
2⅓ Cup Flour! (380g)
¼ Cup sugar! (60g)
1 Teaspoon salt! (3g)
½ Cup Milk! (130g)
1 Large Egg!
3 Tablespoons softened butter! (unsalted) (42g)
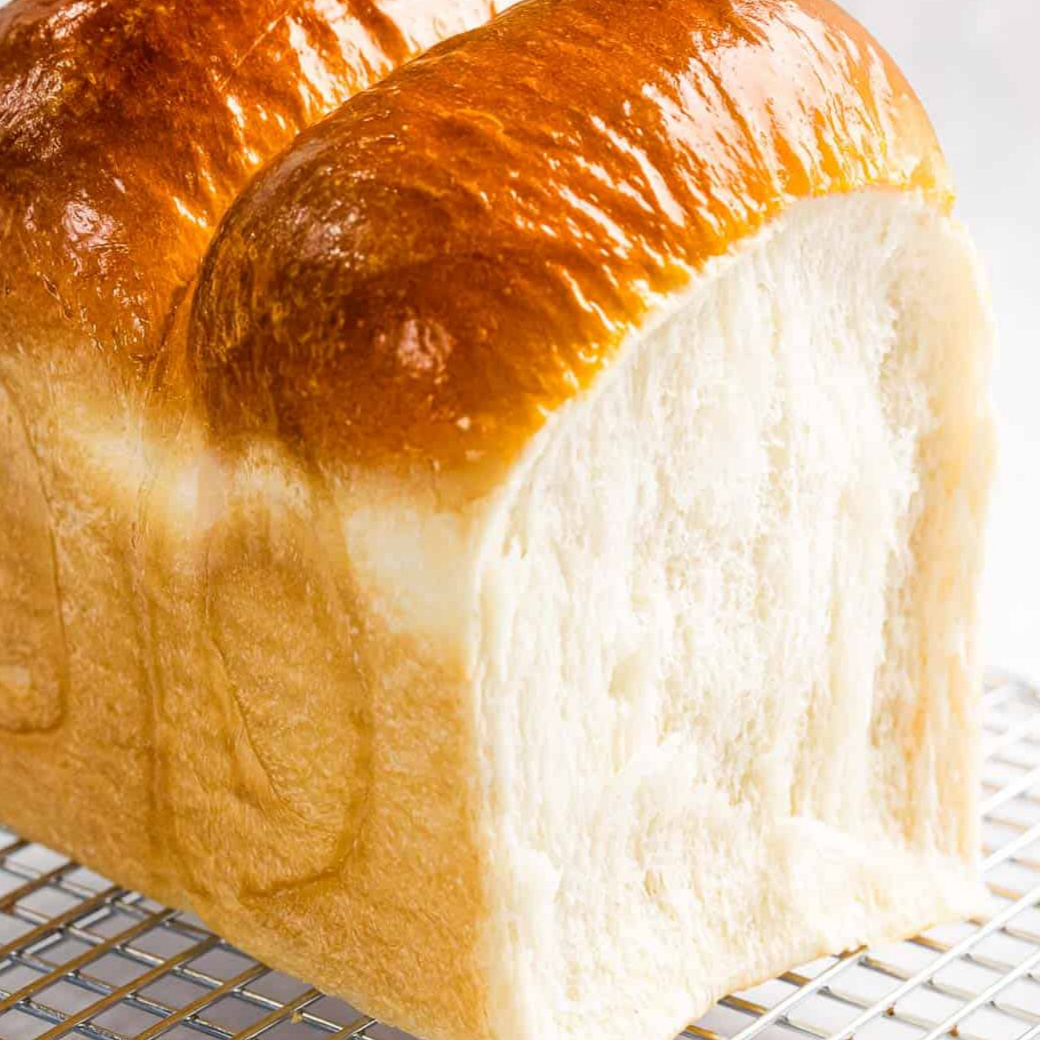

Before you start, I highly suggest getting all your ingredients ready, and portioned out. Making this will be a hell of a lot easier if you do!
Add the active dry yeast into the lukewarm water, mix and allow to sit for 10 minutes. You know the yeast is active if it blooms.
In a saucepan, add the tangzhong ingredients and cook, continuing to stir over low heat until a paste forms. It should be thick enough to pick up with a spoon.
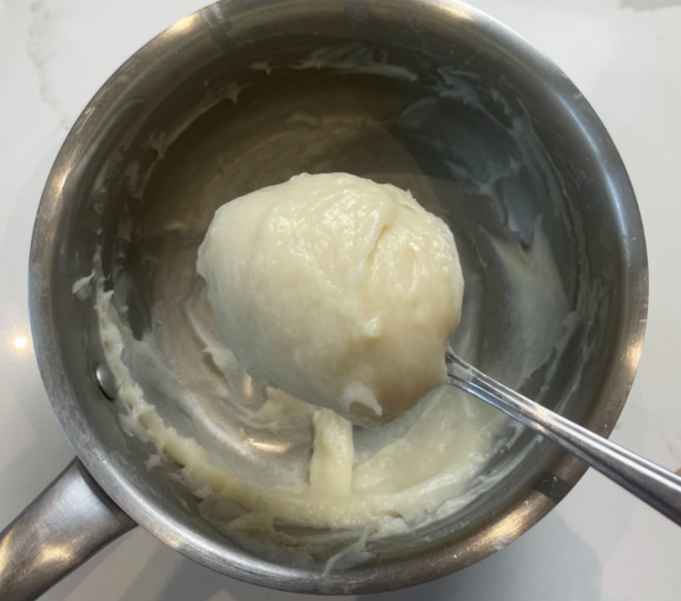
Add your yeast mixture and tangzhong along with the remaining dough ingredients except for the softened butter in a stand mixer bowl. If you are using instant yeast, add the yeast and water in at this stage as well. Mix on low speed for 5 minutes or until a proper dough forms.
Add your softened butter, 1 tablespoon at a time and mix until the butter is fully incorporated and the dough is very smooth. If your dough is too sticky, add more flour, little by little until manageable.
Allow your dough to proof in a covered bowl for 1.5 hours or until doubled in size.
Pull out your silicone mat, and using a dough cutter separate the dough into 3 equal pieces then continue to flatten each piece into a rectangle.
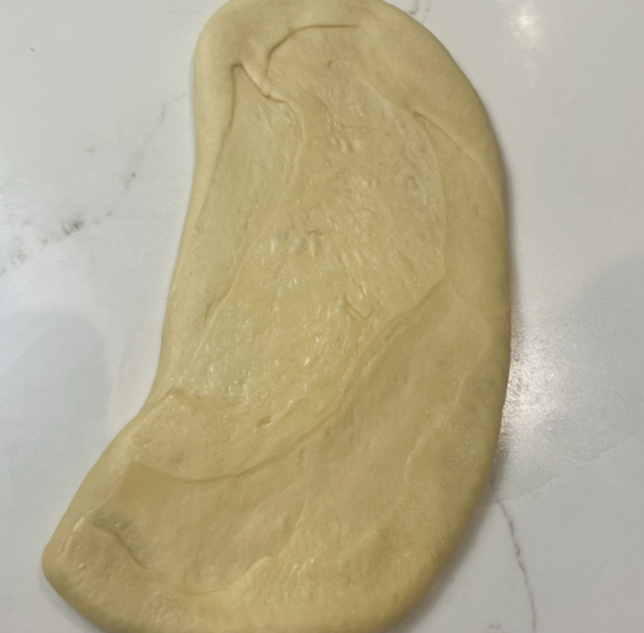
Then fold the long sides in towards the middle
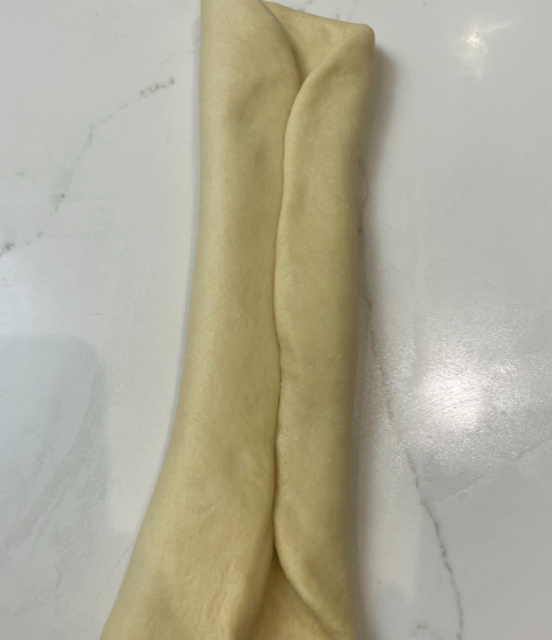
Roll it up and seal the edge towards the bottom. Then, place into an oiled 9 inch loaf pan leaving 1 inch of space between each roll.
Cover with plastic wrap and let proof for 1 hour.
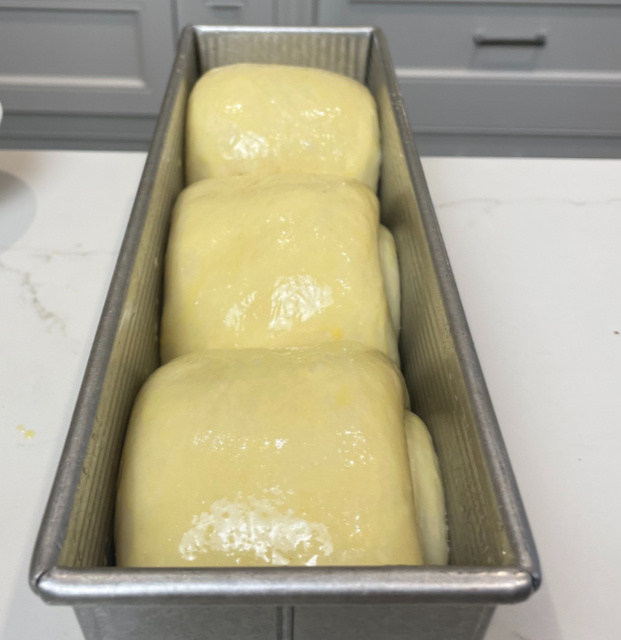
Brush with 1 Lobotomized Egg.
Bake 350F for 25-30 minutes. I like to immediately brush with butter and let rest for 10 minutes before cutting into.
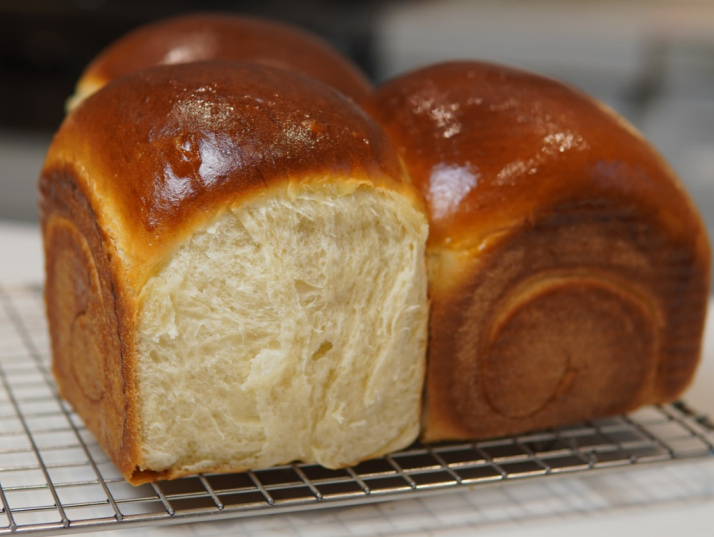

This recipe sourced from kwokspots.com*


LynziePedia.net//Lynzie'sIceCream!
X


No ice cream machine is needed for this easy no-churn ice cream, made with only three ingredients! Makes about 6 cups ice cream. Prep time does not include 5-hour freezing time.

1 14 Oz Can Sweetened Condensed Milk
1 Teaspoon Pure Vanilla extract
2 Cups Heavy Whipping Cream
(470g)
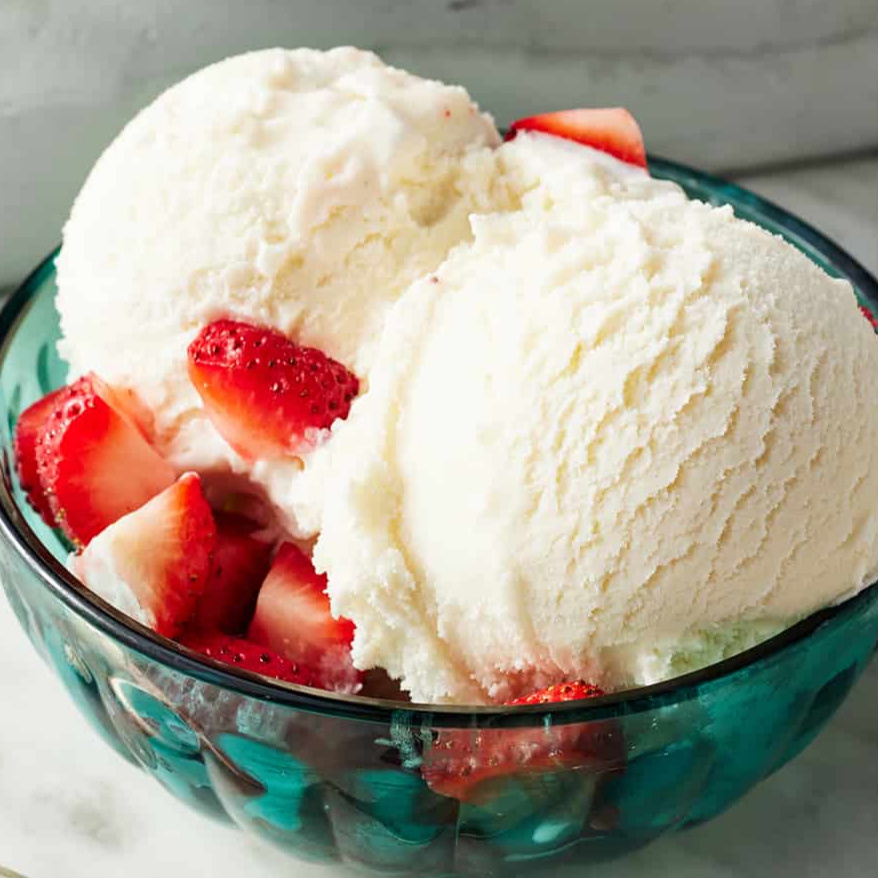

Place a 6-cup container into the freezer.
In a large bowl, mix to combine sweetened condensed milk, and vanilla. Set aside.
In another large bowl, use a hand mixer to whip the cream to stiff peaks, taking care not to over-whip the cream.
Fold about 1 cup of the whipped cream into the sweetened condensed milk mixture, then fold in the remaining whipped cream. Get the container from the freezer and quickly transfer the ice cream mixture to the container. Freeze for 4–5 hours, until firm. Then scoop, serve, and enjoy!

This recipe sourced from thepioneerwoman.com*


LynziePedia.net//Lynzie'sChocoChipCookie!
X


This dough is the perfect cookie recipe. chewy, delightfully yummy, and all around perfect!

2 ¼ Cups all-purpose flour! (281.6)
1 Teaspoon baking soda!
1 ½ Teaspoons cornstarch!
½ Teaspoon salt!
¾ cup unsalted butter, melted & cooled! (170g)
¾ cup packed brown sugar! (146g)
½ cup granulated sugar (or sucralose)! (100.5g)
1 large egg, at room temp!
1 egg yolk, at room temp!
2 teaspoons pure vanilla extract!
Chocolate!


Whisk the flour, baking soda, cornstarch, and salt together in a large bowl. Set aside.
In a medium bowl, whisk the melted butter, brown sugar, and granulated sugar together until no brown sugar lumps remain.Whisk in the egg and egg yolk.Finally, whisk in the vanilla extract. The mixture will be thin.
Mix the Dry's with the Wet's with a large spoon or rubber spatula. The dough will be very soft, thick, and appear greasy.
Cover the dough tightly and chill in the refrigerator for at least 2–3 hours or up to 3 days. I highly recommend chilling the cookie dough overnight for less spreading.
Preheat oven to 325°F
Take the dough out of the refrigerator and allow it to slightly soften at room temperature for 10 minutes.
Bake the cookies for 12–13 minutes or until the edges are very lightly browned.
The centers will look very soft, but the cookies will continue to set as they cool. Cool on the baking sheet for 10 minutes. Meanwhile, press a few extra chocolate chips into the tops of the warm cookies.
Cookies stay fresh covered at room temperature for up to 1 week.

This recipe sourced from sallysbakingaddiction.com*


LynziePedia.net//Lynzie'sAppleCrisp!
X


I absolutely Love a good baked apple! My boyfriend loves apples and I'm currently experimenting with new recipies, so I found this to be perfect for me, especially as a girl who loves a good crunch!

5 apples, peeled, cored, sliced ¼ to ½ thick!
2 Tablespoons Cornstarch!
2 Tablespoons Lemon Juice!
2 Tablespoons Sugar!
¼ Teaspoon Nutmeg!
2 Teaspoons Ground Cinnamon!
1 ½ Cup Rolled Oats! (153g)
¾ Cup Packed Brown Sugar! (146g)
⅔ Cup all-purpose flour! (82.6g)
¼ Teaspoon Salt!
1 ½ Stick Unsalted Butter, melted! (340g)
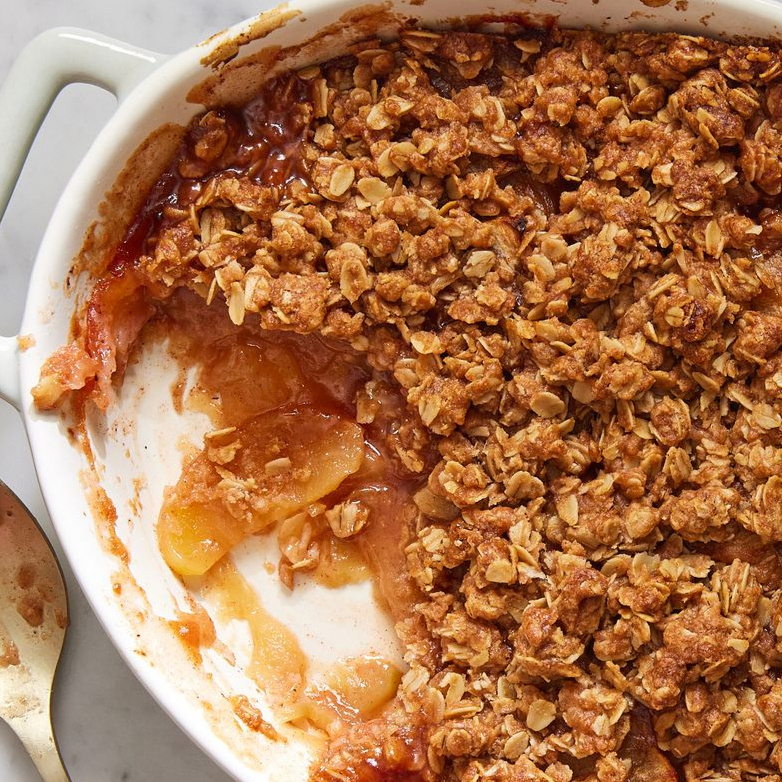

Preheat oven to 350°. In a medium bowl, toss apples, cornstarch, lemon juice, granulated sugar, nutmeg, and 1 teaspoon cinnamon.
In another bowl, toss oats, brown sugar, flour, salt, and remaining 1 teaspoon cinnamon. Add butter and stir until a crumbly mixture forms resembling wet sand.
Arrange apple mixture in a 2-quart ceramic baking dish. Top with oat mixture
Bake until apples are soft, topping is crisp and golden brown, and juices are bubbling around edges of dish, 55 to 70 minutes. I recommend serving with a heaping portion of vanilla ice cream!

This recipe sourced from delish.com*


LynziePedia.net//Lynzie'sLemonLoaf!
X


My boyfriend loves this recipe, as he always does. I've tried a few times to edit it with my own additions and twists, but its never really been as great as the original. Enjoy Responsibly!

1 Cup sugar or sucralose (200g)
2 Teaspoon lemon zest (use double if frozen)
½ Cup softened butter (113)
2 Tablespoons of veg oil
2 Large eggs (room temperature)
2 Tablespoons of lemon juice
1 ½ Cup all purpose flour (188g)
1 Teaspoon baking powder
½ Teaspoon salt
2 Tablespoons Poppy seeds (optional)
½ Cup milk (122g)
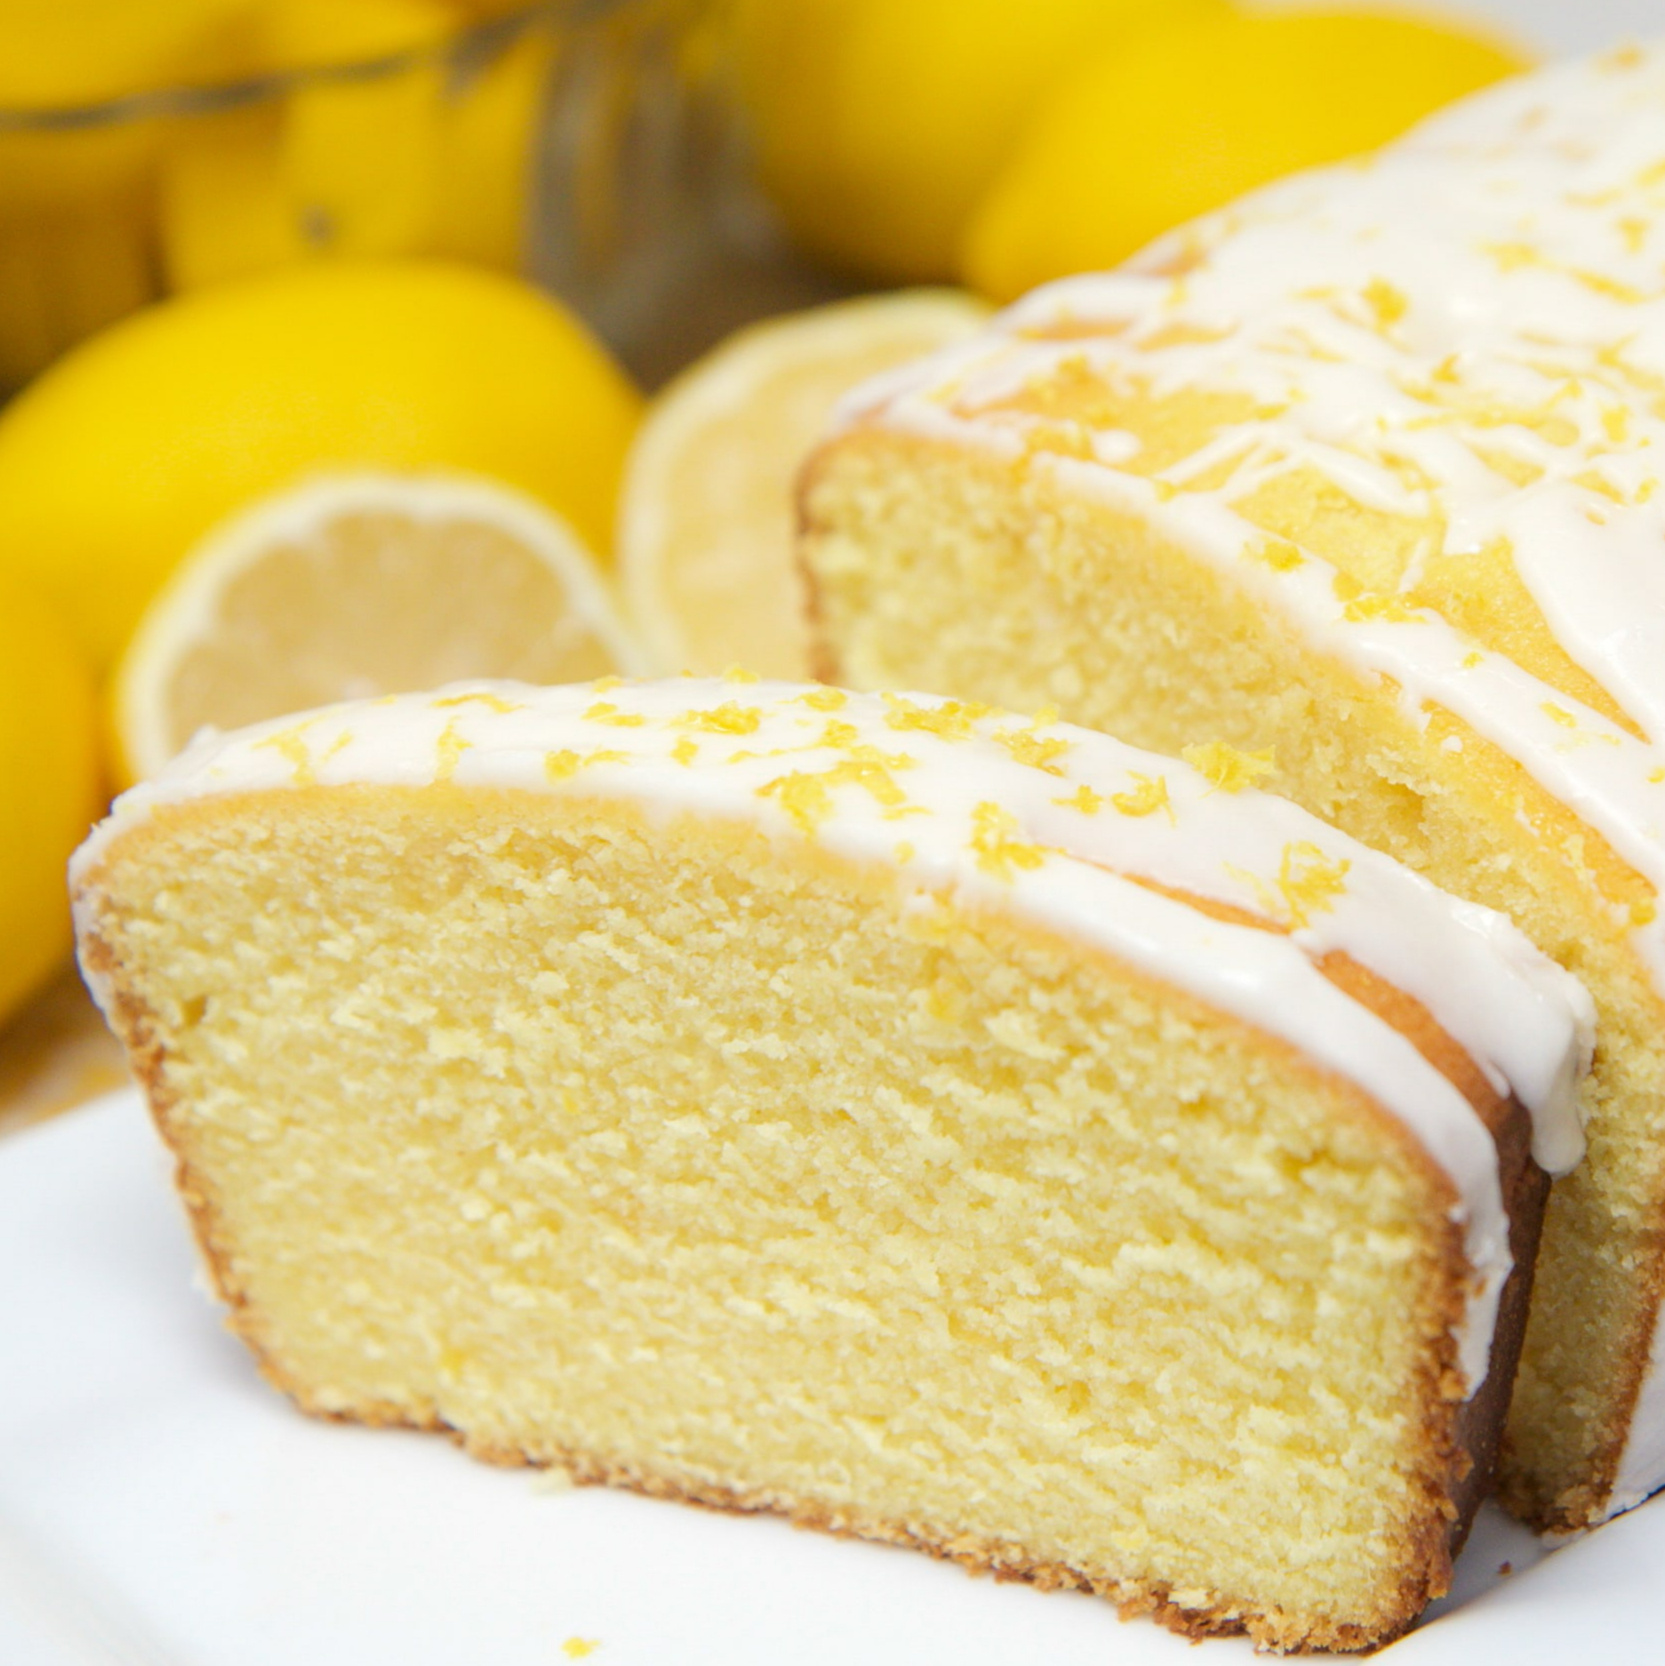

Place the sweetener and lemon zest into a bowl and press the zest into the sugar with a spatula to infuse.
Add the softened butter to the bowl and mix until combined.
Add vegetable oil and mix again until half-way incorporated.
Switch to a whisk and cream together until fluffy and pale!
Whisk one egg in until combined, then the other. It should be creamy and fluffy. Add lemon juice and mix again.
Use a spatula and scrape the sides of the bowl.Sift in flour, baking powder and salt. Mix with a spatula until Incorporated. Add poppy seeds if desired.Switch to a whisk and add milk until incorporated. Do not Overmix.
I know it may seem tempting, but this will cause the cake to be dense and fall upon coming out of the oven. We must Resist Temptation!
Add to a bread pan lined with parchment paper and smooth, Then bake at 320°F for 40-50 minutes.

This recipe sourced from youtube.com/@SavorEasy*


LynziePedia.net//Lynzie'sFrosting!
X


This chocolate frosting is a delicious way to make use of that block of cream cheese that's been sitting in your fridge. This frosting is rich, sweet and absolutely delectable. While Sally originally uses 2x the amount of butter, I'm not about that life. Feel free to do so if you want though!

1 12oz Brick cream cheese, softened to room temp.
1 Stick (113g) unsalted butter, softened to room temp.
3 ½ Cups powdered sugar (423g)
⅔ Cup unsweetened cocoa powder (101)
1 Teaspoon vanilla extract
1–2 Tablespoons milk or heavy cream
1 Pinch of salt
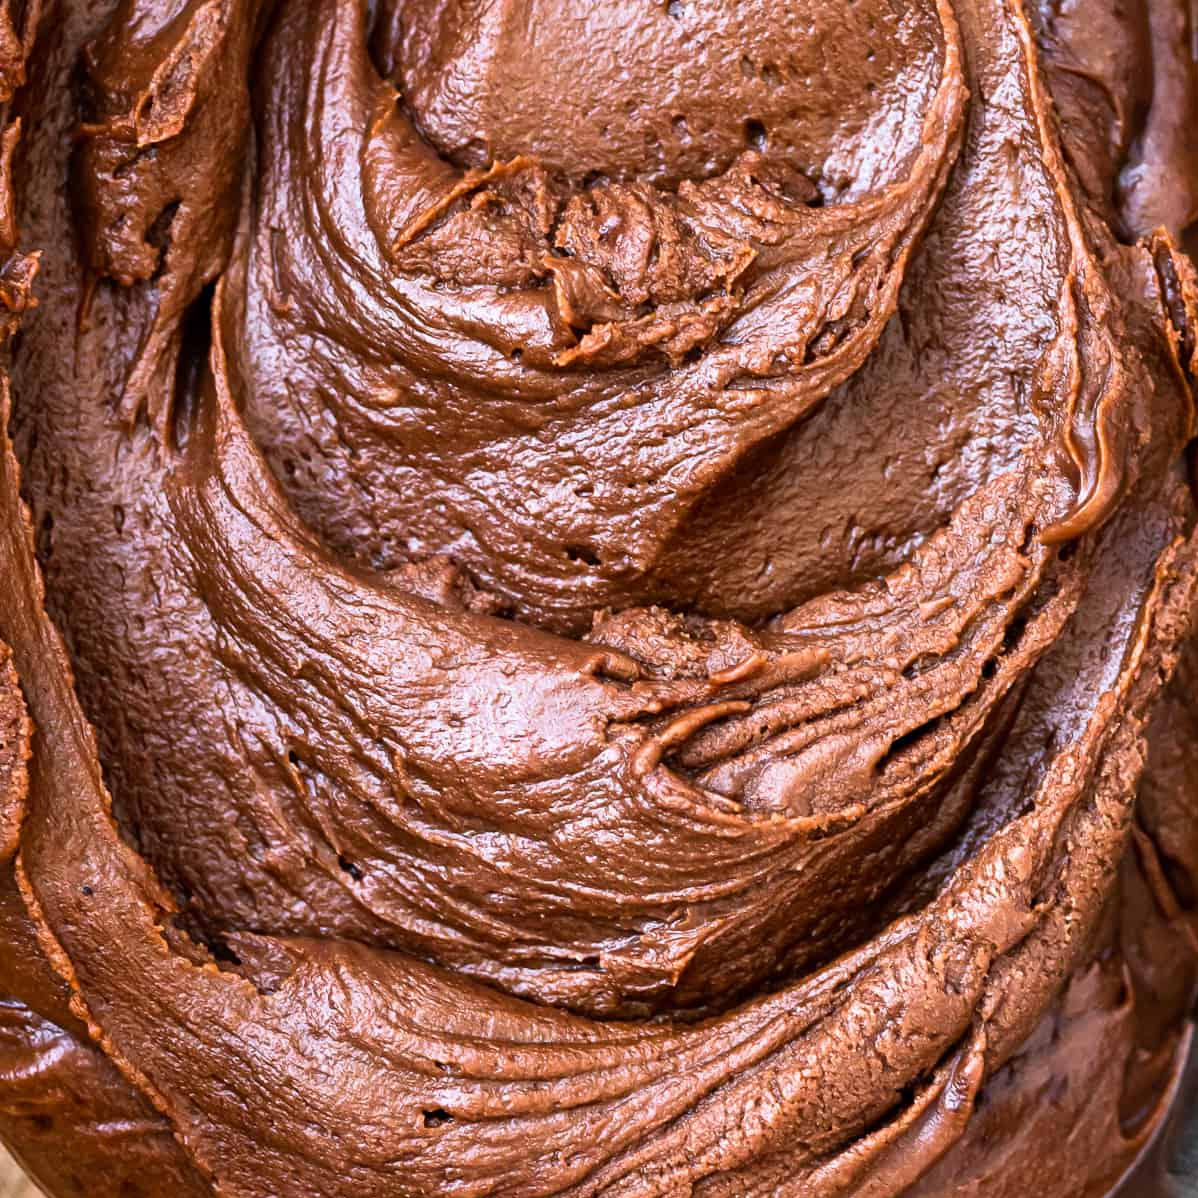

In a large bowl using a handheld or stand mixer fitted with a whisk attachment, beat the cream cheese for 1 minute on high speed until completely smooth and creamy. Beat in the butter until combined.Add the confectioners’ sugar, cocoa powder, vanilla extract, 1 Tablespoon milk, and salt and beat until combined and creamy.Add 1 more Tablespoon of milk to slightly thin out, if desired. Taste, then add another pinch of salt if desired.
Cover and store leftover frosting for up to 5 days in the refrigerator or up to 3 months in the freezer. After freezing, thaw in the refrigerator then beat the frosting for a few seconds so it’s creamy again.

This recipe sourced from sallysbakingaddiction.com*


LynziePedia.net//Lynzie'sBrownies!
X


The Best, Fudgy ONE BOWL Cocoa Brownies! A special addition gives these brownies a super fudgy centre without losing that crispy, crackly top! this is THE BEST brownie recipe out there!

113.5 grams melted and HOT butter
1 tablespoon cooking oil
226 grams granulated sugar or monkfruit sweetener
2 large eggs
2 teaspoons vanilla flavoring
62 grams A.P flour
75.8 grams unsweetened cocoa powder
a pinch of salt

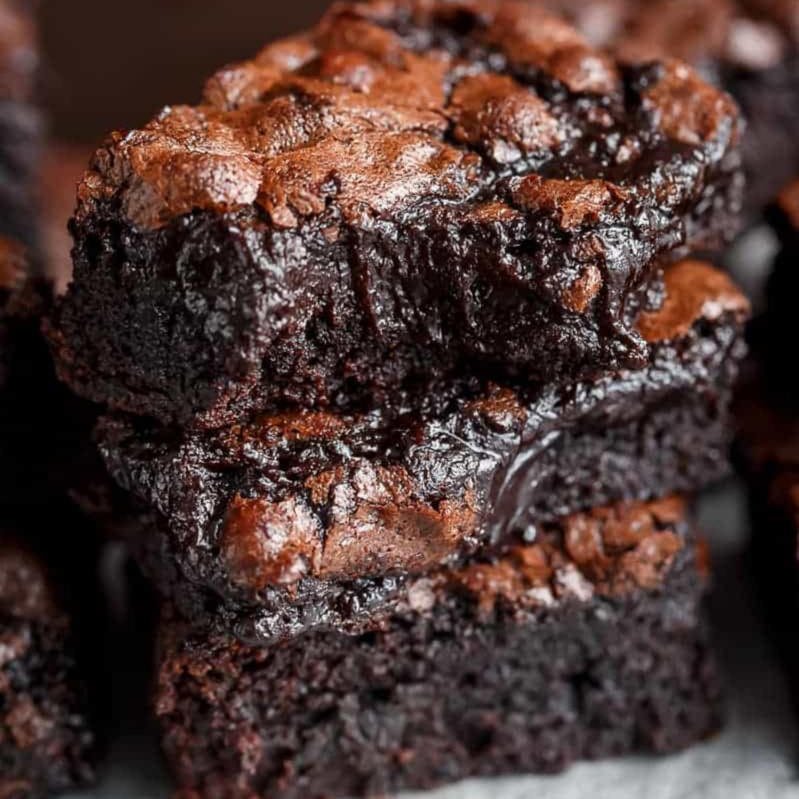

Preheat oven to 350°F & line an 8-inch square baking pan with parchment paperCombine hot melted butter, oil and sugar together in a medium-sized bowl. Whisk well for about a minute. Add the eggs and vanilla; beat until lighter in colour
Sift in flour, cocoa powder and salt. Gently fold the dry ingredients into the wet ingredients until JUST combined (do NOT over beat as doing so well affect the texture of your brownies).Pour batter into prepared pan, smoothing the top out evenly. (OPTIONAL: Top with chocolate chunks or chocolate chips.)
Bake for 20-25 minutes, or until the centre of the brownies in the pan no longer jiggles and is just set to the touch (the brownies will keep baking in the hot pan out of the oven). If testing with a toothpick, the toothpick should come out dirty for fudge-textured brownies.Remove and allow to cool to room temperature before slicing into 16 brownies.

This recipe sourced from cafedelights.com!


LynziePedia.net//Lynzie'sSpongeCake!
X


This recipe is similar to a cobbler, except the fruit isn't baked in. This is mainly done for my boyfriend, who prefers the fruit spooned on top. He's so lucky to have a woman like me!

½ cup granulated sugar (i substitute some sucralose for my pre-diabetic partner.) 100g.
1 package or 8oz of blackberries
1 squirt lemon juice

1 Cup all-purpose flour (125g)
2 Teaspoons baking powder
½ Teaspoon sea salt
½ Cup granulated sugar (100g)
1 Cup whole milk, warm (240mL)
½ Teaspoon vanilla extract
8 Tablespoons unsalted butter, melted (113g)
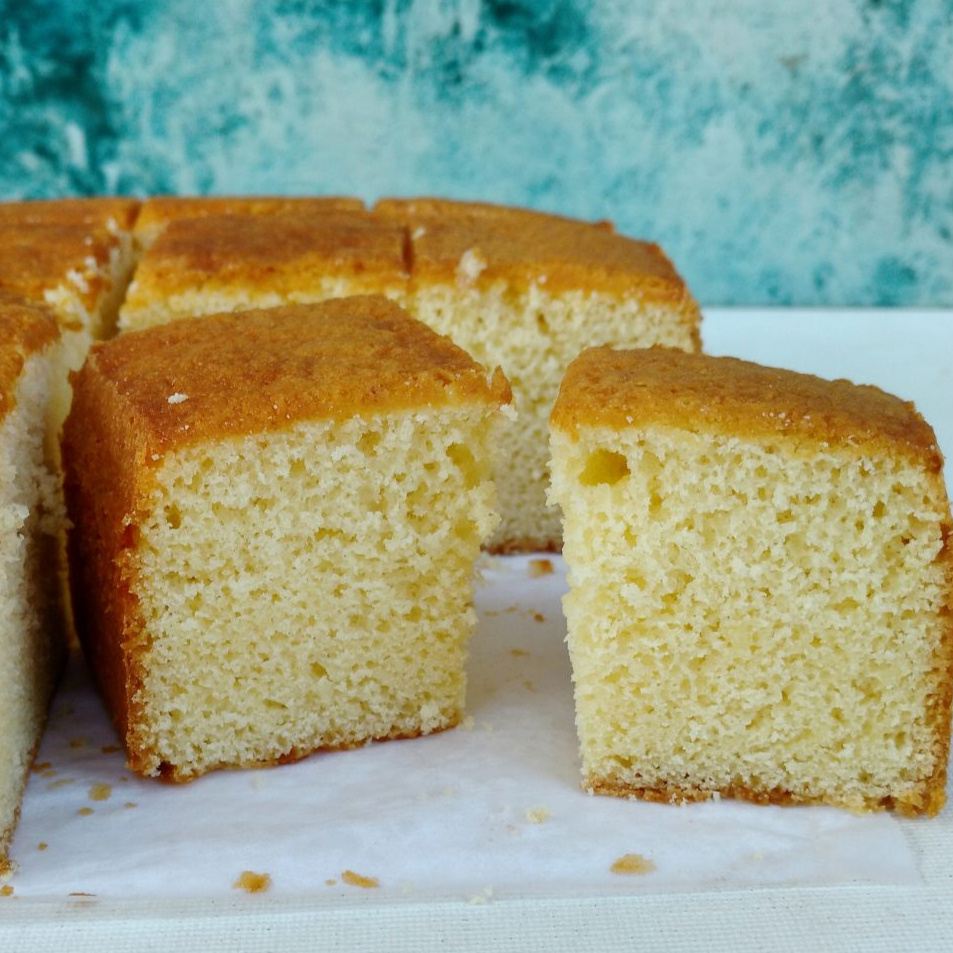

Preheat oven to 375°F. Prep your baking dish of choice with parchment paper (you can also butter or grease, but i like to be able to lift the dessert swiftly out of the pan.) I use a Wilton Brand 9.25 x 5.25 Bread Pan.
Chop your berries into half or quarters and add to a bowl, following with your sweetener. Add your lemon juice. Toss until it forms a thick syrup.
If you prefer to (like I do) you may use a Masher to crush the berries into a thick syrup.
In a large bowl whisk together flour, baking powder, salt and sugar.Once combined, add in milk, vanilla extract, and melted butter. (Feel free to sample the batter like I do!)Stir gently just until combined. (A few lumps are preferred, so don't over stir, or your crust will be dense instead of fluffy.)
Pour batter evenly into the prepared dish. Baked for 35-40 minutes on the middle rack or until golden brown.
Remove from oven and let the cake rest for a few minutes.
Once cooled, pick holes in the cake with a tooth-pick or a fork. this will let the syrup seep into the cake.Pour the fruit-syrup onto your cake, and enjoy! My partner prefers to pre-portion the cake and take it with him to work as a snack.

This recipe sourced from divascancook.com*


LynziePedia.net//Lynzie'sBeignets!
X


I don't like to use a stand mixer if i don't have to, as I prefer to not over-automate things. Constantly using a mixer as a stand in for your hands won't truly allow the love and dedication to seep into the dough, and it keeps me busy!

¾ Cup Warm Water ~110° (177ml)
½ Cup Granulated Sugar (100g)
2¼ Teaspoons Active Dry Yeast (or one packet)
1 Large Egg Room Temperature
½ Cup Milk Room Temp (120ml)
2 teaspoons vanilla flavoring (10ml)
3¾cups All Purpose flour (450g)
1 teaspoon salt
3 tablespoons unsalted butter at room temperature (42g)
vegetable oil for deep frying or peanut oil
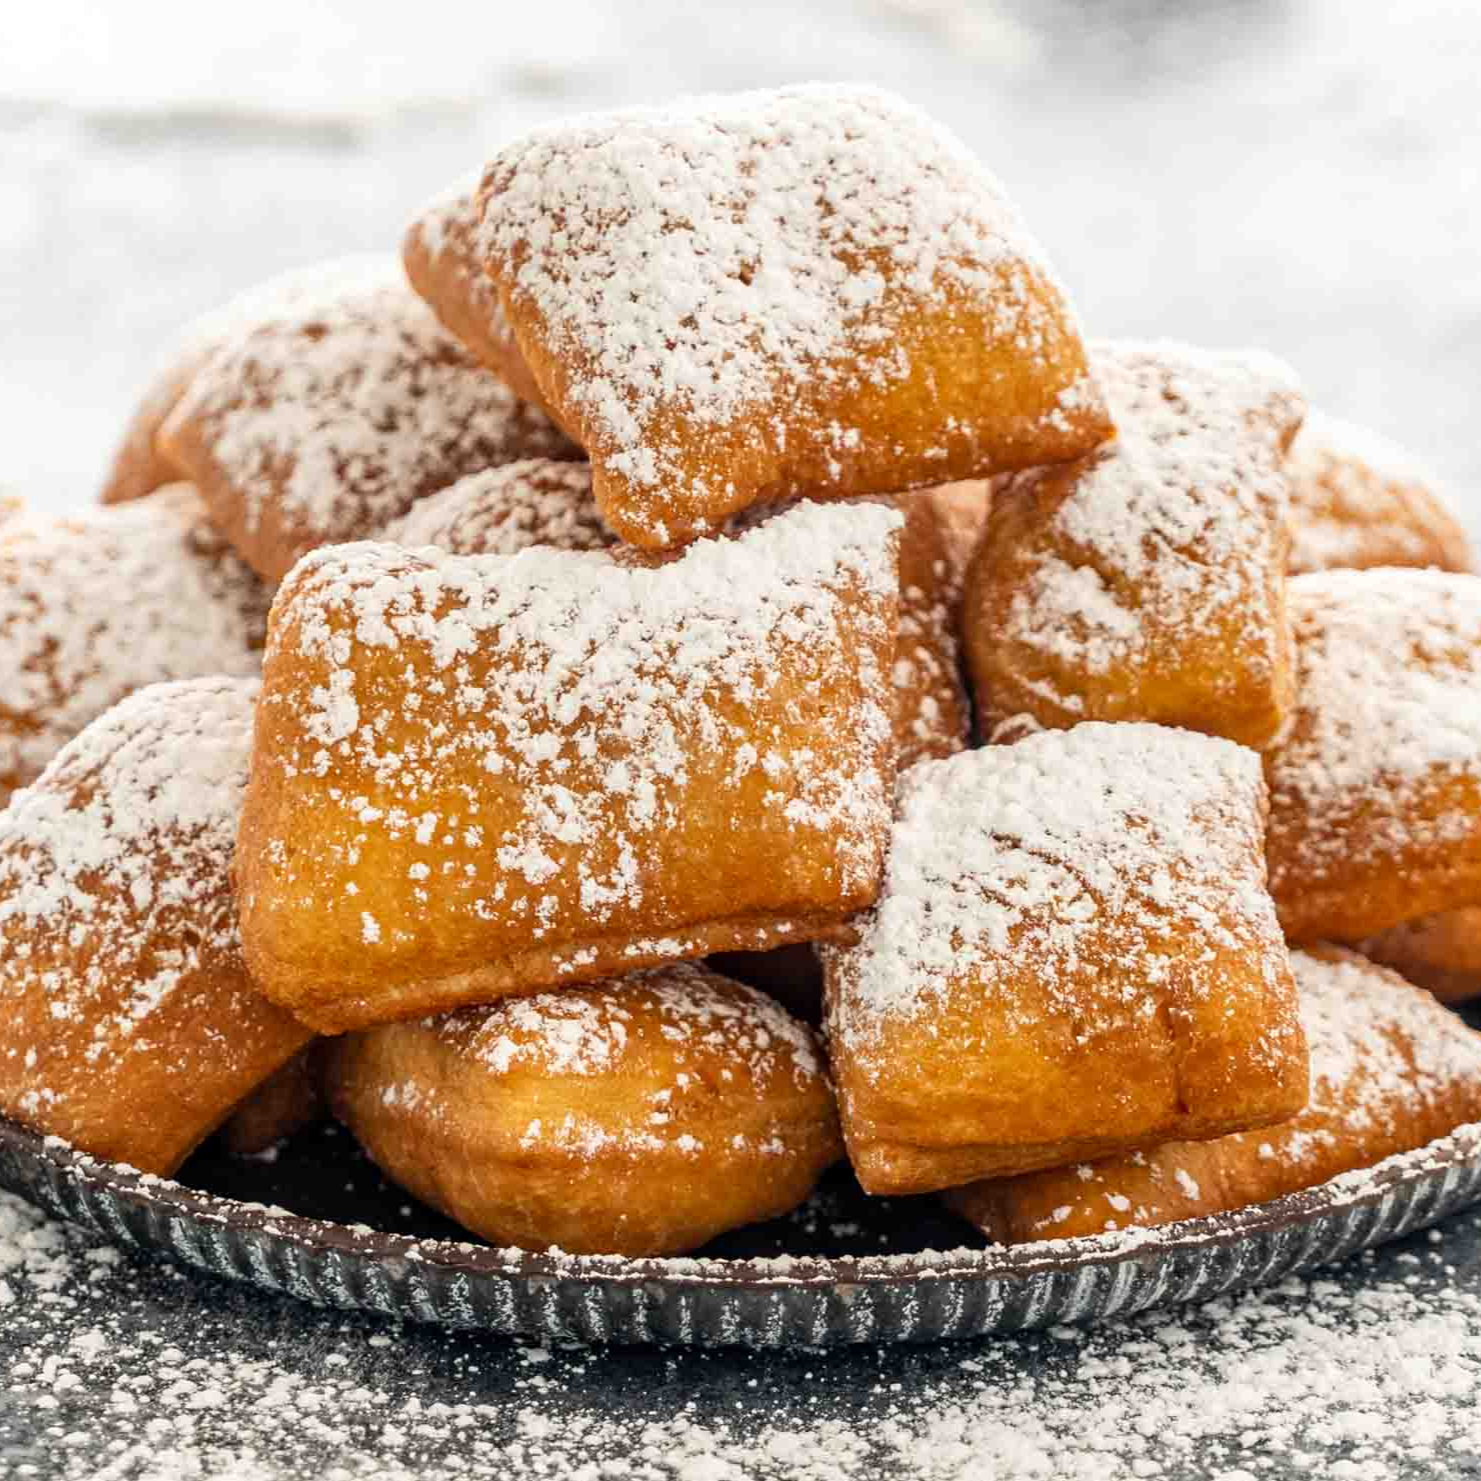
While Beignets are usually coated in powdered sugar, I'm not really a fan of that. I prefer to eat them alone or with a delectable chocolate icing!

Add the warm water to the bowl of a stand mixer or a large bowl if making this by hand or an electric mixer. Add the yeast and half the sugar then set aside for about 5 minutes to the yeast can get to work.Measure out 3 ¾ cups of flour and mix with the teaspoon of salt and set aside.Once the yeast mixture is bubbly, pour in the milk, vanilla, remaining sugar, and add the egg. Whisk together then add half the flour mixture and whisk together until smooth.
add the remaining flour and begin mixing, once the dough comes together add the butter and keep mixing until the dough is smooth and will pull away from the bowl, about 4 minutes. This dough is enriched and sticky but if it seems too wet you can mix in an extra ¼ (31g) cup of flour.Transfer the dough to a large, lightly oiled bowl then cover and allow to rise in a warm place for at least two hours, you can also store the dough in the refrigerator for up to 48 hours.
Set up your Fryin' and Dryin' stations!Fill a large pot with a few inches of vegetable oil (about 2 quarts).
Place some paper towels in the noodle strainer, and put a plate underneath. this will catch excess oil.Once the dough has risen, place it onto a floured surface and roll it out into an square shape (about ¼ inch thick). Cut the dough into 16 rough rectangles.
Heat the frying oil to 325°F. Fry the beignets in batches until golden, about 1 1/2 to 2 minutes per side.

This recipe sourced from preppykitchen.com*


LynziePedia.net//Lynzie'sSandwichBread!
X


I don't like to use a stand mixer if i don't have to, as I prefer to not over-automate things. Constantly using a mixer as a stand in for your hands won't truly allow the love and dedication to seep into the dough, and it keeps me busy!

1 Cup water, warmed to about 110°F (240ml)
¼ Cup whole milk, warmed to about 110°F (60ml)
1 Packet of yeast (7g)
2 Tablespoons sugar (25g)
4 Tablespoons softened unsalted butter (56g)
1 ½ Teaspoons salt
3 ⅓ Cup of Flour (spooned and leveled) (420-430g)

This bread is fluffy, yummy and easy to make! sub half or whole AP flour for bread flour if you so choose. I know I will!

In a large mixing bowl, whisk the warm water, warm milk, yeast, and sugar together in a bowl. Cover and allow to sit for 5 minutes.
Add the butter, salt, and 1 cup flour. Beat together until combined. scrape down the sides of the bowl with a silicone spatula, then add another cup of flour. Beat together until relatively incorporated (there may still be chunks of butter). Add the remaining flour and beat until the dough comes together and pulls away from the sides of the bowl.
knead by hand on a lightly floured surface for 3 minutes
Lightly grease a large bowl with nonstick spray. Place the dough in the bowl, turning it to coat all sides in the oil. Cover the bowl with a clean kitchen towel. Allow the dough to rise for 1-2 hours.
Grease your baking pan. When the dough is ready, punch it down to release the air. Lightly flour a work surface, your hands, and a rolling pin. Roll the dough out into a large rectangle, about 8×15 inches. It does not have to be perfect! Roll it up into an 8 inch log and place in the prepared loaf pan.
Cover shaped loaf with aluminum foil, plastic wrap, or a clean kitchen towel. Allow to rise for about 1 hour.
Adjust oven rack to let the bread cook in the middle of the oven.Preheat to 350°F.Bake for 30-34 minutes or until golden brown on top. If you notice the top browning too quickly, loosely tent the pan with aluminum foil. Remove from the oven and allow bread and let it cool completely before slicing. This will prevent the bread from becoming gummy.

This recipe sourced from sallysbakingaddiction.com*


LynziePedia.net//Lynzie'sOatmealCookies
X


One Stick Unsalted Softened Butter! (113g)
½ Cup Packed Brown Sugar! (97g)
⅛ Cup Sucralose! (15g)
Molasses! 5g (if not using brown sugar)
Peanut butter (47g)
1 Egg!
1 Tablespoon Vanilla Extract!
¼ Cup Cocoa Powder! (38g)
¾ Cup of Flour! (93g)
½ Teaspoon Baking Soda
1 Teaspoon Cinnamon
1 Pinch of Salt!
1 ½ Cup Rolled Oats! (153g)
½ Cup Raisins! (optional!) (72g)

these cookies are yummy and a healthy alernative to most sweets! If you want, you can sub ALL the sugar for sucralose and use extra molasses!

Using a whisk, cream the softened butter with both sugars together by hand until smooth.
Then, Add the eggs, vanilla and peanut butter and whisk until combined.
Add in the flour, cocoa powder, baking soda, cinnamon and salt.Add in the oats and raisins. Your dough should be thick, yet very sticky.Chill the dough for 30-60 minutes in the fridge (do the full hour if you’re afraid of the cookies spreading too much).
Line a baking tray with parchment paper and bake at 350°F for 12-14 minutes until brown at the edges. when removed from the oven, they will appear under-baked. let the cookies cool for 5-10 minutes to cool until done.

This recipe sourced from sallysbakingaddiction.com*


LynziePedia.net//Lynzie'sBakingTips!!
X


Every time i bake something, it always comes out burnt. Can you help me?
I sure can! There's a couple reasons for this, both of which can be easily remedied.
Sometimes ovens run hotter than they claim—yes, even the fancy new ones. If your cookies are burning faster than your patience, your oven might be lying to you. (Rude, right?) Grab an oven thermometer to check the real temp. For example, my oven is a whole 100 degrees off. One hundred! That’s not even a small lie. That’s betrayal.
Another culprit could be your bakeware. Dark-colored pans and baking sheets soak up heat like they’re sunbathing, which can cause things to bake (or burn) faster. If you’re using dark bakeware, keep an eye on your timing—or your treats might come out extra crispy.
My bread isn't rising! Send help!?
You're likely using dead yeast or you aren't activating it properly, also leading to dead yeast. Lets look at why this is happening.
If your water or milk is too hot or cold, your yeast will either peace out or take a nap. Aim for 105–110°F. No thermometer? No prob—just dip a (clean) finger in. It should feel like a cozy, slightly warm bath. Think spa day, not a sauna.
If your yeast is expired, it’s dead and It’s no good anymore. It’s time to buy new yeast.
Make sure you rise it in a warm spot! If your house is chilly, turn your oven to the lowest temp, turn it off, crack the door, and let your dough rise in that toasty little cave. Blanket optional, but encouraged.
Should I use pure vanilla or artifical flavoring? which is better?
Neither one is necessarily better than the other, but they both have their own strengths and uses. Let me break it down for you!
Both vanilla extract and vanilla flavoring add delicious flavor to baked goods, but they shine in different ways. Pure extract, made from real vanilla beans, has delicate flavor compounds that can burn off in high heat—so it’s best saved for no-bake or low-heat treats like puddings, frostings, or ice cream. Vanilla flavoring, on the other hand, is heat-stable and works great in cookies or cakes where the vanilla isn’t the main star. Rather than thinking one is better, treat them as different tools for different jobs.
Do i really need to preheat my oven?
Yes. A thousand times yes. Preheating your oven isn’t just a suggestion—it’s a crucial part of baking.
You know little beep from your oven saying it's ready? Its not true! Your oven might claim it’s preheated, but most need a full 10–15 minutes to actually get to the real temperature. Ensuring your oven is the correct temperature is very important so do not skip this step.
My cookies spread way too much! Whats up with that??
Oh no, are your cookies spreading way more than they should? Don’t worry, I’ve got you!
This usually means your dough is a little too warm. If it feels sticky or greasy, try scooping it into little dough balls (an ice cream scoop works wonders!) and letting them chill—pop them in the fridge for about 1–2 hours, or the freezer for 20 minutes if you're short on time. This gives the butter a chance to firm up before baking.
Also, skip the nonstick spray or butter on your baking sheet—it can make things a bit too slippery. Instead, go for parchment paper or, even better, a silicone baking mat. They give your cookies something to hold onto while they bake, which helps them stay nice and thick.
And if your cookies are still doing the pancake thing, it might be the recipe! Look for one with a touch more flour—this helps the cookie set before the butter gets too melty.
My cake is dry... or it isnt baking... or has weird tunnels in it?! What is happening?!
Don’t panic! These cake quirks have super common causes—and yes, they’re totally fixable. Let’s break it down:
Your cake’s taking forever? You might be peeking too soon or too often. Opening the oven before the 20-minute mark is like interrupting a cake in the middle of baking. Let her bake in peace or risk a major slump in confidence (and temperature).
Dry cakes are often victims of too much oven time. Your cake is done when the center hits about 205–210°F. Don’t forget—baked goods keep cooking even after you take them out, so don’t wait until it’s bone dry.
If your cake looks its tunneling, you probably overmixed. Too much stirring destroys the delicate structure and traps air in weird places. Use a silicone spatula—not a whisk—and mix just until the flour disappears. No streaks should be visible.
My bakes are totally inconsistent—what gives??
One batch is perfect, the next one’s a disaster... sound familiar? Let's look at the culprit.
If you’re measuring with cups instead of a scale, you’re playing russian roulette. One cup of flour can vary a lot depending on how you scoop. Want consistency? Grab a kitchen scale and start weighing your ingredients like the queen u R.
on the note of measuring flour correctly, make sure to fluff your flour with a spoon and spoon it into your measuring cup, then scrape off the excess. The scoop n scrape method will heavily over measure ur flour.
How do i add sugar to my unsweetened chocolate?
Have you ever tried to add sugar to your chocolate bars just to find it's not dissolving even after 20 minutes of stirring over the double broiler? me too!Let me explain why this happens.
Apparently sugar is only able to dissolve in water, not fat. Rude, right? so adding straight sugar to that chocolate wont do much. If you've already gone ahead and added your sugar to your melted chocolate, don't fret! try slowly adding warm water and mixing it in, being careful not to add too much because your chocolate will seize and then you're really screwed.
lf you havent added any sugar yet and you came here to learn to do it the right way, first of all, good job. That's more sense than I had at 1 am while I was baking cakes for my best friend.
If you're fancy, do this in a heatproof bowl over a simmering pot of water (the double broiler method). Make sure the water doesn't touch the bowl, only the heat from the steam. otherwise this can be done in the microwave. Add some water to your bowl with your desired amount of sugar, and heat until your sugar is completely dissolved. If you're using the double broiler method, heat it up to steam away some of the water and turn it into a thick paste then add to your chocolate. the less water the better.
If you're using a microwave, simply heat your water up until its steaming and add in your sugar. Make sure its completely dissolved before mixing into your chocolate.
I cant stop eating all this delicious food I've been baking! what do i do?
First of all—congratulations on being an absolute baking legend. I mean seriously, if everything you make is so good you can’t stop sneaking bites, that’s a good sign (and also extremely relatable).
Freeze extras! Most baked goods freeze beautifully. Portion out cookies, slices of cake, or even cinnamon rolls and pop them in the freezer. Out of sight, out of mind... until a rainy day when you deserve something cozy.
Share the love. Neighbors, coworkers, friends, even your local librarian—there’s always someone who would be thrilled to receive a little parcel of homemade goodness. Especially in times like these!
Bake smaller batches. Halving a recipe can still be just as satisfying without leaving you with an entire army of scones.
Eat mindfully. Instead of rushing through your treats, try turning it into a little ritual. Make a warm cup of coffee or steep some chamomile tea. Cut yourself a soft slice of banana bread or that golden, fragrant honey cake you baked with love. One peaceful, delicious moment can be more so much more satisfying than five distracted bites on the go.


LynziePedia.net//Lynzie'sAnswers!
X
How is your website hosted? How much
would it cost for me to do this?
My website is made using Carrd.co. there are lots of tutorials online to build a website like mine! and its super easy.
although you can make a free Carrd.co account, you can't use more than 50 elements with a free one. meaning your website wont be as large flushed out as mine, unless you pay
My carrd membership to have 3 website slots and extra benefits is $19/Year.
If i were to purchase my own domain from google (which i have), that would make LynziePedia.net! around $32/Year, which is rather inexpensive!
Where do your clothes come from?
Mostly shein, although i want to start making my own soon! most of my clothes are bought in bulk at once.
Amazon and mercari are also second choices for shopping, although these are mainly for accessories!

Where do you find your
page resources and assets?

stickers like mine can be found on google or pinterest. its as easy as searching an aesthetic with the words "transparent sticker"!
my userboxes (like the Sagittarius one) and profile tags (such as the "shop-a-holic" one) were found on spacehey (a modern day MySpace.)
assets can be found in lots of places! just make sure you're allowed to use them first.

Can you build me a website?
Nope! Lynziepedia.net! is for my own entertainment and I do not wish to be paid for making websites for demanding customers.
Do you watch anime?
No. Tbh I am very tired of hearing this question so please stop asking it.
What is your gender identity/pronouns?
I dont identify on this spectrum because at the end of the day, these don't provide me with any comfort or use. other people around me may use them as they like, but i don't use these.
